
Our Restored and Modernized GMC is Sold!

Our Restored and Modernized GMC is Sold!

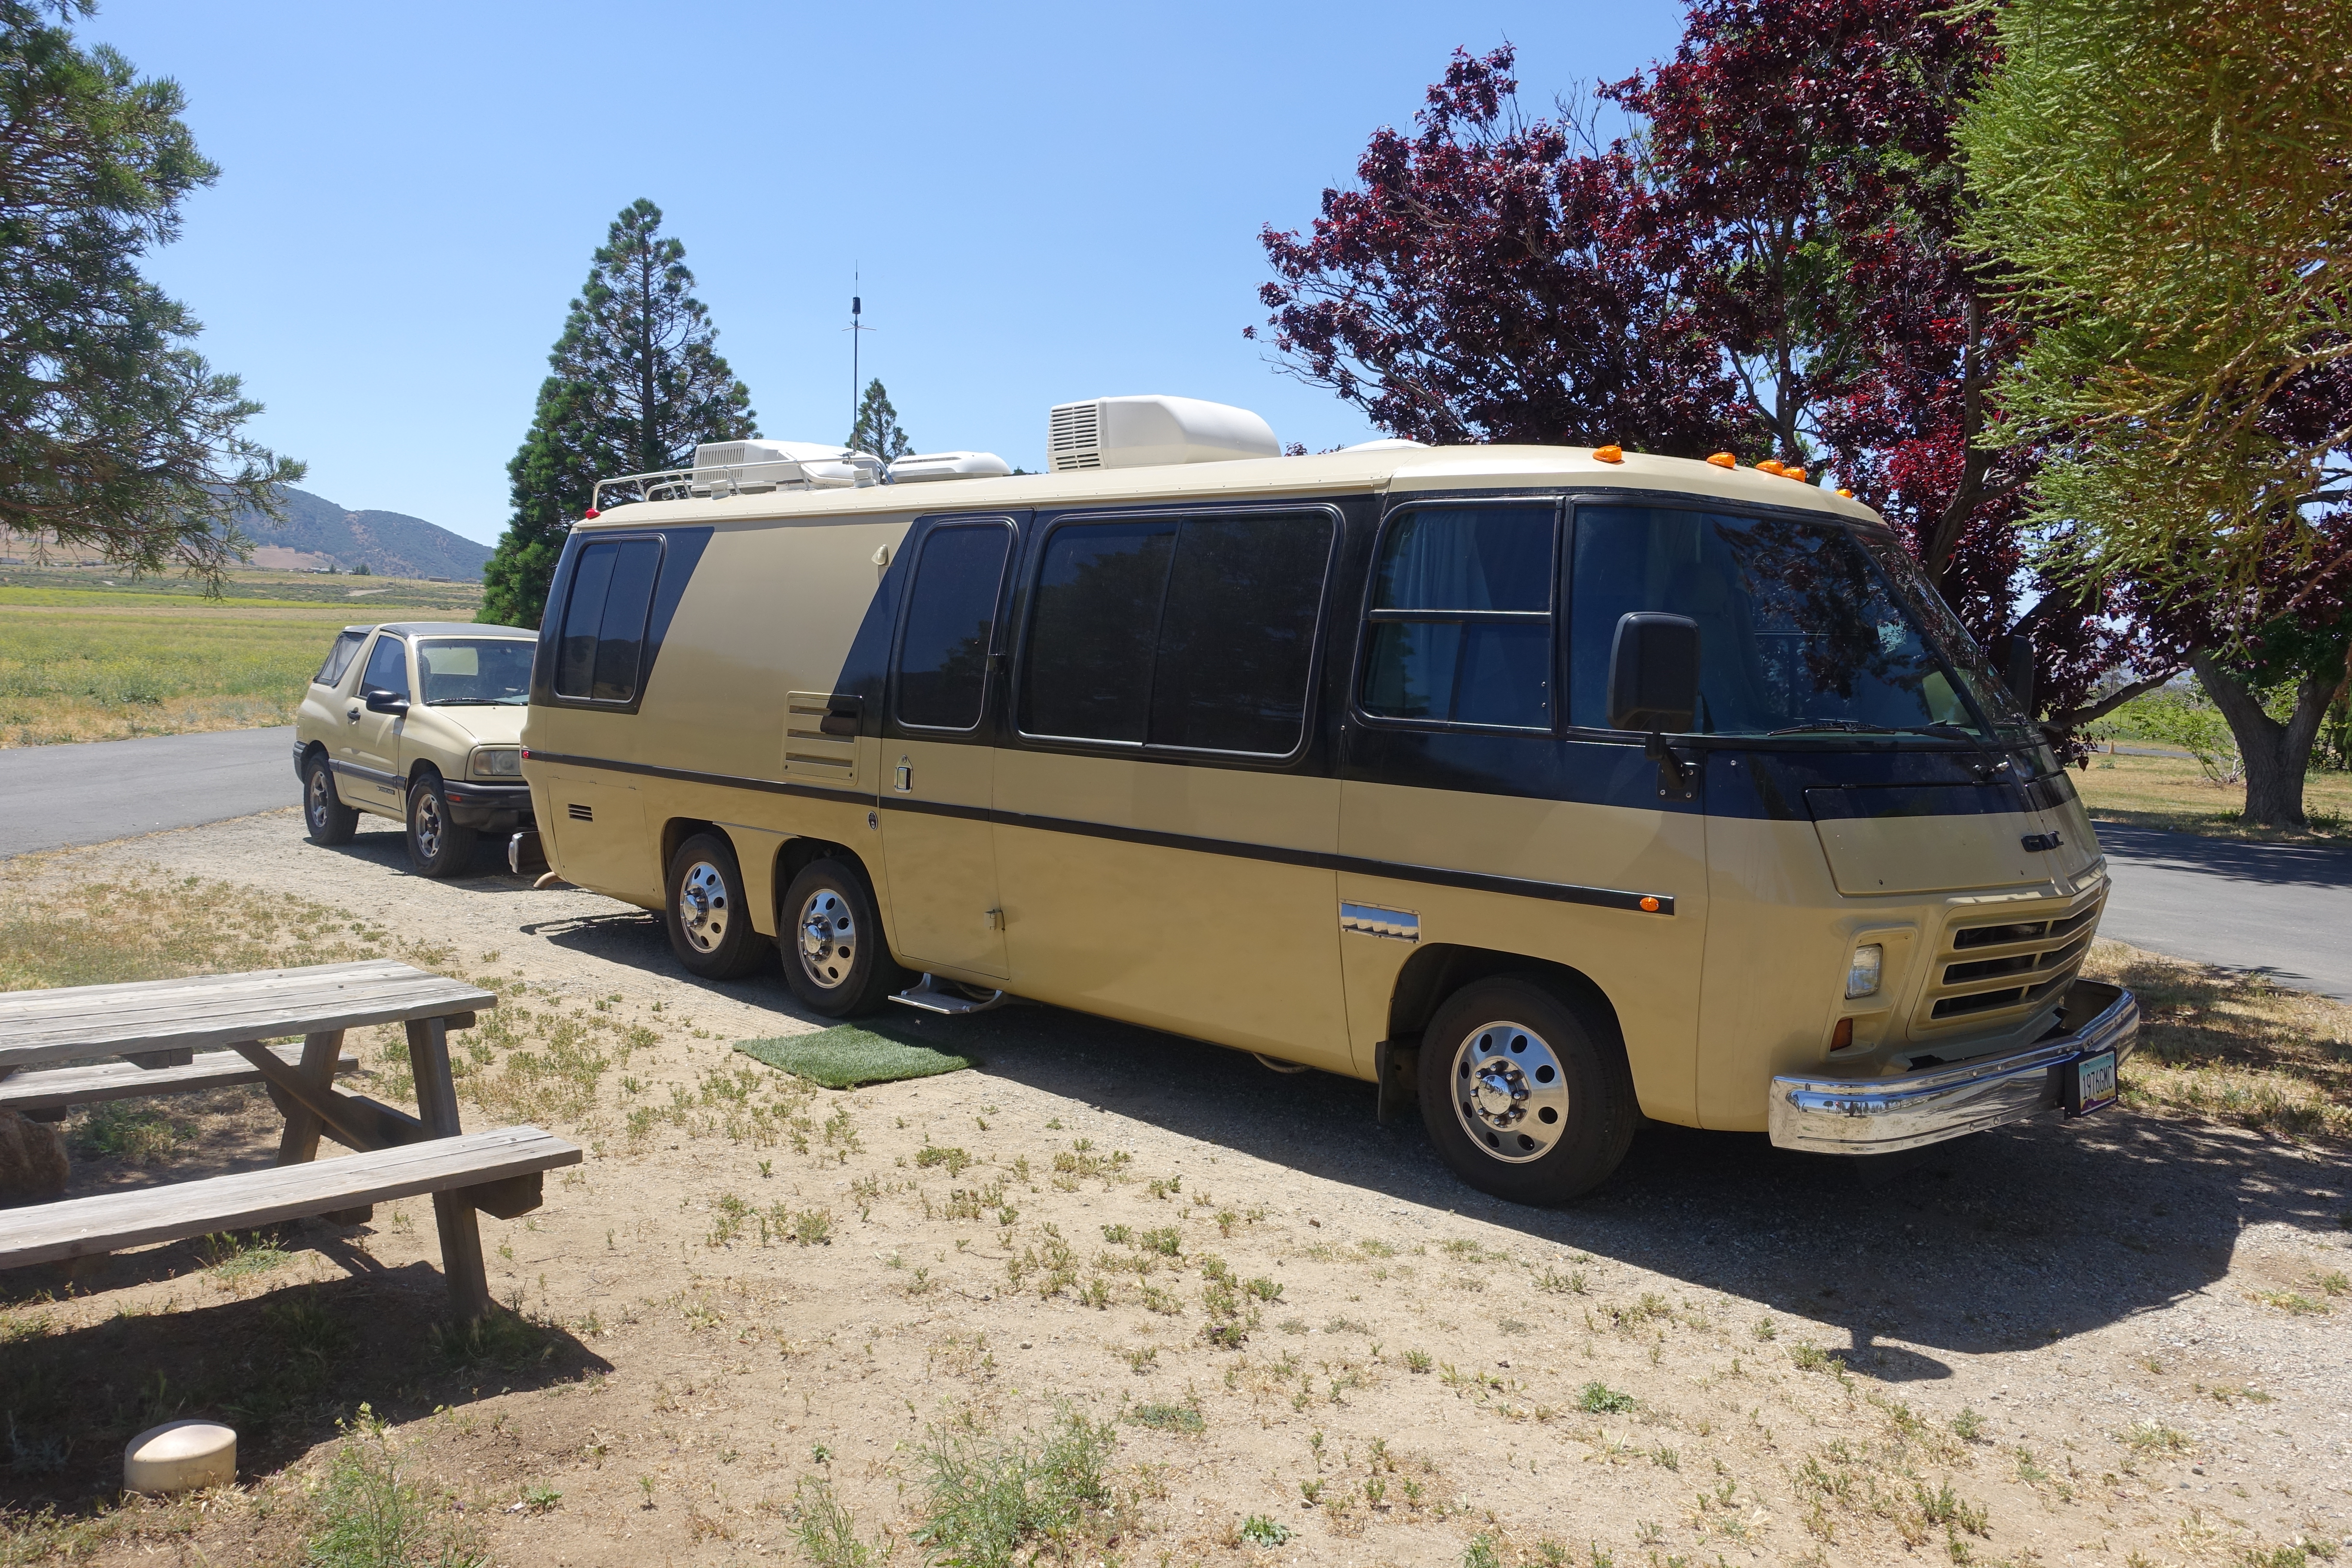
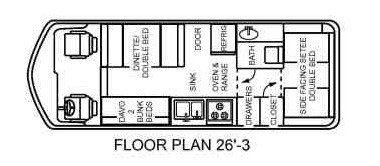
FOR SALE SOLD: Restored and Modernized – a 1976 GMC Eleganza. It’s a beauty. Updated and modernized in every way. She (Barbie) was quite spoiled and has every bell and whistle we could afford in the last 11 years – everything from a FiTech fuel injection system to a drinking water dispensing system. Her interior is modern and clean – best floor plan ever, with long twin beds in front and a fabulous dinette in the back, all new maple custom cabinets, new flooring, new ceiling…..must see!!! HERE is a walk-around video I made to help.

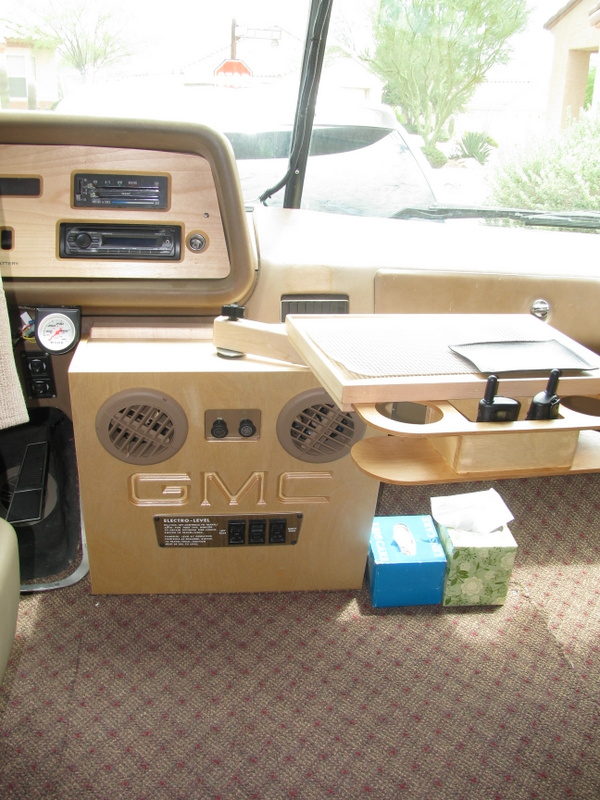
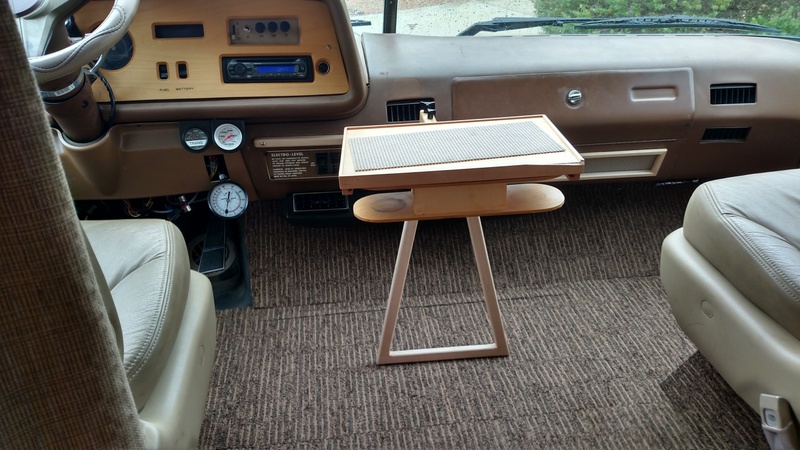
Please note: this coach was an Eleganza II when we got it but it is now something a little different. Instead of maximizing the number of sleeping spaces we have opted to make it perfect for a couple. It now has twin beds in the front living space and a customized dinette in the back, taking advantage of the largest window in the coach. It is very comfortable for sleeping and the dinette is amazing – comfort with a view.

We are asking $29,500 for the coach – including miscellaneous spare GMC parts and manuals.

Below is a list of specific areas of the GMC and some improvements and changes that we have made in each of the areas. Depending on the area, there are links from our web site on some items and photo after each section if available.

Safety and braking have always been top concerns for us so we have done the following:

  • Applied GMC reaction arm 4-wheel disc braking on rear (no parking brake)
  • 80mm brake calipers on front wheels
  • Dave Lenzi sensitized brake booster
  • 100% Duty cycle high capacity auxiliary vacuum pump for brakes
  • Aqueous foam fire suppression system in engine compartment
  • Halon fire extinguisher in refrigerator compartment

Driving comfort improvements:

  • Rostra electronic cruise control
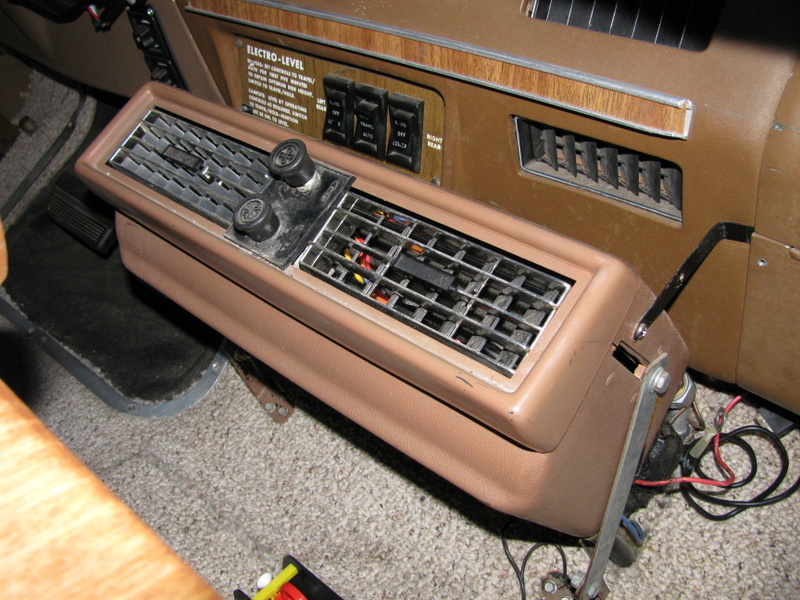
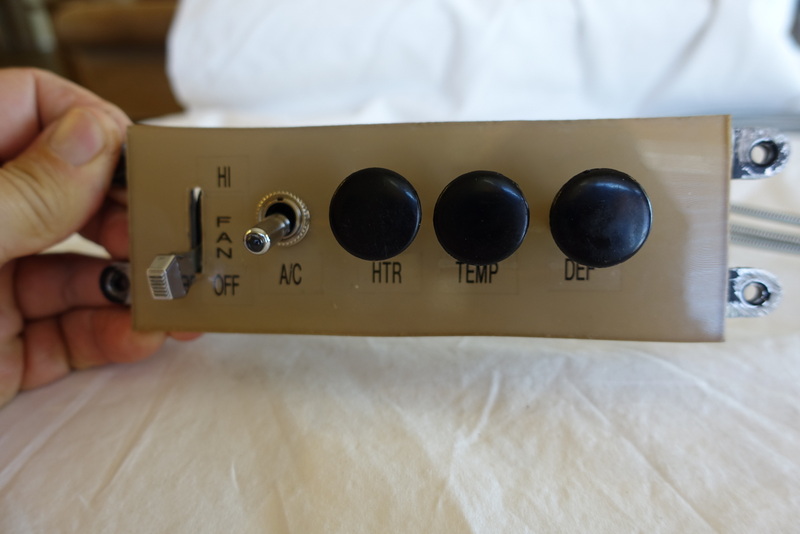
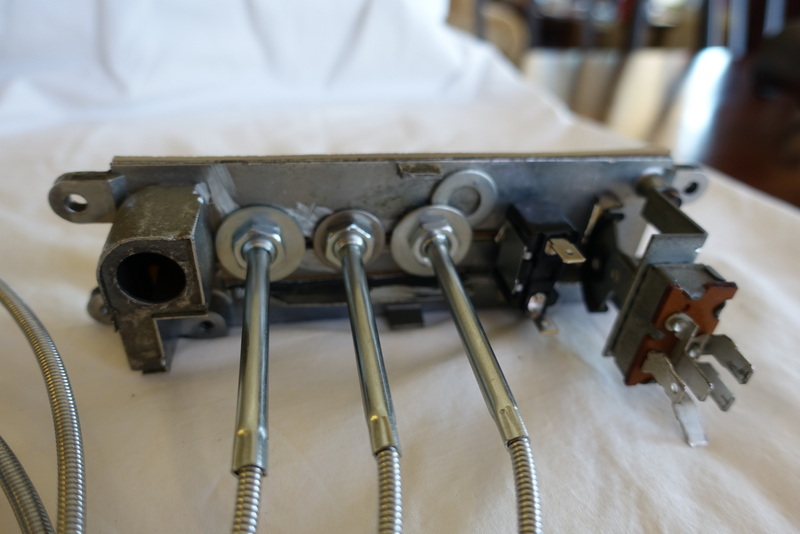
  • Dash A/C modified/fixed – works great
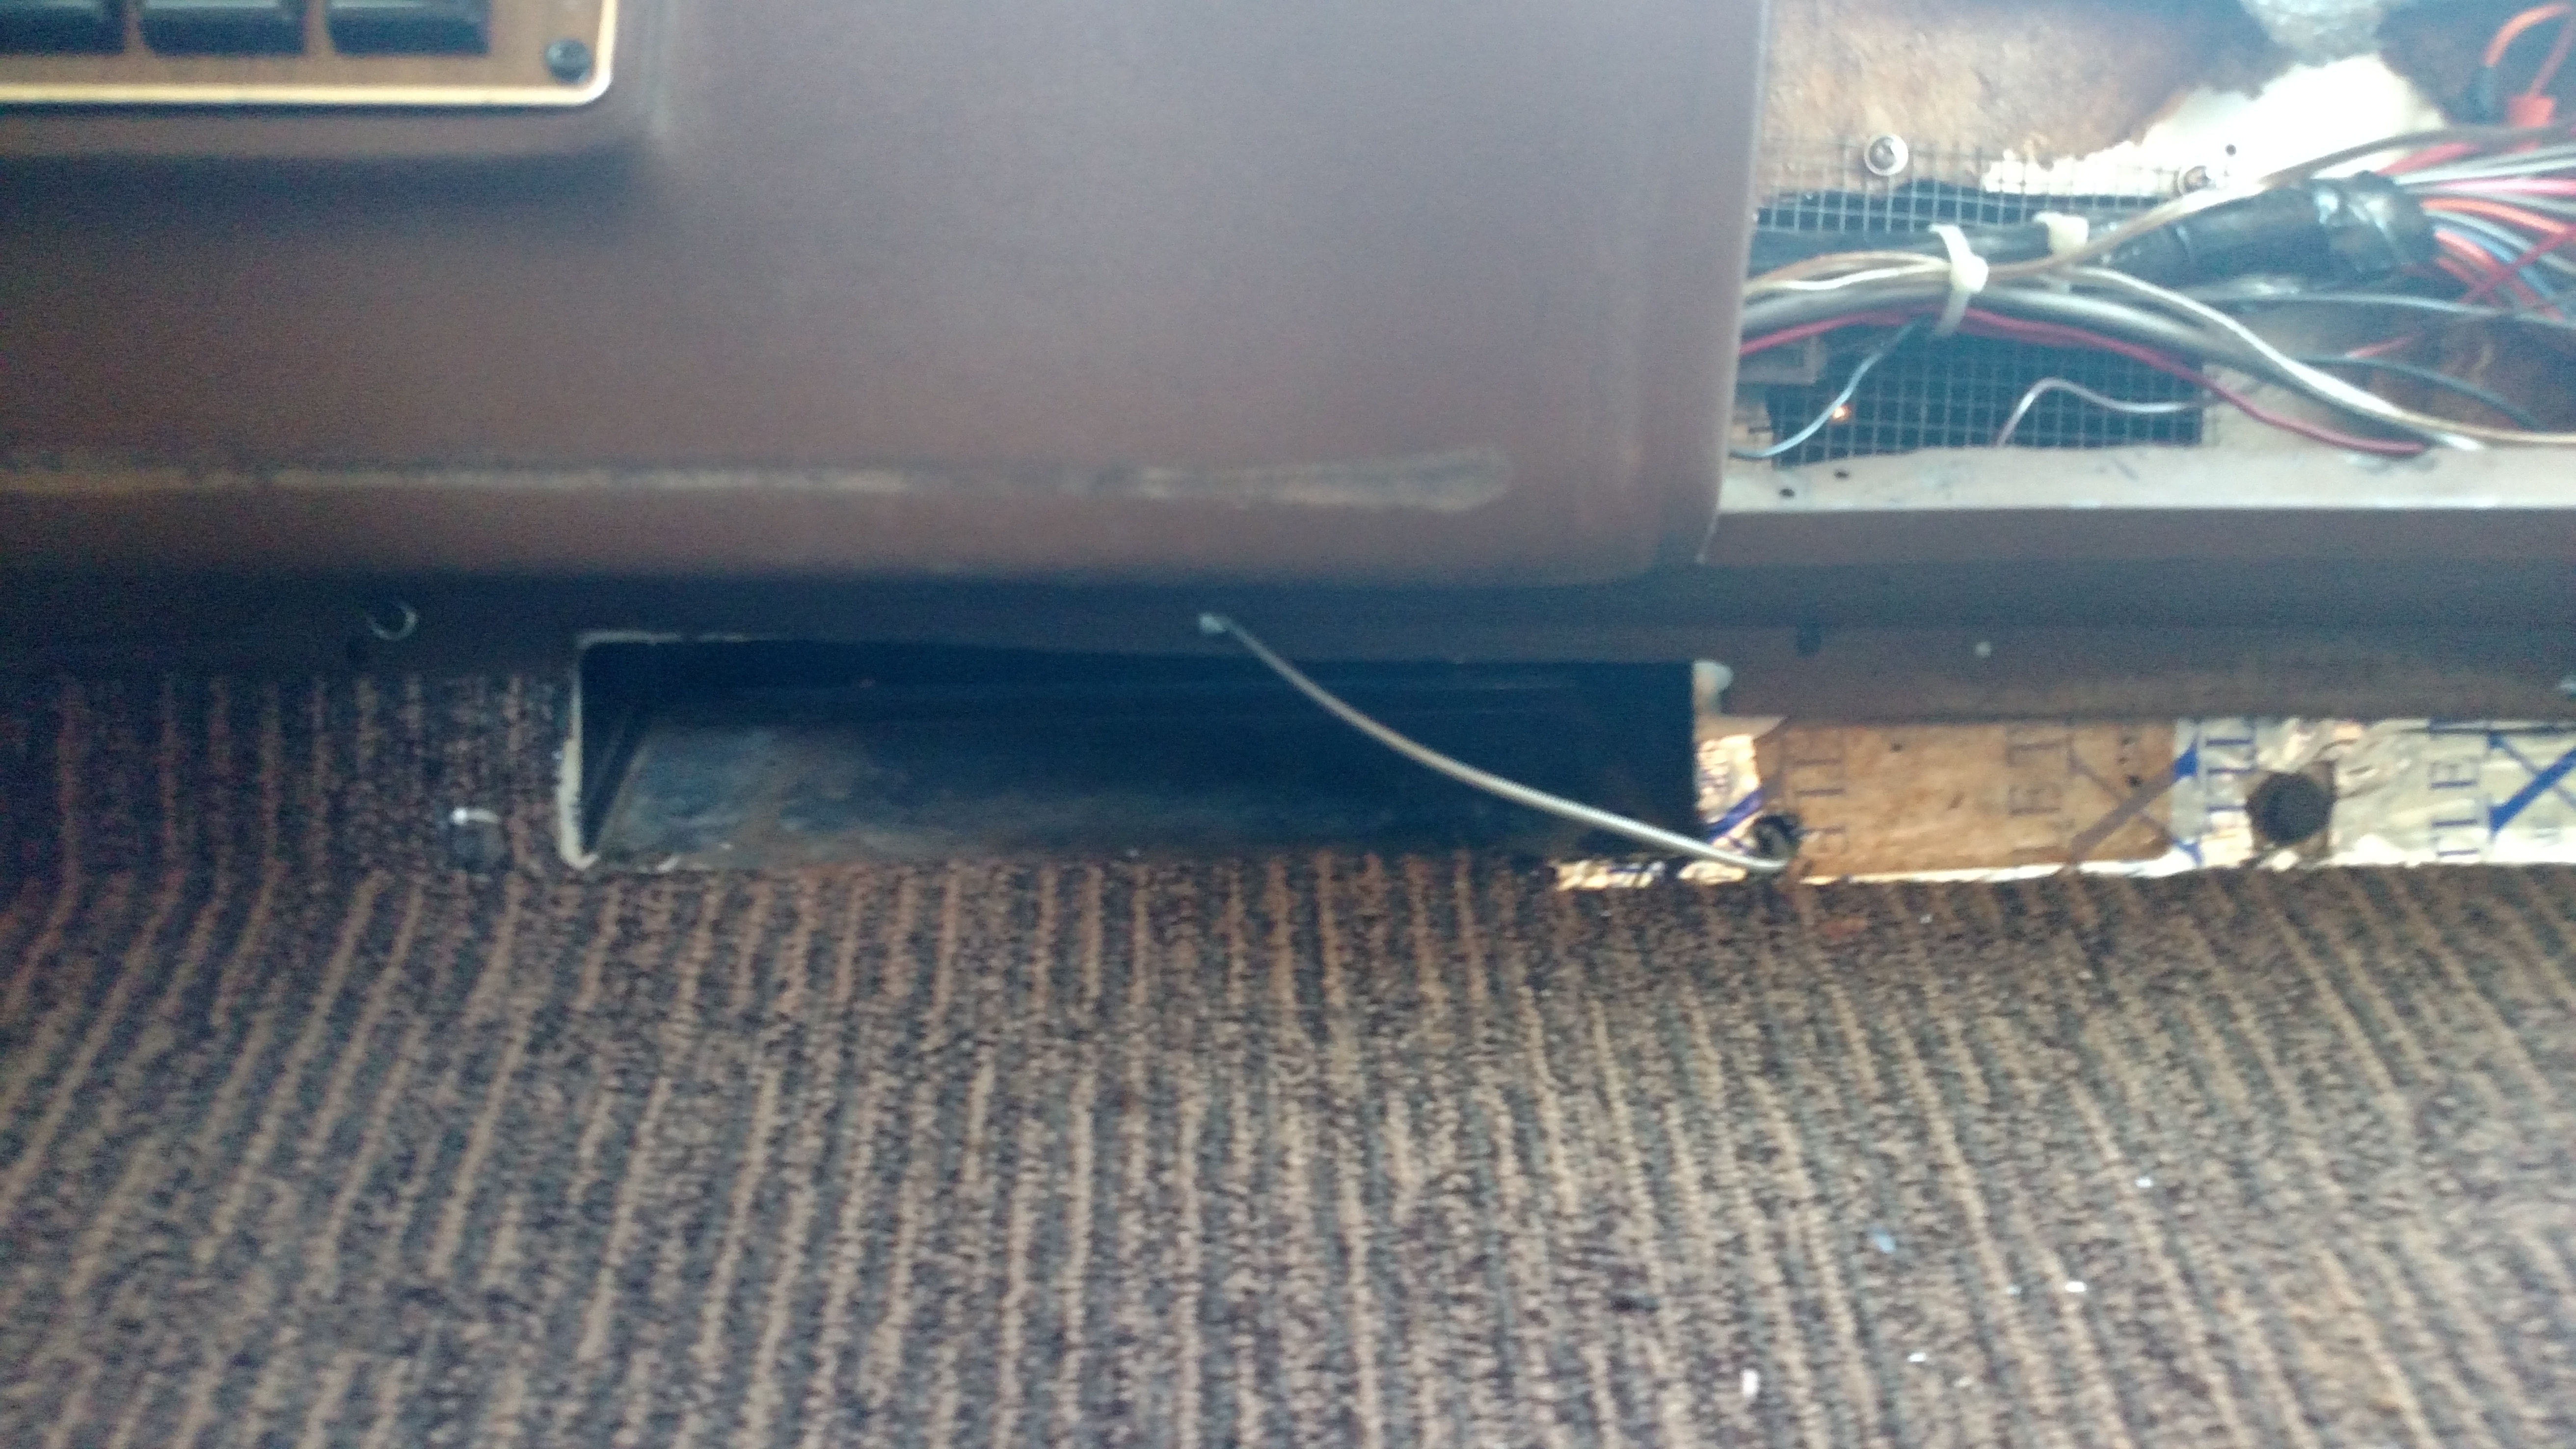
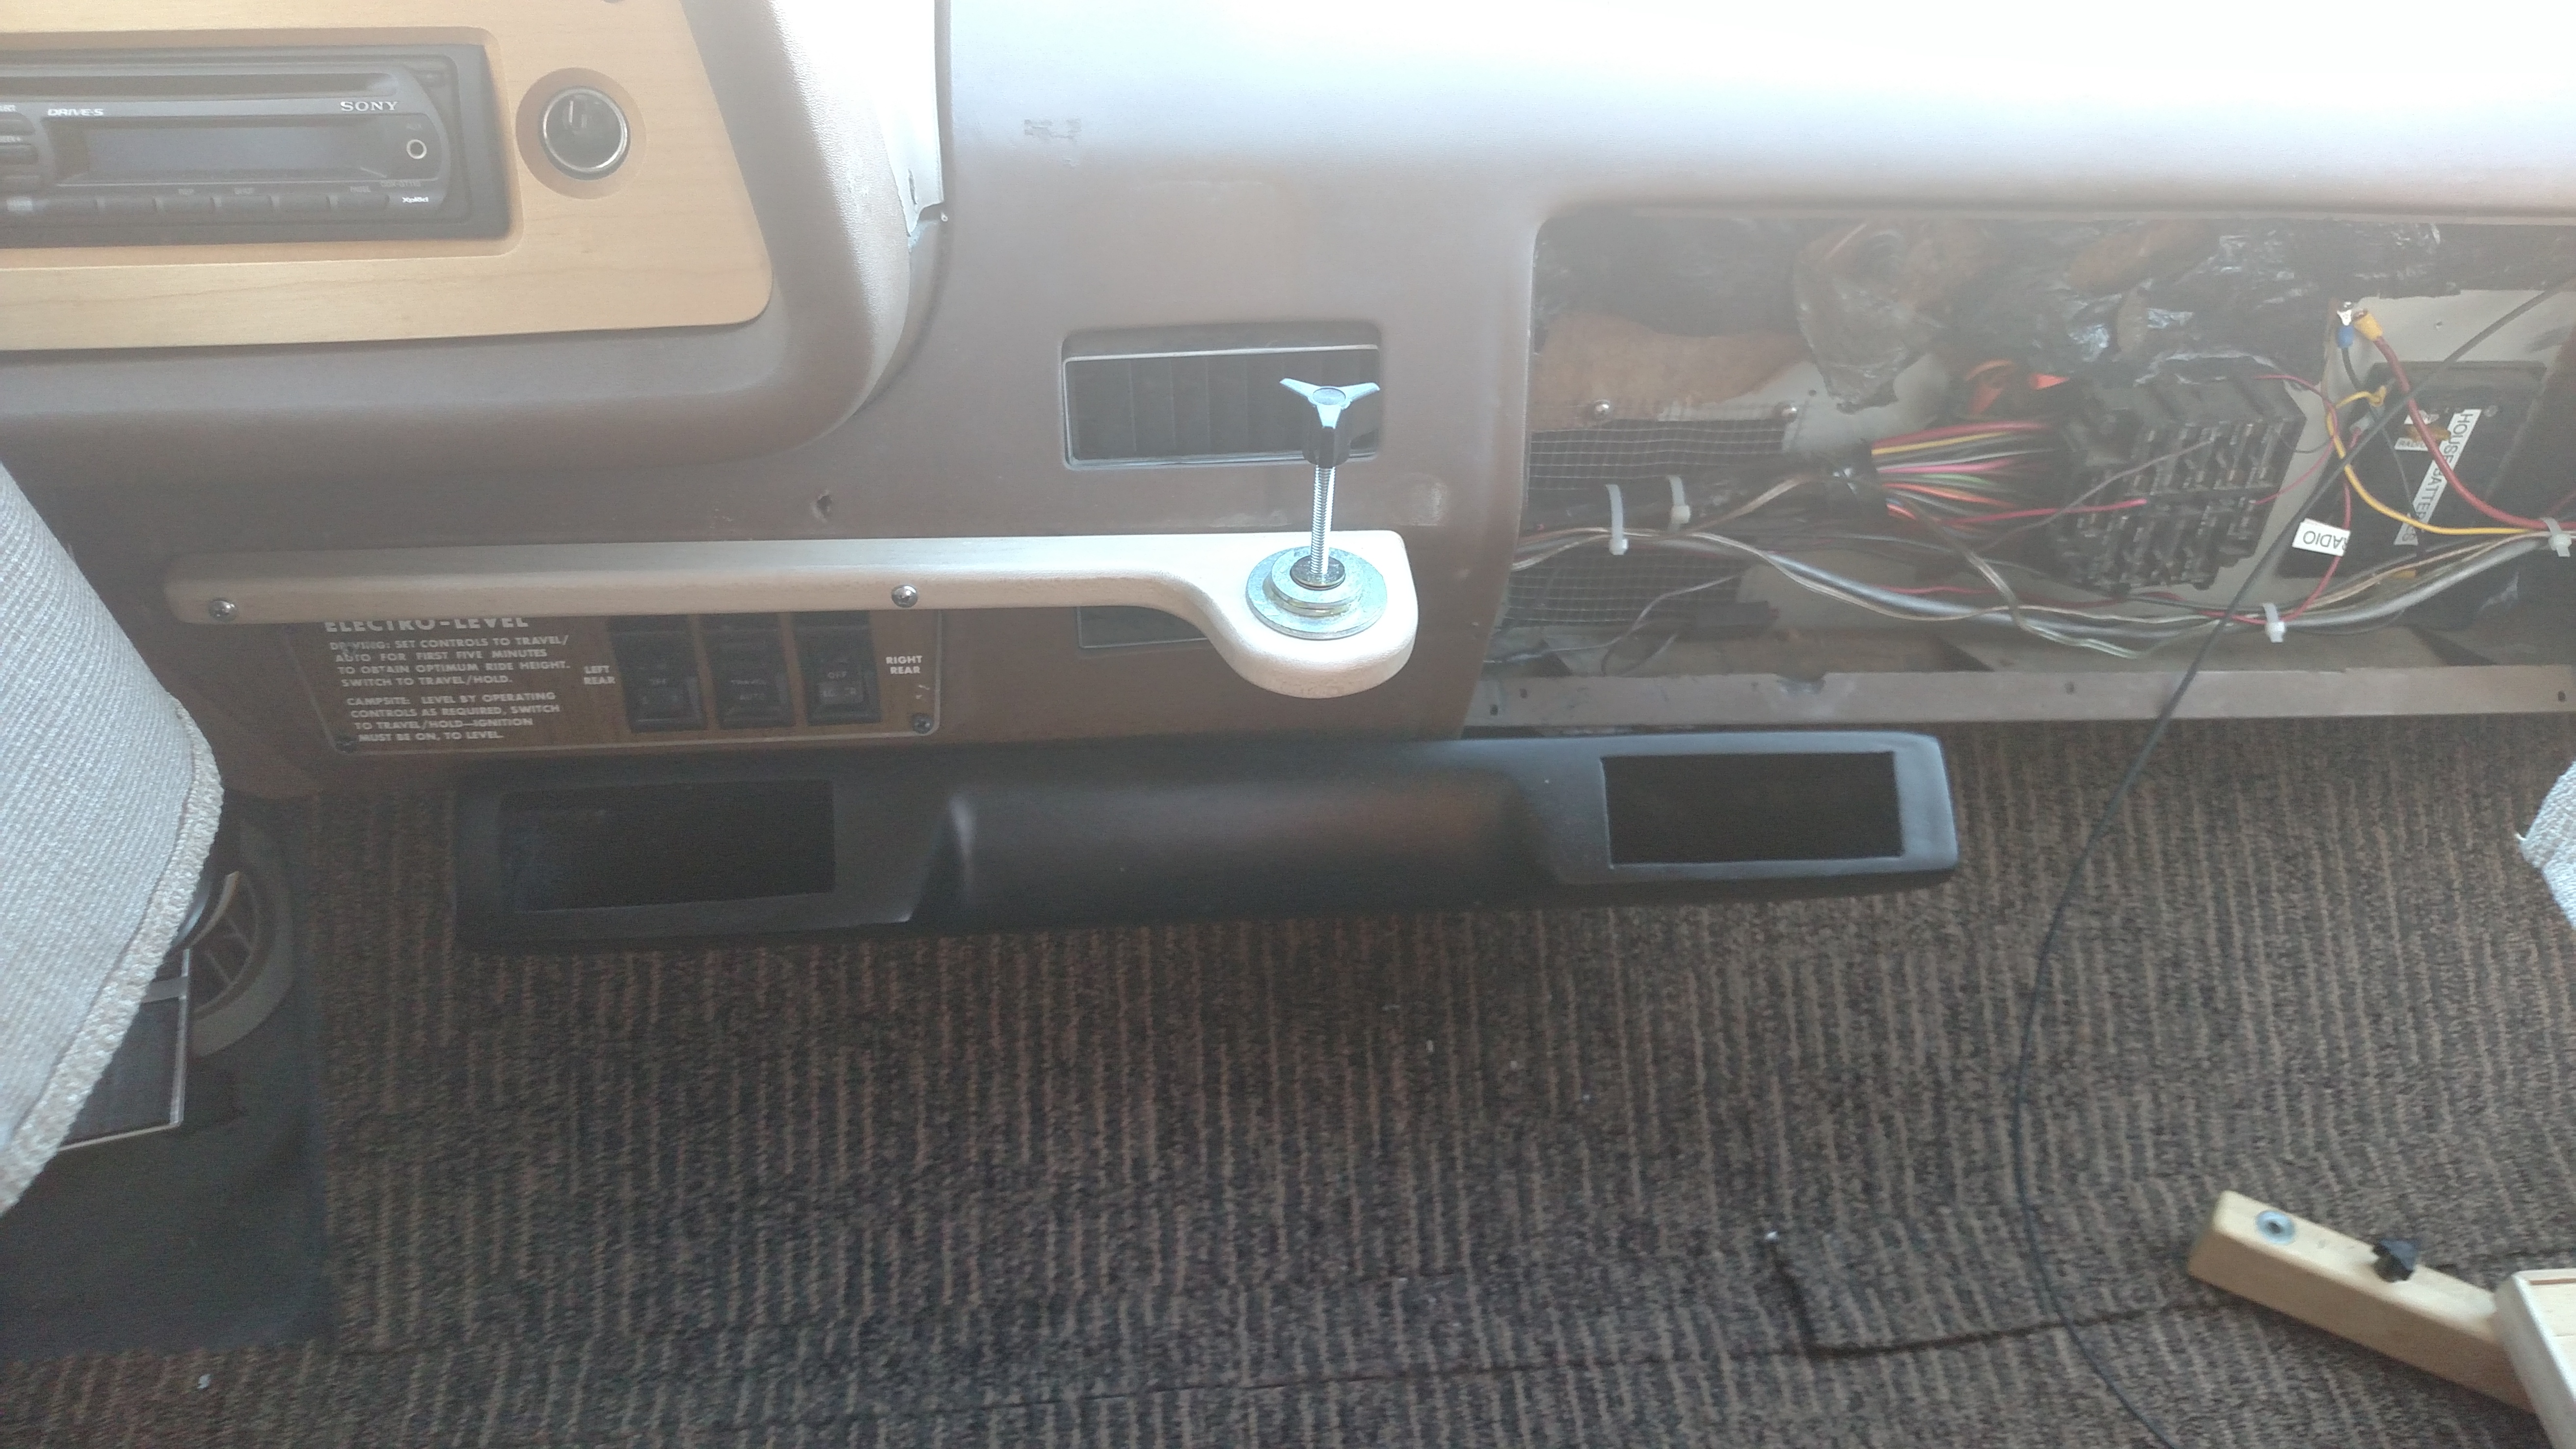
  • Ventilation ports in cab floor
  • Both windshields replaced in last 8 years
  • Lumina wipers and blades
  • Drives and steers like a car – no wandering
  • Ramco remote control mirrors
  • Added lights and gauges: low fuel pressure light, voltage, engine vacuum, engine and transmission temperature

The drive train  and suspension are in great shape:

  • Low mileage replacement 455 engine from Calif. government-maintained coach – better than rebuilt (52,000-mile engine installed at 168,200 – now 172,000 so 56,000 miles on engine)
  • 3.55 final drive
  • Transmission rebuilt in 2012 (about 40K miles ago)
  • JR Slaten SS engine oil cooler lines
  • New starter
  • Fuel hoses replaced 2007
  • Dual SS Magnaflow mufflers
  • KYB shocks (old but still good)
  • OEM knuckles have zerk fittings for easier maintenance
  • Applied GMC Quad-bag rear suspension with VIAIR 480C compressor and SS tank
  • Tires replaced in 10/2014 with BF Goodrich Commercial T/A’s

Most GMCs and Barbie included have issues with hot weather. Every year when Summer approaches the discussions on the GMCnet (and now Facebook) migrate toward fan clutches, temperature gauges, fuel vapor issues (“vapor lock”) and overheating concerns. Living in Southern Arizona and its Summer temperatures of 110°F to 120°F exaggerates these issues so we have done lots to address them and they are now gone:

Onan 6K generator works great

  • Onan carb rebuilt
  • pertronix ignition (on flywheel)
  • upgraded control board
  • new mount cushions
  • new muffler
  • Genturi exhaust for Onan

House systems:

  • Dometic RM2652 2-door refrigerator (120V + propane 1998)
  • Macerator
  • New SS water heater
  • Intellipower PD9245CV power converter
  • Surge tank and whisper-king water pump in house water system
  • Dual water pump switchs with indicator lights
  • New Suburban 19K BTU furnace in 2014
  • Tri-metric battery meter
  • 140 Watt solar panel and charge controller
  • House and chassis battery shutoff switches (Blue Sea)
  • Thermostatic mixing valve in bathroom (no burns)

Exterior appearance:
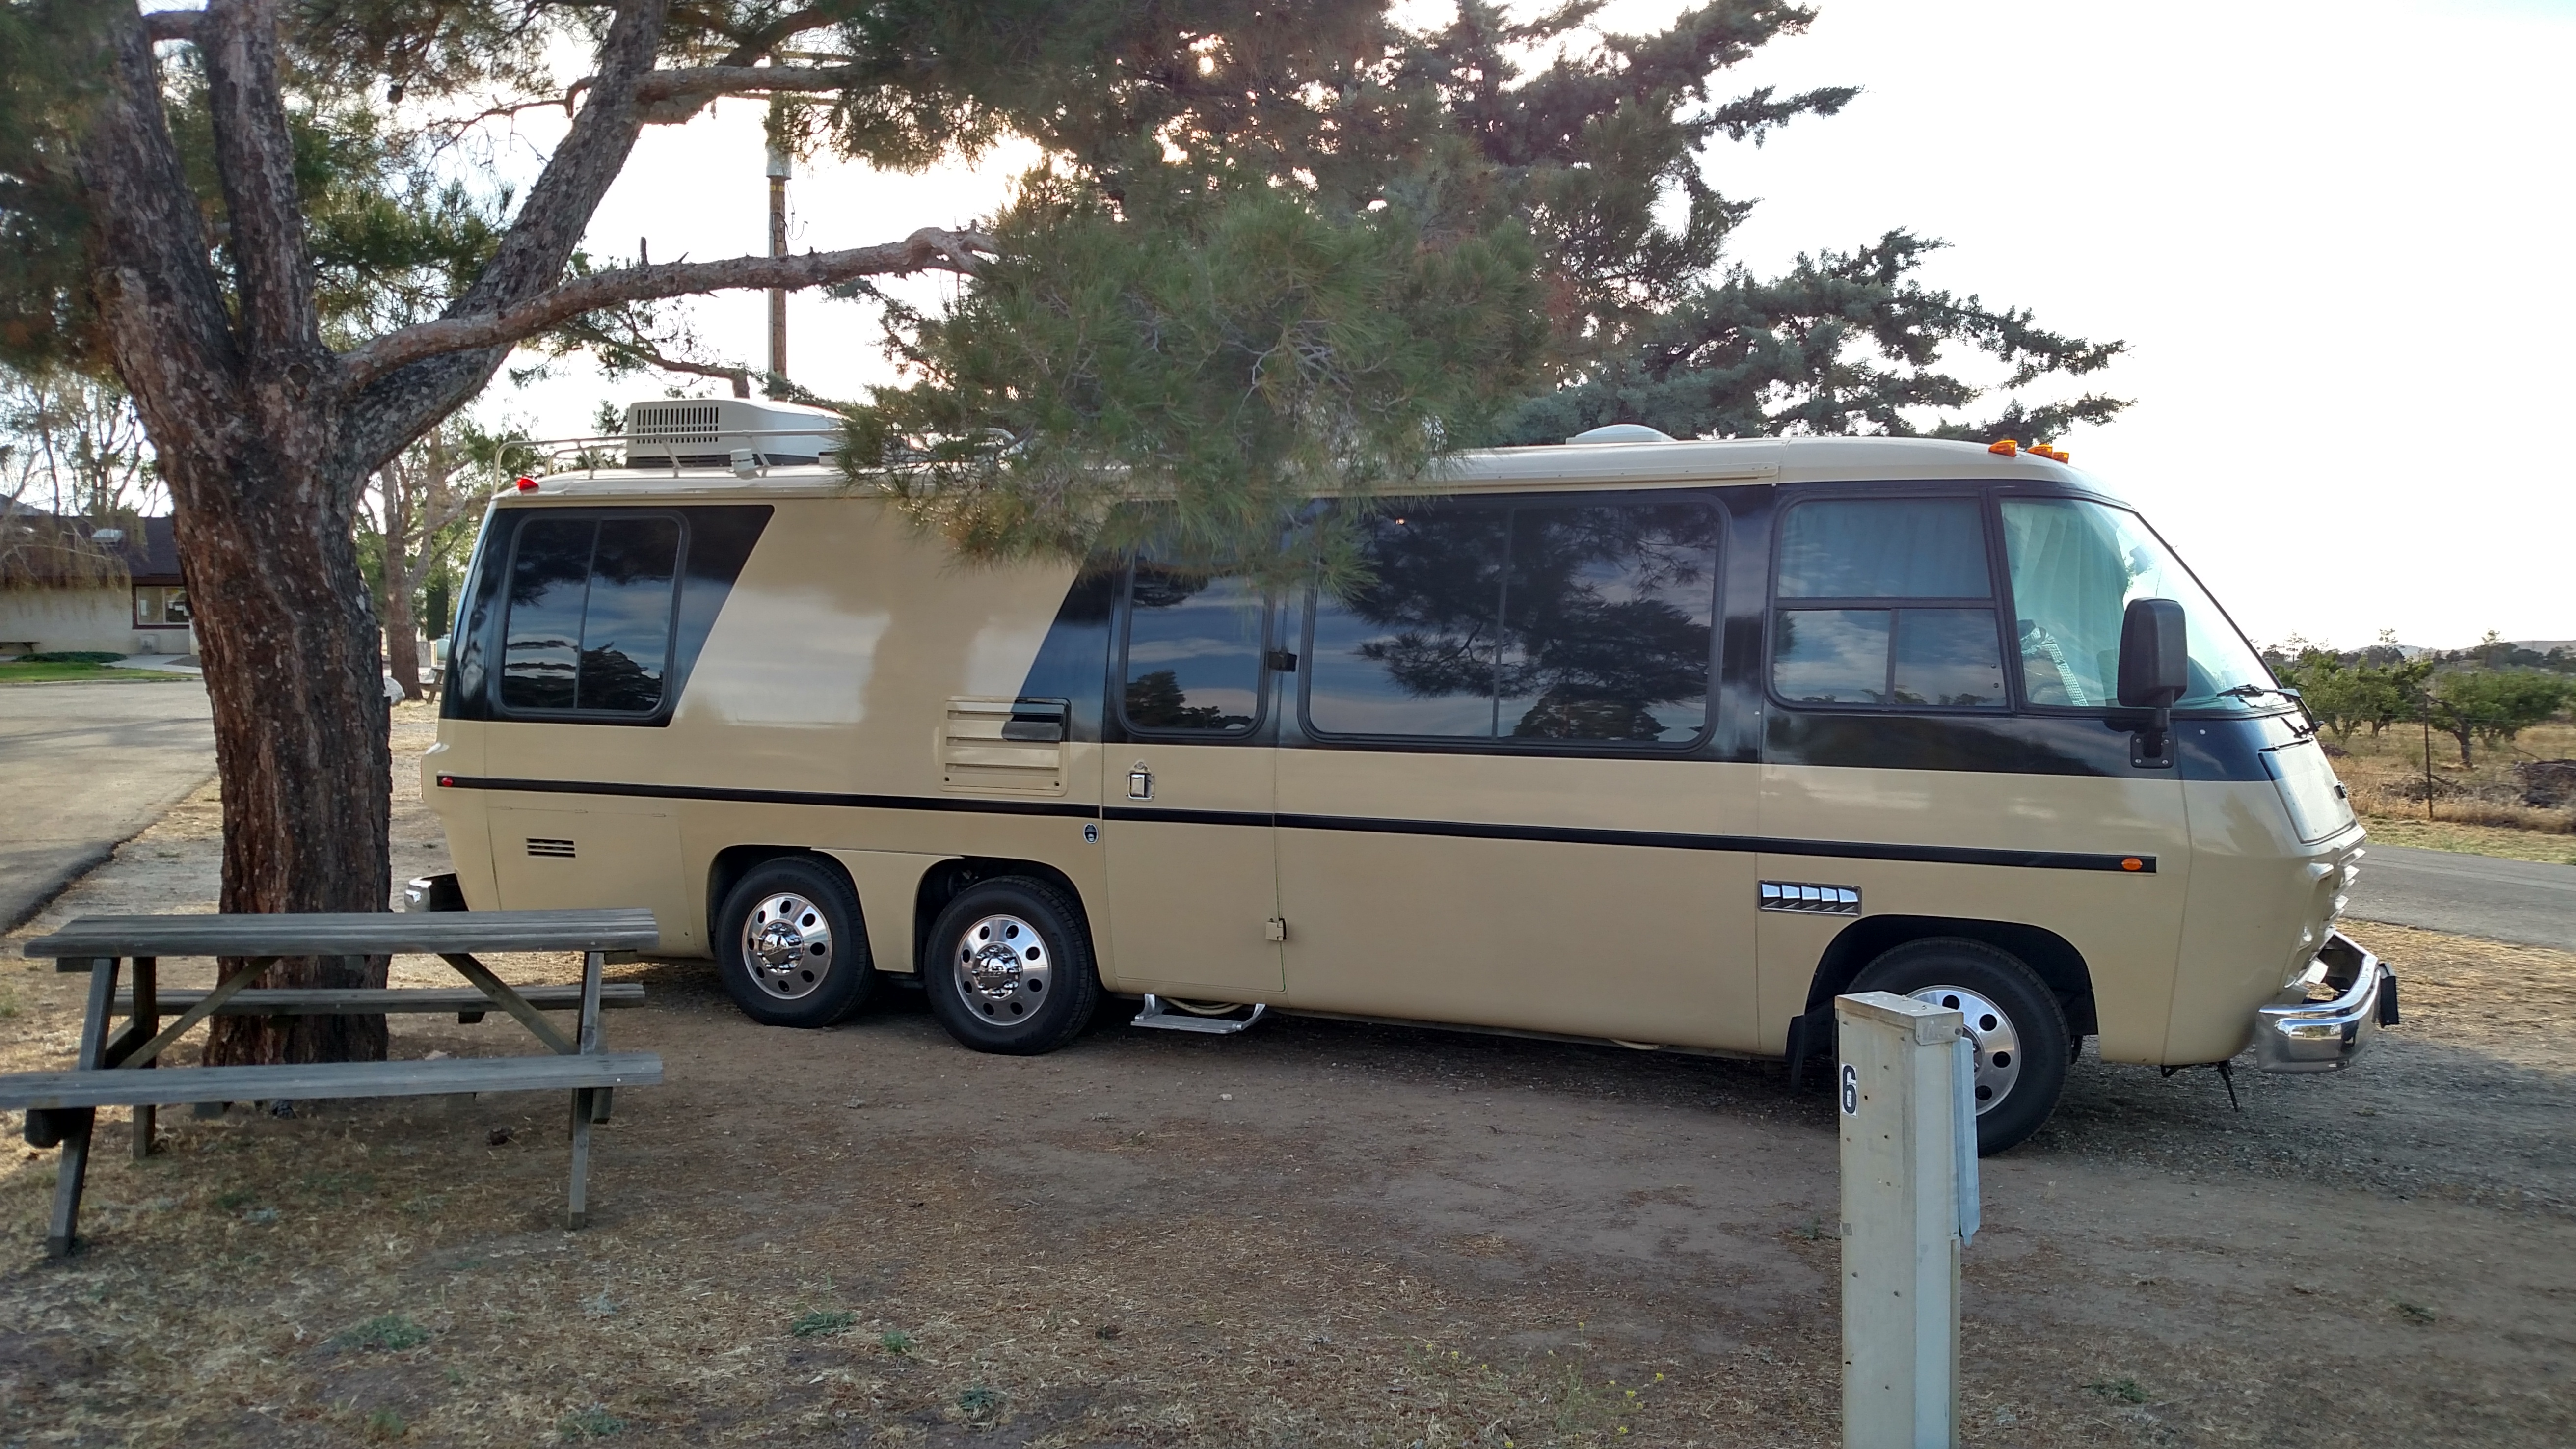


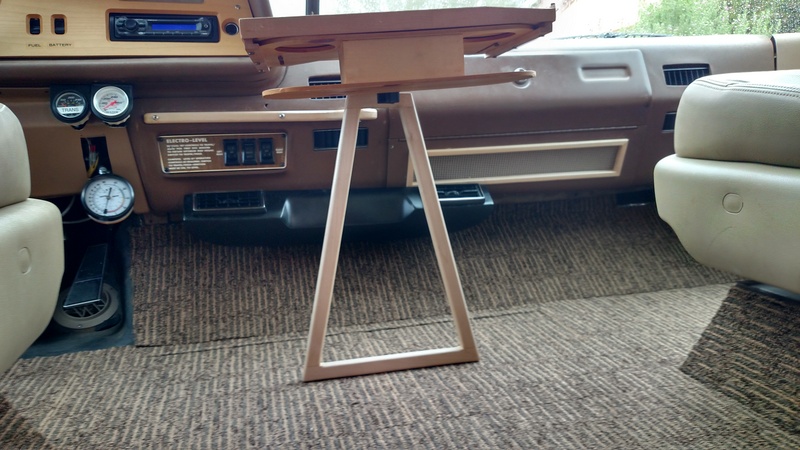
Interior updates and upgrades:


Converting the floor plan from #26-3 to #26-10

Converting the floor plan from #26-3 to #26-10

When we bought the GMC, a 1976 Eleganza II, it was a pretty vanilla version of a GMC Motorhome. We used it that way for about the first 4 years of ownership. About 7 years ago, in 2010, we removed the side-facing setees and converted the back section into a permanent bed. We also removed the dinette that converted into a double bed and replaced it with a couple of Honda Odyssey middle bucket seats and a round table. The davo on the driver’s side that converted into a bunk bed was removed in favor of a sofa that I made from wood with two large and very useful drawers under it.

We used the coach that way until about a year ago – mid-2016 – when we started sleeping in separate beds, mostly because of the difficulty of getting in and out during the night. When this started I added the ability to convert the sofa into a standard-sized twin bed by topping it with a folding piece of plywood that allowed the seat and back cushions to combine and form the mattress. This made a comfortable bed but we don’t like sleeping separately.

On our trip to Coos Bay in September of 2016 we lost our engine and had a two-week adventure installing a “new” one. One of the reactions to this incident was a loss of faith in the GMC and the expressed desire (by some of us) to give up on the GMC and find something more reliable. We did shop around and convince ourselves that there was nothing like a GMC available – considering size, floor plans, and cost ($100K is a good estimate). Reliability is always and issue but the floor plans were the biggest issue and some of the ones that might have filled the bill had twin beds which made us reconsider them as an alternative to one big bed.

With twin beds becoming an alternative we took another look at the GMC and saw some new possibilities. Carol, from day 1, loved the idea of a dinette in the back where the permanent bed now was. When we bought the coach the side-facing setees were set up and looked very inviting with that giant rear window. There was no table back there and I doubt it ever had one but we could imagine it. We decided to remove the permanent bed to install our own version of a rear dinette and to remove the bucket-seat dinette (which we had come to dislike a little anyway) and replace it with a mirror-image couch like the one I had been sleeping on. With both couch/beds open for sleeping there would be about 14 inches of space between them – plenty of space to allow getting in and out of bed during the night without disturbing each other. The benefit of using the areas in front of the entry door and the kitchen for the twin beds is that there is more room for slightly longer beds

Insulating the fuel tanks

Insulating the fuel tanks

Hot fuel is a big problem with GMCs. Not only does it cause what I call “the vapors” (vapor lock is a specific type of vapor-caused failure which we don’t really see) but boiling fuel is corrosive and dangerous. It has twice peeled the paint around the fuel-fill opening on my new paint job. In October, on our return trip from our attempt to get to Coos Bay we were driving on the Interstate in Southern Arizona with the outside air temperature at 93 degrees Fahrenheit and we smelled gasoline. I pulled over to see what was happening and heard my gas cap venting – again! I took my laser IR temperature gun and found that the front of the front fuel tank was 155 degrees and the bottoms of both tanks were 139 degrees. In putting together a seminar about “the vapors” a couple of years ago I found that “Winter” gas can boil at about 140 degrees.

The heat that elevated the tank temperatures from the ambient 93 degrees to 155 degrees is coming from the engine compartment, the exhaust system, and the hot asphalt which is only about a foot away. The engine, using the FiTech EFI and Fuel Command Center, was running great but the fuel was producing lots of vapor. The usual story line is that the fuel/vapor separator and the charcoal canister are supposed to take care of that vapor and you should never have pressure in your tanks and definitely not be venting through your gas cap. If you do develop pressure in your tanks you must have a blocked vent line the story goes.

I think that is BS. The opening in the fuel/vapor separator is about 1/16″, maybe slightly more but not much. I opened mine when I got home from that trip because I thought there must be something wrong with it. There is, it is inadequate for today’s fuels and the GMC’s design. There are approximately 20 square feet of fuel in those tanks and that much boiling fuel cannot be adequately vented through a 1/16″ opening – that is obvious to me. The gas cap is designed to vent at 2 PSI (minimum) for safety reasons.

My friend, neighbor and fellow GMCer, Dan Gibb came up with the idea to insulate the tanks with a modern high-tech material called Ceramic Fiber Blanket Insulation and some roofing metal panels. We had heard of some other GMCer who covered his tanks with aluminum diamond plate and claimed it had solved his vapor problems. Dan found and bought all of the materials for the project (both his and my coaches) and we made the panels and installed them on my coach this week. It took two of us about 16 hours to make all 4 panels and to install them on my coach – Dan has a newly discovered fuel leak that has to get fixed first. [Note: long after installing the insulation I developed a leak in my rear air suspension system. Turns out we nicked the air tubing while installing the tin material eventually causing a significant leak. Fixed by replacing all three lines from that point to the driver’s side air bag.]

Below are photos of our project. The photos of the uninstalled panels and the drawing are by Dan. The panels will be installed in his coach after a recently discovered fuel leak is fixed: 


Auxiliary Vacuum Pump Setting

Auxiliary Vacuum Pump Setting

February 10, 2017

In my last post I said I didn’t like the way my vacuum switch was working. I bought the adjustable switch from Dave Lenzi and he said to adjust it so that my pump turned on at 16 inches of mercury and off at 18 inches. I did that but because my engine only pulls 15 inches, the pump turns on every time I use the brakes. I asked Dave about this and he said that the booster works best at 16 inches or more and that a normal engine should be able to pull about 18 inches at sea level.  He said that for each 1,000 feet of altitude above sea level that number will go down by 1 inch. I am at about 2,600 feet at home. That would make my vacuum at sea level be almost 18 inches and my pump would not be coming on anywhere near as much.

Dave’s advice is to let the pump run and keep the vacuum up where the booster is the most effective. I told him I would heed his advice and leave it the way it is.

Auxillary Vacuum Pump Installation and Test and FiTech Test Drive

Auxillary Vacuum Pump Installation and Test and FiTech Test Drive

February 8, 2017

Dave Lenzi’s vacuum switch arrived today so I installed and adjusted it. It is set to Dave’s instructions to turn on at about 16 inches of mercury and turn off at 18 inches. It all works but I don’t think I like the switch range because each time I use the brakes the vacuum pump turns on because the engine only produces about 15 inches at idle. I will email Dave and ask about turning it down a little. The one note is that I had to get a booster check valve and disable it in order to get a good tight connection to the booster. My straight 3/8″ to 1/2″ adapter leaked because it was designed for hose rather than the grommet that holds it in the booster’s opening.

I took the coach for another test drive after getting the vacuum pump working and it ran good. Not perfect yet but getting close assuming that the FiTech unit is actually “learning”.

FiTech Is Back and Fixed (I hope)

FiTech Is Back and Fixed (I hope)

February 4, 2017

Last evening we were out in the street at our weekly Friday evening neighborhood meeting which is on our street but around a corner and out of sight of the house. I had left a note on our front door asking the Fedex driver to please leave the package containing the FiTech unit. The note contained the Fedex tracking number, my name, cell phone number and my signature. At about 5:30 or so a Fedex truck came around the corner from the direction of our house. I stopped the driver and asked if he had dropped the package as I requested and he said “no, I need a ‘direct’ signature” which means he needed me to sign his little hand held device. He even wanted me to go back to my house so he could drop the package there – I talked him into giving me the package out in the street – tight procedures for valuable packages I guess.

Anyway, there were no notes in the package and the only sign that something had been done was a small vacuum hose connected between the un-ported vacuum connector to the fuel pressure regulator on the side of the unit. I reinstalled the unit in the coach this morning and took it for a ride. It ran very well with almost no hint of any issues – almost because it did a little hesitation early in the ride but by the time I drove about 6 miles it was running very smoothly. I hope it is fixed – we plan to use it a little around town before taking it on a trip in about a month.

The replacement vacuum switch (the first one quits working sometimes) for my vacuum pump arrived today and I may try messing with it a little but I think I’ll just wait for Dave Lenzi’s switch to get here. 

FiTech and Brakes

FiTech and Brakes

12:30PM, Friday, February 3, 2017

It turns out that UPS dropped off my unit at FiTech at about 9:39AM on Wednesday and then Fedex shows the shipment being ready for pickup at FiTech at 12:26PM, less than 3 hours later.  Cody, from FiTech, was supposed to call me yesterday with info about what was found wrong with it but so far, as of 12:30PM on Friday he has not. I did talk to him late yesterday and he assured me he would find out what happened and let me know. I called there this morning and talked to Bryce, another of the tech support guys, and he knew about the unit and that I was looking for answers. He promised to call me back but, so far, he has not either. I am thinking that it must be some sort of manufacturing defect that they saw immediately and corrected. Why else would they be reluctant to tell me?

Back to brakes. Dave Lenzi (he is an amazing designer and machinist who makes and rebuilds GMC parts) suggested that I reconfigure my vacuum pump setup to keep the pump from cycling and running unnecessarily. What he suggested is that the vacuum sensing switch should effectively be sensing the vacuum on the booster side of the check valve because, otherwise, a leak in the check valve in the pump itself will cause it to keep running. I made that change by removing the check valve from the booster port (Dave’s rebuilt boosters have dual ports) and replaced it with a 1/2″ to 3/8″ straight adapter, used 3/8″ hose to get to the vacuum switch, then back to 1/2″ for the vacuum check valve that was in the booster.  I am buying Dave’s adjustable vacuum switch and adding a vacuum gauge  (I got one from China for $5 on Amazon) so I can adjust it to come on at 16″ and turn off at 18″.  

4:45PM

I just got an email from Cody at FiTech that basically says that they could not find the problem. Says they put it on the test engine and “did not find a major fueling issue like you stated” but the put it on the “test bench” and ran a bunch of tests, burned new code into the ECU and then tested it again. It ran “flawless”.  If it ever arrives like it is supposed to tonight I will reinstall it tomorrow and give it another try.


The FiTech Mystery Deepens

The FiTech Mystery Deepens

February 2, 2017

I have decided to try to actually use this section on my site as a log (blog?) of what is going on because I manage to forget when things happen and in which order. With this first entry of this type I will try to catch up on what has happened lately.

The FiTech mystery of today is why my FiTech throttle body is on its way back to me after being at the FiTech shop for less than a day. I sent it to them using an RMA and following all of their requirements like including a copy of my original invoice (I bought it directly from them?) and by filling out a standard form that Cody, their tech guy, sent me with the RMA#17-052 filled in. I sent it via UPS on Monday, it arrived at FiTech yesterday (2/1) morning and they sent it back to me today via Fedex. The only reason I knew it was on the way back was that I got an email message from Fedex. Cody did not know why they would have sent it back and he promised to call me right back but so far, 2 hours, has not.

I’ll go back a couple of weeks and recount what has happened. First thing was that from the very beginning of using the FiTech system I had a definite, measureable (1/2 second?) hesitation when hitting the gas pedal, especially when it was cold. Many times I had a hard time keeping it running at idle. I called FiTech many times (20 or so) and was told to try a lot of things like adjusting IAC Steps at idle, changing the ACC (accelerator pump) settings, and probably others. They asked if I checked for vacuum leaks, I could not find any leaks. 

It did turn out that my brake booster was leaking vacuum. I figured this out because my vacuum pump ran when it should not need to and with the engine stalled (happened quite a lot when cold) I had no brakes. I ordered a rebuilt vacuum booster from Applied GMC and a new vacuum pump from a guy on eBay. After a very difficult removal and replacement of the booster and the pump, the pump would hardly shut off because the booster was leaking ‘internally’. Applied replaced the booster with another rebuilt and this one actually failed while I was driving and I had no brakes a couple of times. I ordered a rebuilt booster from Dave Lenzi and I returned the second one to Applied. Dave explained what was probably going on and it involves the bracket that holds the master cylinder and the booster to the upper part of the dash. I am still working with Dave to improved the booster/pump configuration but my brakes work great now.

With the booster and the associated leaks fixed I still had issues with the FiTech unit. It was actually getting worse. One of the symptoms I could see via the FiTech Handheld unit was that the engine was running rich most of the time. A possible reason for this, according to advice and research, was an ignition problem – misfires. I decided that maybe my ignition module was going bad – they can fail in some mysterious ways and it is really hard to determine if it is fuel or ignition related. My fellow GMCer and good friend, Dan Gibb, had wanted a little tutorial on how that was done so I called him and told him my plan to swap the module on Saturday. 

On Saturday morning, with Dan watching and listening, I replaced the ignition module. It made no difference. The engine would hardly idle at all. With everything I knew to try exhausted I was drawing a blank when I thought of the perfect thing to try next – swapping his FiTech unit for mine. Dan agreed to give it a try – I had let him borrow my FiTech Command Center when his was not working so he was returning the favor.  We drove to his house, uninstalled his FiTech unit and installed it on my engine and all of the problems I have been fighting with the FiTech unit went away. It ran like a new car. We took it for a test drive and I could not believe how great it was. I tried it again on Sunday morning when the temperature was in the 40’s and it did not have any problems that were constant with my unit.

Monday morning I called FiTech. Cody answered the phone, I explained what was going on, and he sent me the RMA stuff. Below is what I sent back with the unit:

Problems:

  • Does not respond to throttle – seems like accelerator pump issue if it was a carb – has been doing this from day 1 – vacuum gauge dips to “0” but no engine response for measurable amount of time
  • Idles rough and sometimes stalls in idle – hot or cold
  • Stalls and even backfires back through TB when throttle applied at low speed – cold
  • Runs rich – has hard time matching target AFR – hot or cold
  • These problems have gotten worse over time
  • I have adjusted IAC Steps multiple times. Each time it has needed readjustment after driving for a while.
  • I have restored factory defaults multiple times with no help.
  • A friend has the same vehicle and engine with a FiTech 400 model (I am not using spark control) – we moved his unit from his vehicle to mine and all of my problems went away. It ran perfectly.

Own a GMC? Why you should join a GMC club.

Own a GMC? Why you should join a GMC club.
GMCWS Logo

GMCWS Logo

People new to the Classic GMC Motorhome are amazed about the amount of information and help that is available to them – primarily via the internet (GMCnet and now Facebook) but also via GMC clubs. All they have to do is ask a question and people are “crawling out of the woodwork” to help them. There is even a list of people who are willing to try to help people who are just passing through their areas with their GMC’s.

It is not obvious, so let me point out that the vast majority of that valuable GMC-specific information is available because GMC people (GMCers) have documented it – almost always for presentations at various club rallies. In fact, without the GMC clubs we GMCers would probably be like the owners of most other classic motor homes … mostly on our own.

GMC Western States, GMC Eastern States, local clubs and now GMC Motorhomes International (on June 1st) make our technical information (developed as tech seminars for rallies, written for newsletter articles and recorded in databases) available to anyone who needs it. GMCMI will even make their online parts interchange database available to anyone who needs it – member or not. The only information the clubs keep as “members only” now is membership data.

Attending rallies is not the primary purpose of joining clubs – contributing to their support is. Running rallies, publishing data, and maintaining web sites costs money. Joining the clubs – the bigger clubs who generate and distribute the information, and your local club where there is lots of information, help, and friendship – supports those activities.  And to all you younger GMC owners, just remember, a lot of us may be senior citizens but, when it comes to GMCs, we are all still kids and, when we get together we cannot stop talking about our toys (GMC’s).

Carol and I belong to GMCMI, GMCWS, and GMCSJ (Saguaro Jetset – local to AZ and NM).  We cannot usually attend GMCMI rallies because they are too far away but we have managed three of them in our almost 10 years of ownership. We have attended all of the GMCWS rallies in the past 5 years and we attend most of the GMCSJ rallies each Winter. Our membership in GMCMI has always been to support the club’s mission in spite of our inability to attend most rallies.

Without your support, the clubs will not be able to continue developing, maintaining and promoting the new products and ideas that GMCers will continue to develop and present at rallies. Your membership fee supports the clubs’ missions – preserving and promoting the Classic GMC Motorhome. Join some clubs today.

Armand Minnie

Reworking the OEM Dash Air Conditioning System

Reworking the OEM Dash Air Conditioning System
IMG_2499

Under-dash air conditioner installed by a PO.

When we got our coach it had an under-dash air conditioner that some previous owner (PO) had installed in place of the original equipment (OEM) setup. The OEM system was never very good until the mid-1977 and 1978 models and even then I hear complaints. Our coach is a 1976 so the system was not good – it did not blow very much air and what it did blow was 100% from outside air so it was not very cool and gave hardly any heat in the winter.

IMG_5706

My solution to the ugliness and inconvenience of the PO-installed under dash unit

The under-dash unit was in the way, poorly installed, and made lots of noise from fans hitting housings, etc. I hated the way it looked and hated that it got in the way of the suspension switchs and of having a tray or other platform for holding drinks, food, and our navigation computer. A couple of years ago I made a cover for the under dash unit that made it a lot more attractive and incorporated a swiveling tray that held drinks, food and our computer.

Our last trip – the June 2015 trip to Northern California – was so hot and uncomfortable that I decided to do something about it before our next trip in September when it will still be hot here. I had read and heard that there were solutions to the problems with the OEM system. One fellow GMCer that I talked to last Spring at our Treasure Island rally said that he had to turn his down on the trip to the rally even though it was about 100 degrees out.

2015-08-22 07.47.33

This is showing the hole that I cut in the back of the input chamber of the HVAC box and the coach fire wall to allow inside air to be taken in instead of the hot outside air as designed. The damper control on the right is the “max air” damper that is now normally open unless the “defroster” cable is pulled. The spring helps keep it open.

Fixing the OEM system requires two things: converting the system so that all of the input air is recirculated from the already cooled (or heated) interior air – commonly called “recirculate” on controls. This involves cutting a hole in the back of the fan intake section of the system and through the firewall so inside air will be drawn in. Covering the outside air intake forces all (95% probably) air to come from inside the coach. The OEM control has a position on the temperature control that says “recirc” but it does not – that control is supposed to open a door that sends most of the cooled air inside so should be labeled “max air” if anything.  There is no recirculation in the original setup.

2015-08-22 08.16.21

This is a view of the hole in the fire wall from inside the coach. I used a hole saw, a 4 1/2″ grinder, and a reciprocating saw to make the hole. I protected the wires with blocks of wood while I was cutting. This hole is directly behind the glove box and next to the fuse box.

The second part of the requirement is to simplify the routing of the conditioned air – the standard ducting system is so convoluted that hardly any air comes out. I looked at our system and determined that the duct work and its controls were so old and leaky (it uses vacuum from the engine) that it was hopeless to get it working again. One of the vacuum actuators actually disintegrated in my hand when I touched it. Instead of using the ducting system I plan to just keep the “max air” door open all the time unless we need defrosters at which time I will close the “max air” door and allow air to go through the OEM ductwork but completely uncontrolled. I also plan to turn the heater valve on and off mechanically (instead of the non-functional vacuum system) and control the flap that regulates the amount of air flow over the heater core mechanically (like it was originally). The heater valve, the “max air” door, and the heater air flow damper will all be controlled using old-fashioned manual choke cables in place of the non-functioning vacuum actuators. The air conditioner will be turned on with a toggle switch and the fan will be controlled using the OEM switch and wiring.

DSC01618

The modified OEM control panel has the original fan speed switch on the left with 4 controls on the right. The toggle switch controls the air conditioner clutch and when it is lit on the end. The first knob turns the heater valve on and off, the second controls the heat damper, and the third closes the max air vent damper and forces the air through the duct work and maybe some defrosting.

DSC01620

The back side of the OEM metal control panel – the extra washer is because there was a high spot on the other side of that control that needed to be offset

Since I needed to hold the original fan speed switch, a toggle switch for the air conditioner, and three “choke” cables I decided to just modify the OEM control panel.  The front of the control panel is made of cast metal with a plexiglass insert. The back of it has standoffs to hold the fan speed switch. I removed the plexiglass insert and used a grinder to flatten out the face of the metal part so that I could replace their plexiglass insert with my own.  In the original arrangement of controls the right side of the panel had two left-to-right slide levers that selected mode and temperature. I drilled holes in the slot that housed the top slider and backed them with washers to hold the new controls. I made my insert from a 1/8″ plexiglass scrap, printed clear labels with mirror imaged text that I installed behind the plexiglass and then painted the back of the plexiglass to hide the ground-down metal panel behind it.

The cable that controls the heater on/off valve and the one that controls the damper that controls air flow over the heater core were no problem but the “defroster” cable, the one on the right, is a problem. My idea was that under normal conditions the “max cool” opening under the dash would be wide open and when we needed the defroster function I could close that damper and force the air through the old vent system and then some of it would be directed on the windshield. I had a real hard time getting the cable positioned correctly to perform the function because of the position of the control lever and the directions it had to move in.

Below are some detail photos and the finished product. I can report that the dash air conditioning is now performing the way you would expect a good dash-air system to work – it blows lots of cold air. Success!

2015-08-22 08.17.46

The “max air” vent exits the HVAC box in this approximately 2″ x 12″ hole under the dash and pretty close to the new intake hole. The damper that is supposed to open with “max air” is right beyond this hole. Originally, there was duct work that directed this air toward each side of the cockpit. The cable that is crossing the opening is the “defroster” control cable making its way from the dash panel to the HVAC box – it was slightly repositioned later to avoid conflict with the duct work.

2015-08-22 08.19.12

This shows the duct work that I got from Golby in Florida in place and waiting for the diffusers that Golby also supplied. The wooden piece attached to the dash is the console pivot point holder.

2015-09-10 12.49.19

This is the new center console arrangement. The triangular gizmo holds it up and provides side-to-side stability while allowing it to be positioned where we want it. Moving it just involves lifting and sliding side to side. Removing and storing it is easy too.

2015-09-10 12.49.26

This view shows the “finished” product. I cut a hole in the glove box to allow the return air to flow more easily. I installed the diffusers in the max air duct and they really help direct and focus the cold(!) air.