Just as I was getting into the paint job after returning from our Spring rally trip to Hemet I used the Onan and it died. It coughed and ran rough for a few seconds and died. It would not start. I verified that I had spark and that the fuel pump was working so it had to be the carburetor. I figured I could take it off and clean it and maybe even rebuild it when the paint job was done. That was in April. It is now August and the paint job is done so, last week, I got started.
The first thing I did was take the carburetor off and, using the diagrams in the maintenance manual, disassemble it and see what was up. There was no obvious dirt anywhere but I did find that the float level was way off of the recommended settings. Since there was no obvious reason for the failure I decided the best path would be to rebuild it (new valve seats, etc.) and then adjust it. While I was tied up with the paint job I read of at least one person having trouble figuring out what was and was not included in the rebuild kit. I ordered the kit from Applied GMC and when I got it and read the included instructions and diagrams I saw the problem. The 6K Onan carburetor is not like any of the versions shown in the diagrams. There seemed to be too many parts – a spring that seemed to be extra and a couple of pieces ( an O-ring and a small gasket) that I could not find in my carb.
I laid out all of the parts that came in the kit along with the main needle valve and float valve seat from my carb, assigned numbers to each item, and tried to figure out what was what. I called JimK and asked him for help. Jim referred me to Greg, his carburetor rebuilder, who uses the same kit as I have. Greg was kind enough to help me validate my guesses and to figure out how to go about the process. The results of our conversation are documented with the photo below (click on the photo to enlarge it):
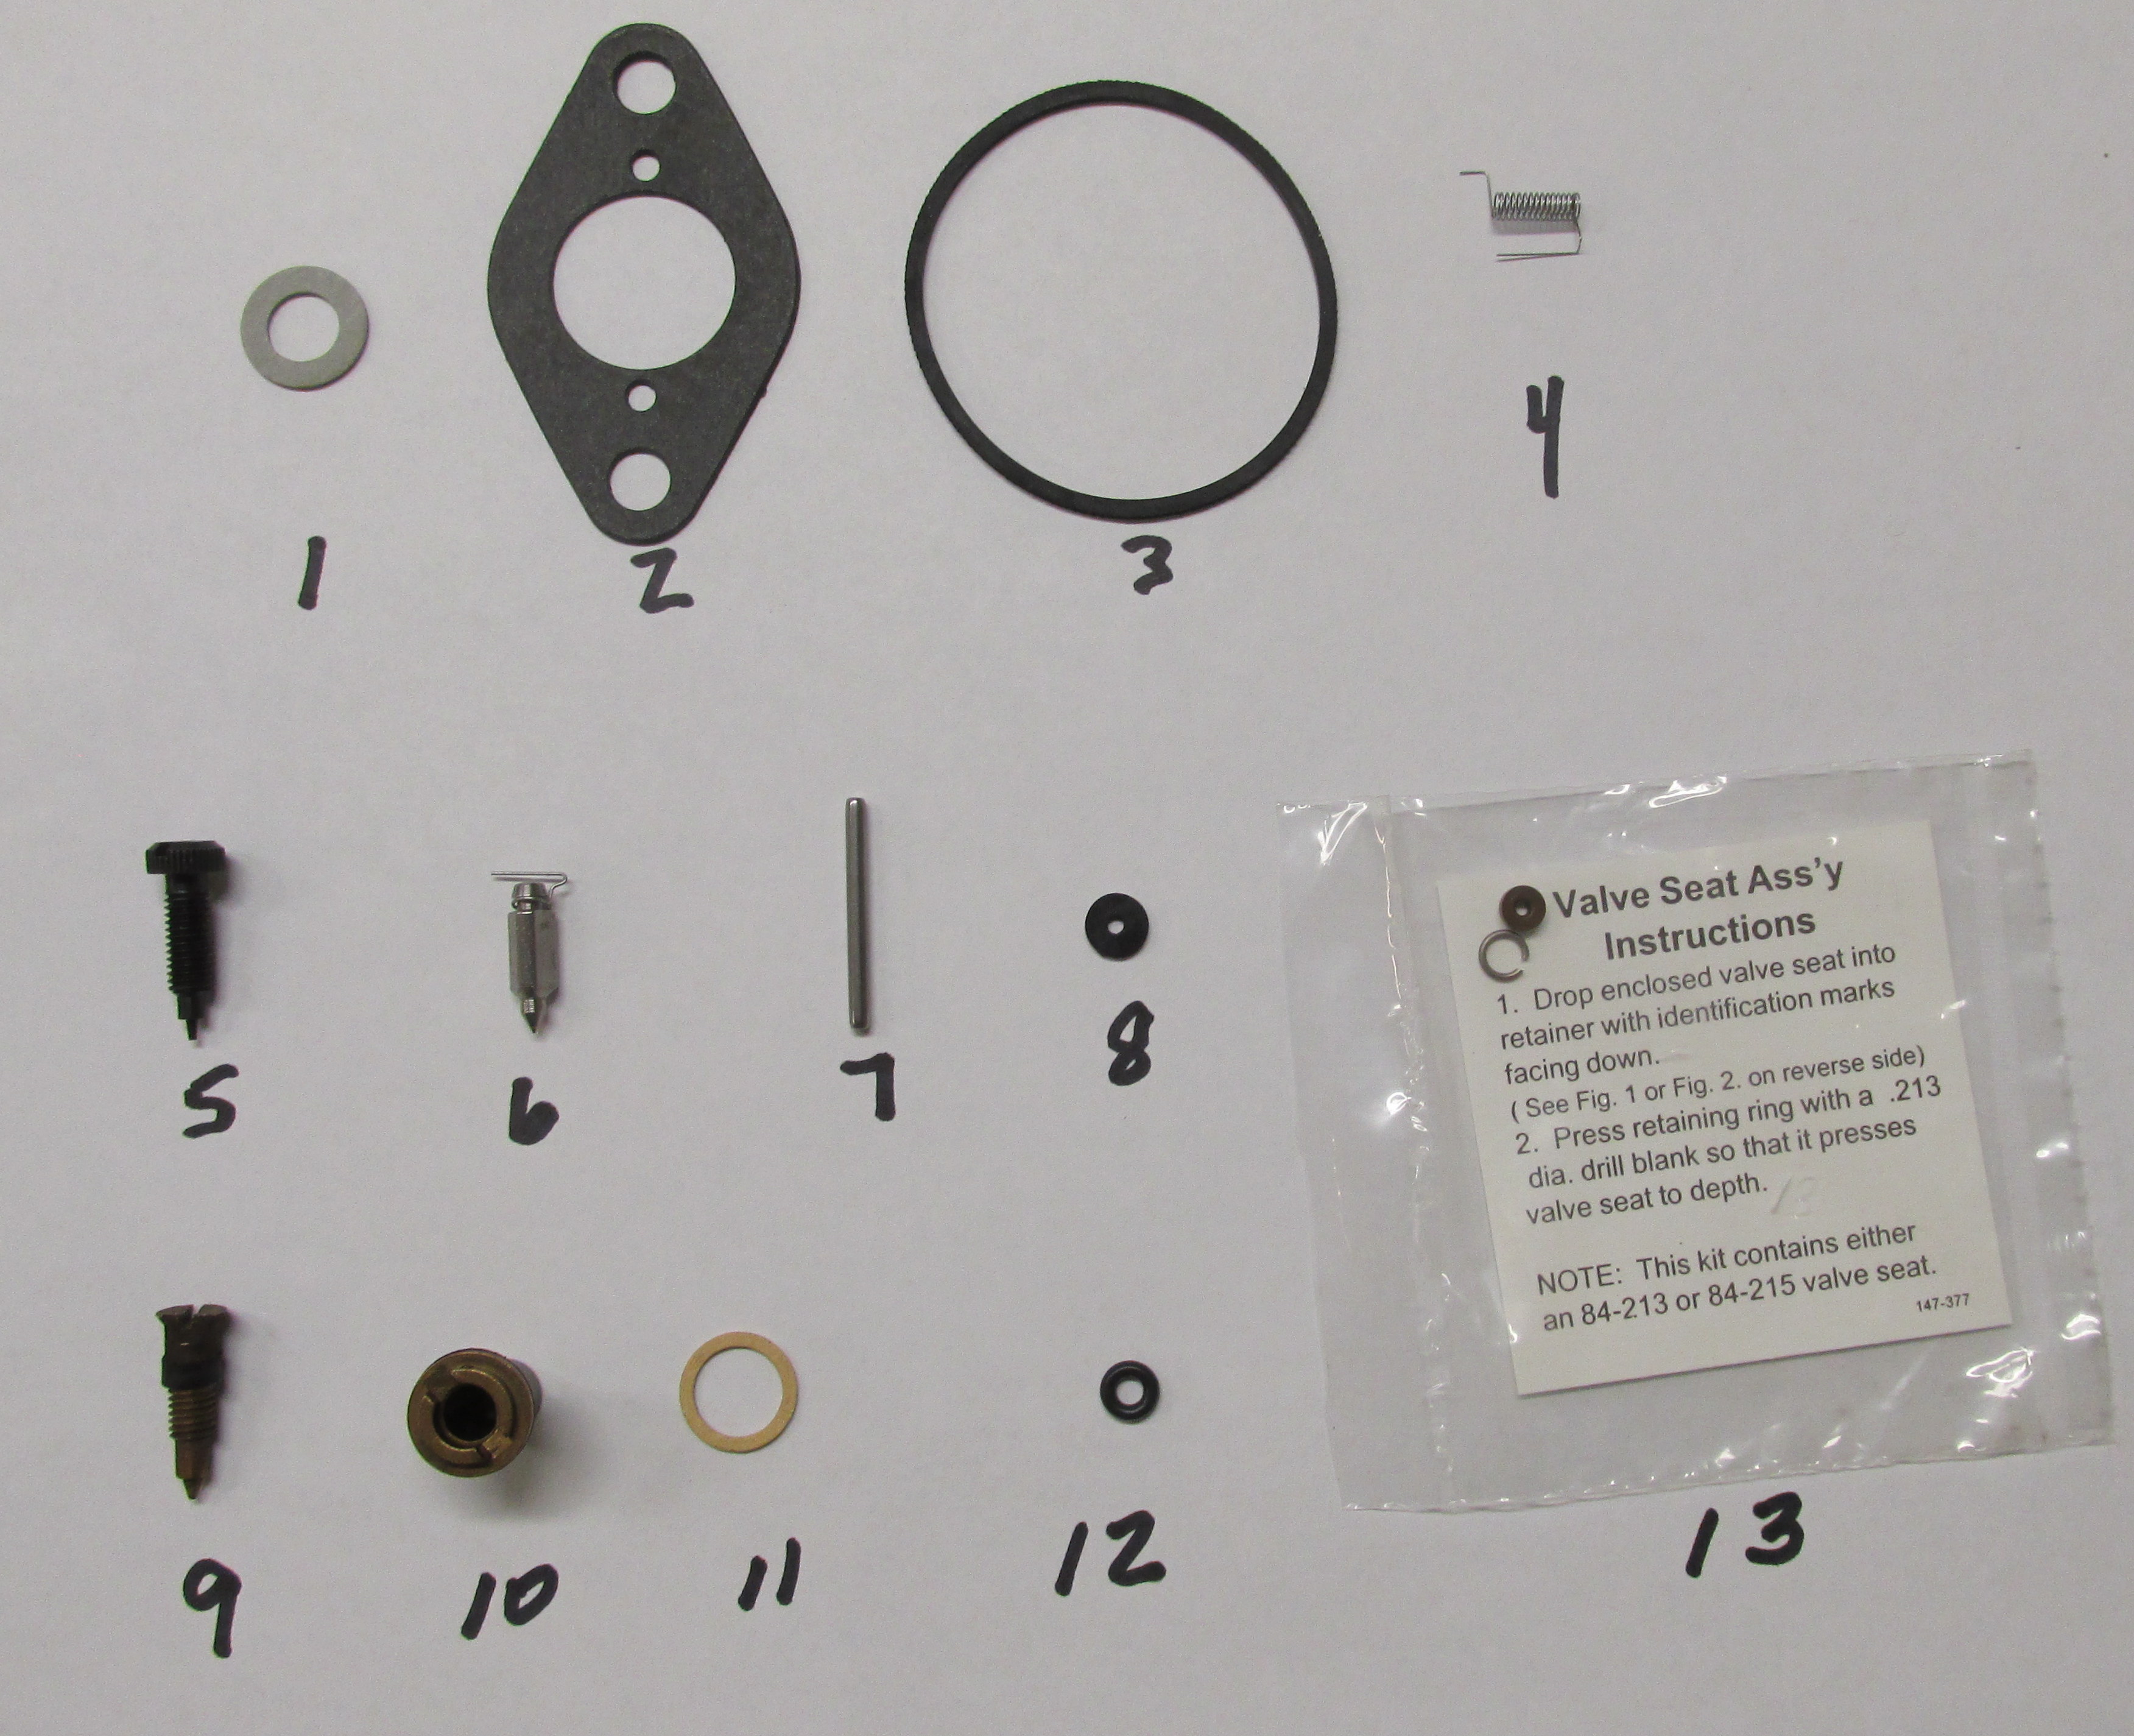
1. Internal gasket at bottom of bowl – reuse the external gasket.
2. Intake manifold
3. Bowl gasket – if the old one is good reuse it.
4. Spring – not used
5. Idle adjustment needle – use the spring from the old one
6. Float valve needle
7. Float pin
8. Gasket – not used
9. Old main adjustment needle – with old O-ring still in place
10. Float valve seat with rubber seat still installed – see additional photo below
11. Gasket for float valve seat – see additional photo below
12. O-ring that goes on main adjustment needle (#9)
13. New rubber valve seat and retaining ring for float valve seat (#10)
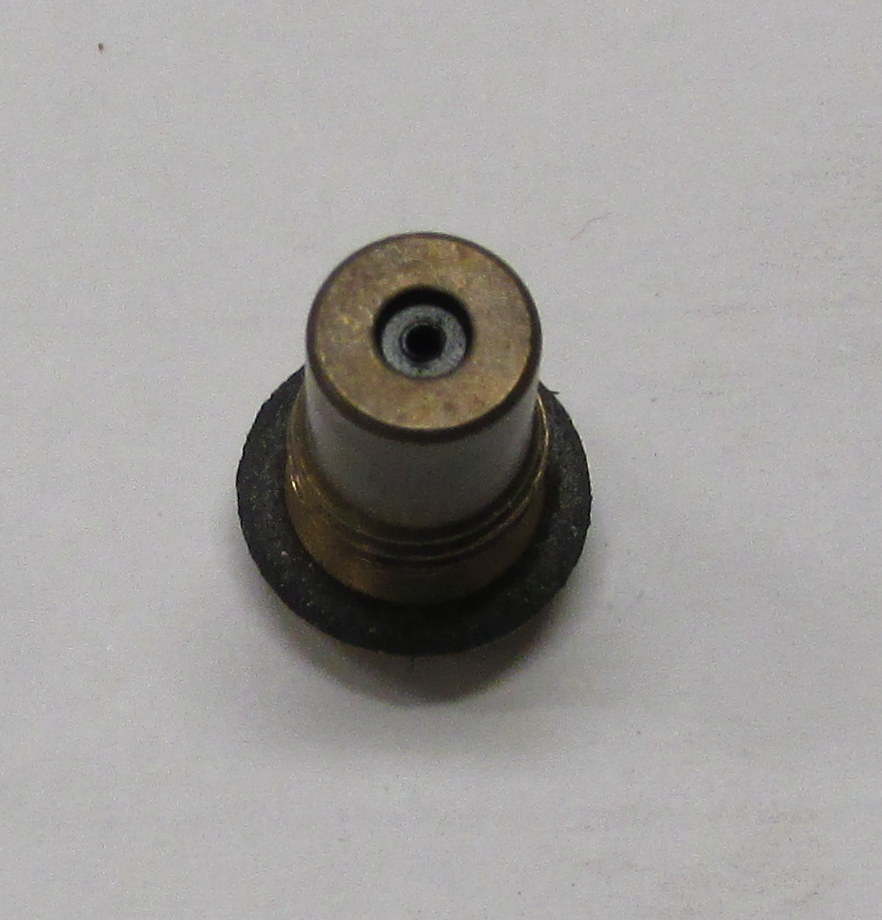
Back of float valve seat showing rubber seat at the bottom and gasket around top.
This shows the view from the back/top of the float valve seat. The gasket (#11) goes around the outside and the new rubber seat and retaining ring (#13) are pressed into it using a drill bit that just fits after pressing out the old one from the back with a smaller drill bit.
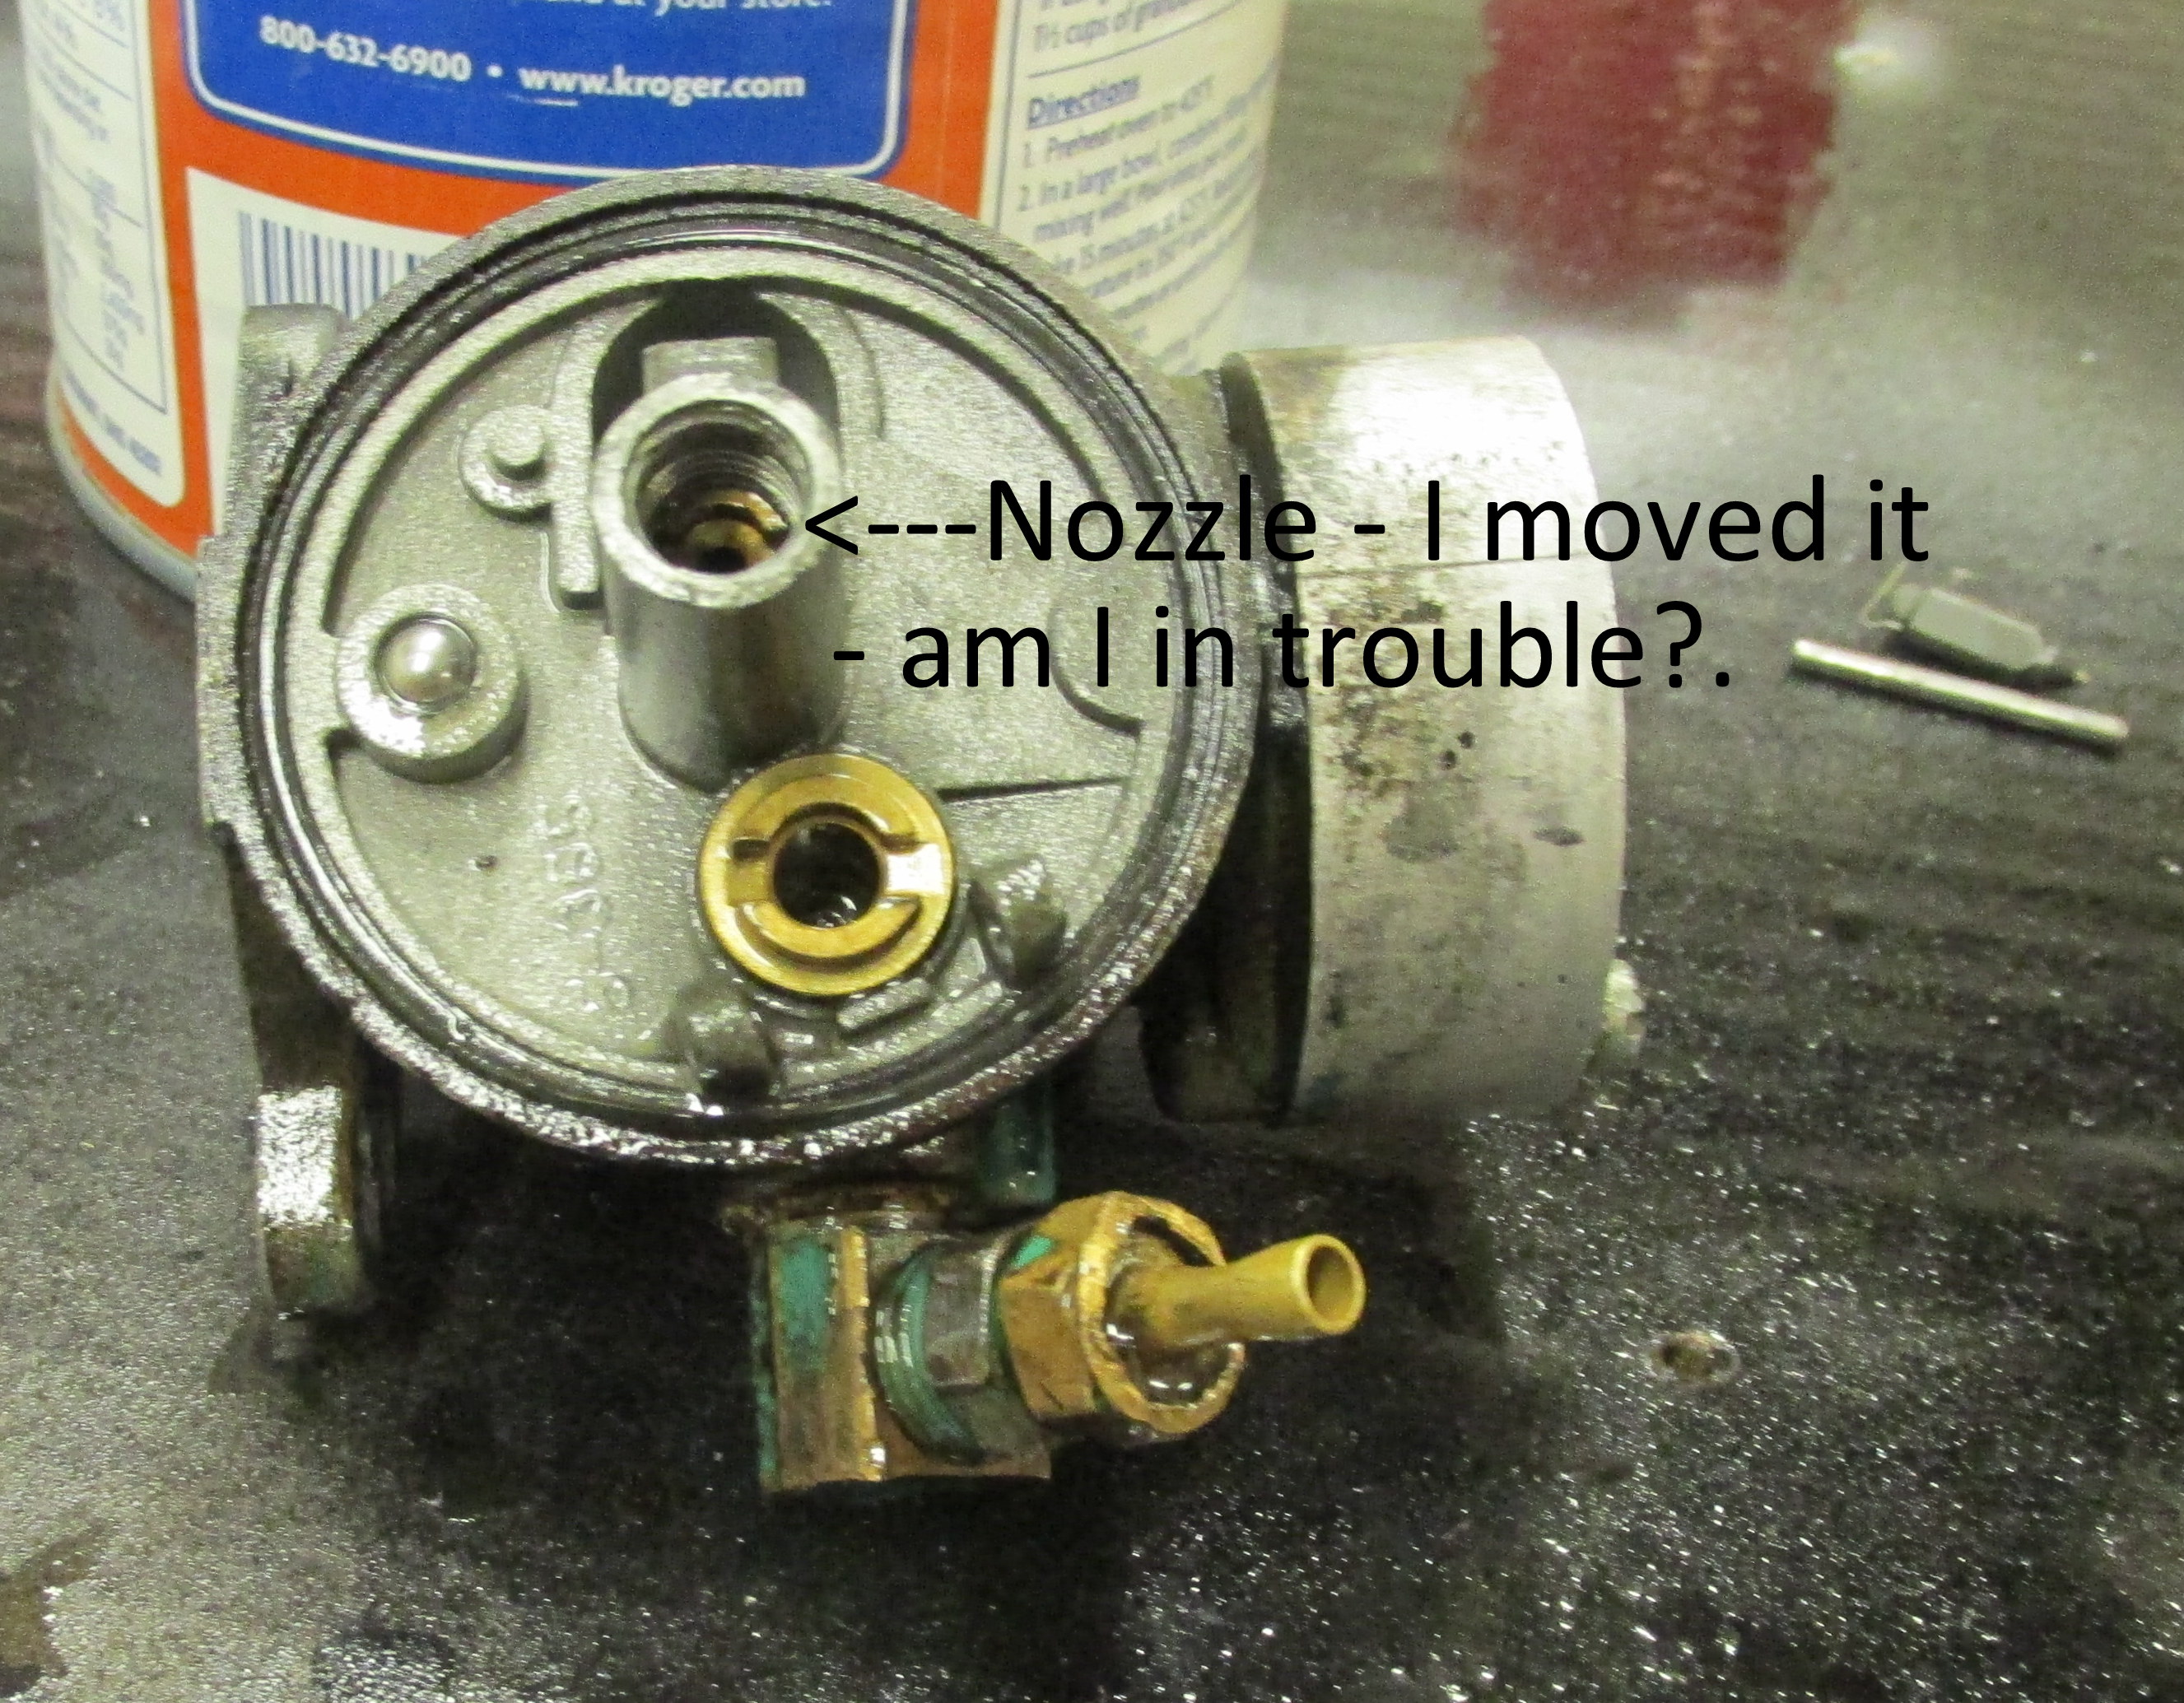
I thought I messed up
The instructions that come with the kit say to not touch the “nozzle” and that if you do touch it you need to install a new one. In a moment of confusion I did touch it but, it turns out, did no damage. It is reinstalled by turning until it bottoms – no problem.
After I had the information from Greg it only took me a few minutes to install the pieces and adjust the float – Greg does set the upper limit at 1/8″ (measured with a drill bit) and the lower at 5/16″ (estimated). The adjustments are made by bending – very gently with needle-nosed pliers, not by pushing on the float – a couple of tabs on the float. It took a few tries but I got it right. Greg says to adjust the 1/8″ favoring larger rather than smaller.
After reassembling the carburetor I installed it and the Onan started right up and ran great. I did not have to readjust anything although I verified that by trying. I think I’ll install the solid-state ignition kit by Gary Bovee next.
No Comments Yet