There are two alternatives for new windows for the GMC Motorhome and we don’t like either one of them. The original living area and bedroom windows in our coach – a 26-foot 1976 Eleganza II – open by sliding half the window forward behind a fixed section. The new windows do not open that way – they have sections at the bottom that open by swinging out. There are two problems with that style of window as far as we are concerned. One is that the original windows provide an easy fire escape path and the new ones do not. Two is that the bar which supports the swing-out sections cut right across the windows at eye level (at least they do in our interior arrangement).
The only solution to this problem is to recondition/rebuild the original windows. Jim Bounds of Cooperative Motor Works in Orlando, FL has the materials and the knowledge to accomplish this. The materials for the large front sliders are less than $100 per window and Jim’s website, at one time, had a complete description of the whole process at www.gmccoop.com -with lots of tips for the first timer. He had it filed under “window rubbers” but the site has been rearranged since I found that. The newest thing is that Jim has done some videos that pretty much explain the whole process and shows him actually doing things on a coach. Ask Jim and buy the supplies from him – lots of info and fair prices.
Another point in favor of rebuilding vs. replacing is that the entire job of rebuilding can be done from the outside. This is important to me because I should have done all of this before I rebuilt the interior but I didn’t and I don’t want to uninstall cabinets and valances now. Also, I have covered the kitchen window on the inside and getting at it from the inside would be a major PIA.
Besides needing new rubber around the outside, our windows have been tinted with film and it is old and has turned purple and must be replaced. The sliders must be cleaned up because they are difficult to open and close and the exterior aluminum frames need to be repainted.
I bought a rebuild kit for one of the large front sliders from Jim a year ago and never got the chance (I was avoiding it I guess) to do it but my Navigator has made a strong request that I get this done before we leave in September for Oregon and the Fall 2013 GMCWS rally.
Monday, August 5th: today I got started on the driver’s side large slider. Earlier, I had scoped this all out – I read Jim’s article above – looked at the actual windows to better understand what had to be done, and even made a simple little tool for removing the plastic tracks for the sliding pane – I used about a one foot piece of a “electrician’s fish tape” because it is a good size and is flexible. I went to an automotive finish supply store and bought some SEM self-etching metal primer and some black enamel for the frames. I bought some good masking tape and paper and some Scotch 233 tape for holding some 3.5 mil plastic over the window openings while I had the windows out.
The first thing I did was cover the window shade and the couch with some plastic so I could work on the window without messing them up and then I removed the old, stiff window rubbers from the whole window – the coach looks better already.
The next step was removing the post that divides the window in half. I forgot to unlatch the window so it could move but I figured that out pretty quickly. Removing the fixed window pane was next and it was easy – it was a hot day like every day in Southern Arizona in the summer – but the “glue” holding the fixed pain in was so soft it felt and acted like a cross between black grease and glue and it got on everything but no damage. I had bought some suction-cup type glass handles at Harbor Freight so it was easy to handle the glass.
Removing the slider was easy too. All I had to do was remove the track from the top of the frame behind where the fixed glass was and then move the slider into that area (open the window) and it lifted right out. The bottom slider track was a little difficult to get out because of all the dirt in it and under it but it did come out. I did some first-pass cleanup on the window frame using a putty knife and lots of mineral spirits to get the “glue” off. I covered the opening with the 3.5 mil plastic sheeting and the Scotch masking tape that is not supposed to leave anything behind even after a week in the hot Arizona sun – we’ll see.
The rest of the afternoon – about an hour or two – was spent removing the old tint film with a razor-blade window scraper. It did take about half the time to just get the “glue” and a lot of silicone off the fixed glass section though. What a mess. Nitrile gloves are a good idea during the whole job with frequent changes – probably depending on the type of “glue” your PO used.
Next will be sanding and painting the window frame and the center post while I try to get some new film installed on the glass. A recommended tint applicator is supposed to call me this week. The plan is to do one window at a time: I remove and clean a window, take it to his shop in late afternoon, he installs the film and then I let it dry for a day before I reinstall it. I am now waiting for him to call.
Tuesday, August 6th: the weather was great for working outside today; it never got above 84 degrees and there was a nice breeze. I put in a call to Jerry Sweet of Sweet Window Tinting to see if he was back in town yet. He answered and agreed to install film on my two window panes this afternoon at his home shop. Jerry does mostly commercial jobs because that is what is available but he likes to do cars and really knows what he is doing. I found him by calling my State Farm Insurance agent – State Farm always directs their clients to good repair people so I knew that they would know of a good one.
While I was waiting for Jerry to get back to his shop I continued the cleanup of the plastic tracks for the glass slider and I worked on preparing the interior under each of the other windows so I would not mess anything up when I do the rest of the windows. I removed all of the screens and their tracks so I could clean them and get them out of the way.
Jerry finally got to his shop at about 3:30pm. We selected a dark tinted film that will look black on the outside and will block about 40% of the suns heat. I watched Jerry install the film on both panes in about 30 minutes and the job is either perfect or close to it. He is fun to watch. Jerry suggested that I let the film dry for at least 24 hours before reinstalling the glass and he actually trusted me to pay him when the whole job is done. I left without even signing my name – I like doing business with people like that.
Tomorrow I plan to remove the glass from the large window on the passenger side and at least start cleaning up that frame. On the driver’s side I plan to paint the frame in preparation for the glass installation on Thursday.
Wednesday, August 7th: a bright and sunny day but not extremely high temperatures – I think it got to about 95 but not humid. I cleaned up the driver’s side window frame inside and out and primed and painted it. There was a ton of sandy dirt in the slot that holds the plastic slider track. It took a brush, a putty knife, and a narrow scraper (a flat screwdriver) to get all the dirt out.
While the primer was drying on the driver’s side window I started working on the passenger side. Having the experience of the first side and the awful greasy glue I used rubber gloves and made nowhere near the mess I made on the other side. The passenger side cleaned up so easily that I managed to get it painted too, both primer and final coat done on both sides now. I alerted Jerry Sweet that I would be bringing at least 2 more panes of glass to him tomorrow. I plan to get the old film off of those two panes in the morning and then start taking the smaller windows apart while I am waiting for Jerry.
Thursday, August 8th: I started out getting the window panes from the passenger side clean and ready to install the tint. That took me about 3 hours. Next was reinstalling the newly tinted panes on the driver’s side. The first piece to go in is the slider – the bottom track first then the top. I had cleaned up the window tracks and noticed that one of the reasons the windows don’t slide like new is because the track wears out – 37 years of grit accumulating in the slide and under it and that acts like sandpaper and wears it out. Even the glass is scratched from it. I installed the former upper tracks on the bottom so that I got a new wear surface (no weight on the top) and put the former bottom ones on the top. It now slides like it must have when it was new – perfect.
That was the easy part. Now to install the fixed pane – a real pain. I applied the black RTV that Jim B. sent along with the rubbers and felt strip. I applied a narrow bead and then spread it with my finger (gloved). It did have some lumps which tried to make a mess but I think I outfoxed it. This is actually a two-person job. One person has to hold the glass in position with the glue and spacers trying to move all the time. The second person starts installing the rubber lock molding at the bottom to hold the bottom of the window and the spacers in place. After the turn is made it will not move.

Completely reconditioned OEM window with black limo tint
Installing the rubbers is not as bad as it sounds – maybe I just have strong thumbs. I did try a tool that Steve Ferguson suggested (on the gmc-photo site I think) but it didn’t seem to help a lot and it made marks in the rubber. Before I do the next window I will figure out an alternative tool. Installing the larger rubber is more difficult than the smaller one but I got it done and it looks beautiful!.
I also removed the window over the kitchen sink – it is covered on the inside so this is for external looks. I removed the window because it was falling out. I had removed the rubber yesterday because I hated how it looked and it had sagged and was in danger of falling out.
Friday, August 9th: I decided that for the next phase of this project I would concentrate on the driver’s side windows because I can’t fit all 8 remaining glass panes in my van at one time going to and from the tinting shop.
I removed the glass from the bedroom window next. This was made much more difficult because some PO had used steel screws to hold the center post in place where Jim Bounds recommends using aluminum rivets. The dissimilar metals action had welded the top screw in place and it would not budge while the bottom screw came out with superhuman effort. I had to use a thin cutting disk on a dremel type tool to cut the screw out from behind. I make a sort of mess of the upper part of the frame trying to drill a very hard piece of steel screw out of some very soft aluminum. I think a new rivet will cover the mess but, if not, I will have to repair it and redrill.
Once I had the 3 new pieces of glass at home I found that the ammonia under a black plastic trash bag worked really well and made it almost easy to get the old tint film off. While the glass was “soaking” under the plastic and ammonia I worked on cleaning and painting the frames. Now the whole driver’s side is ready for glass whenever the new rubbers, etc. get here.
Saturday, August 10th: I took the 5 window panes to Jerry to re-tint. He had suggested getting an early start so we did. I arrived at his house at 7 a.m. and by 8:45 a.m. I was back home. Had to go out of town for a couple of days so removing the remaining passenger side glass will have to wait until I get home. After that the big back window and the cockpit side windows will be next – they will have to be done in place.
Wednesday, August 14th: Had a family issue that took a few days but I got started again this morning. I took out the remaining windows from the passenger side – the door and the bedroom. Having learned what and how to do it, I immediately cleaned and painted the frames and then covered them to wait for tinting to be complete. I found the remaining rubbers and felt strips on my doorstep when we returned home last night so time to start putting some glass back in, maybe tomorrow.
Thursday, August 15th: I removed the film from the large back window over the bed and from the cockpit side windows this morning. I had tried applying some ammonia with plastic trash bags yesterday before I left but that apparently did no good. It took me about 2 1/2 hours to get the old stuff off but I ran the A/C and removed the mattress so I could stay cool and not make a mess.
In the afternoon I went back to the coach with my helper/navigator and reinstalled the newly tinted (former) kitchen window trying my new rubber installation tool – photos below – that I made from a broken wood chisel. I just ground the normally sharp end down to a flat surface, sort of like the end of a flat screwdriver and I rounded the corners and eased the edges a little so it would not mark or cut the rubber. It did slip a couple of times and scratch the newly painted frame but it is so much easier than thumbs or Steve’s recommended tool I will happily touch up the frames for the ease of installation.


Tomorrow, I plan to get down there early with my helper/navigator – her job is to hold the fixed pane and spacers in place on the glued frame while I insert the rubber – and install the bedroom window on the driver’s side and the big sliding window on the passenger side.
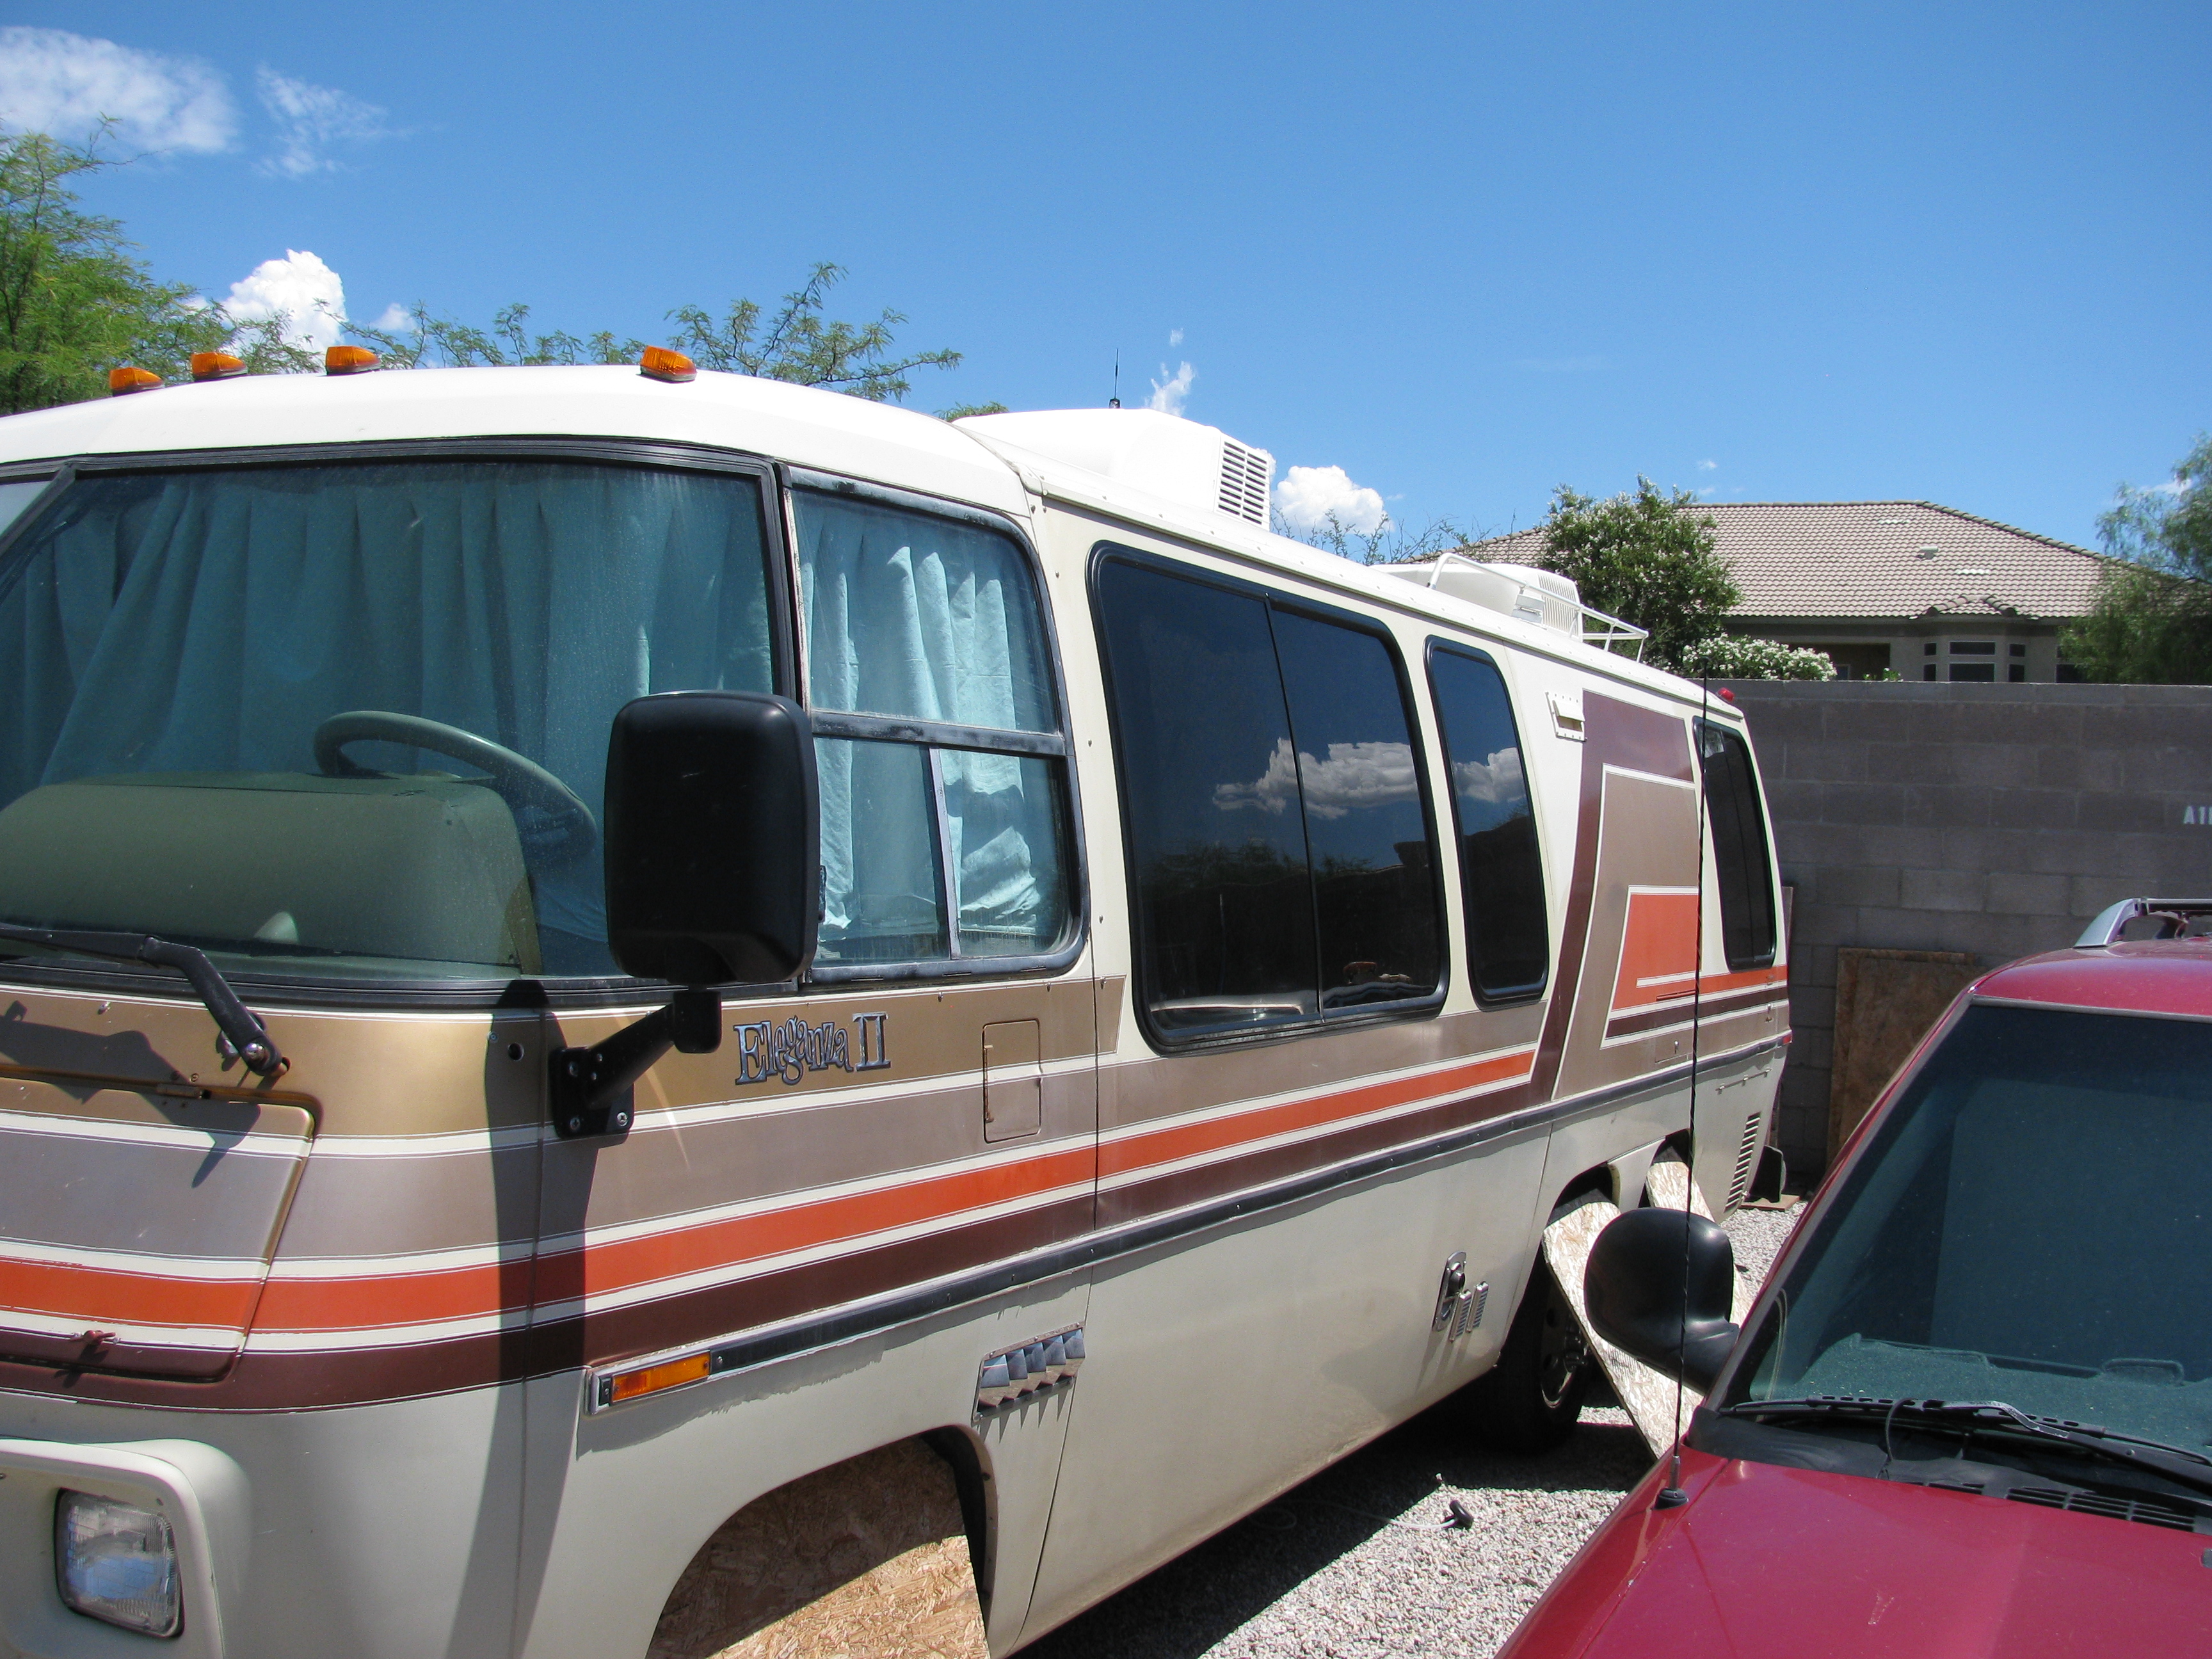
Driver’s side living area windows done
Friday, August 16th: got the bedroom slider on the driver’s side and the big slider on the passenger side done today. The tool works great but the same thing in a hard plastic like ABS would be better because that would be less likely to scratch. I have a few little scratches on the frames to fix so far and only one minor paint damage – not that anyone will notice that. Now just waiting for Jerry, my tint installer, to call me to set up an appointment. I had to take a photo of the driver’s side with the living area windows complete. They look so good they make the cockpit windows look really bad so they are next. I have ordered the stuff from Jim Bounds – hopefully, that will include the slider tracks because they are a mess.
Well, I called Jerry to set up an appointment – thinking tomorrow (Saturday) and he asks: “How about now?” So, at 3:30 I took the coach along with the 3 panes of glass I took out yesterday and headed to Jerry’s. He did the 3 pieces while the coach cooled down a little with the A/C running. When he was done with the 3 pieces he jumped into the coach and tinted that 6-foot by 3-foot back window in no time at all.
I will have to take tomorrow off because I have to let the film dry for 24 hours before handling it. Monday it will be.
Monday, August 19th: Installed the bedroom and door windows on the passenger side so all done. Tomorrow, I will reinstall the screens but I don’t anticipate any problems with that. The plastic tracks for the screens were a little messed up and that resulted in the screens not fitting right and rattling. Messed up means that there were 3 different profiles of plastic track and a couple were installed upside down. I cleaned up the screen tracks, figured out how they were supposed to be installed and did it. I ended up with quite a bit left over because I did not extend the tracks across the window – I installed it only where it needs to be to hold the screens in place – because we never open the screens.
All in all, I would say that the job is not that hard to do. It is just time-consuming and dirty because the old “glue” is messy – maybe yours will not be? Also, I think that there must be a better way of installing the rubbers – there must be a tool. I would suggest taking a sample of the profiles to a body or glass shop and asking for suggestions. I think a hook-type tool could be used to pull the inside lip of the rubbers into place instead of pushing the outside lip in – just a theory.
Materials, including paint, etc. totaled under $1000 (one GMC unit) and the result really nice looking.
Here are the project steps I planned:
- protect (mask/cover) interior around windows
- remove the old rubber
- remove the center post on slider
- remove the fixed window – just pull/push it off – a putty knife helps – save the spacers
- remove slider window by removing the upper plastic track first
- clean and sand frame and post – mineral spirits worked great on the old “glue”
- clean and paint the frame and post with SEM self-etching primer and black glossy paint
- cover the window opening with 3.5 mil plastic sheeting and masking tape – will take 24 hrs for tint to dry
- clean windows and tracks and apply tint film – let film dry for at least 24 hrs.
- replace slider window
- replace fixed window – use original spacers but only use 1/2″ lengths to minimize difficulty with rubber trim
- replace small rubber trim – this is what holds the window in place – trim to edge of fixed glass
- install center post with new brush strip
- rivet post in place – do not use screws
- replace large rubber around sliding pane – leave about 1/8″ long and push it in
Here is a look at the passenger side.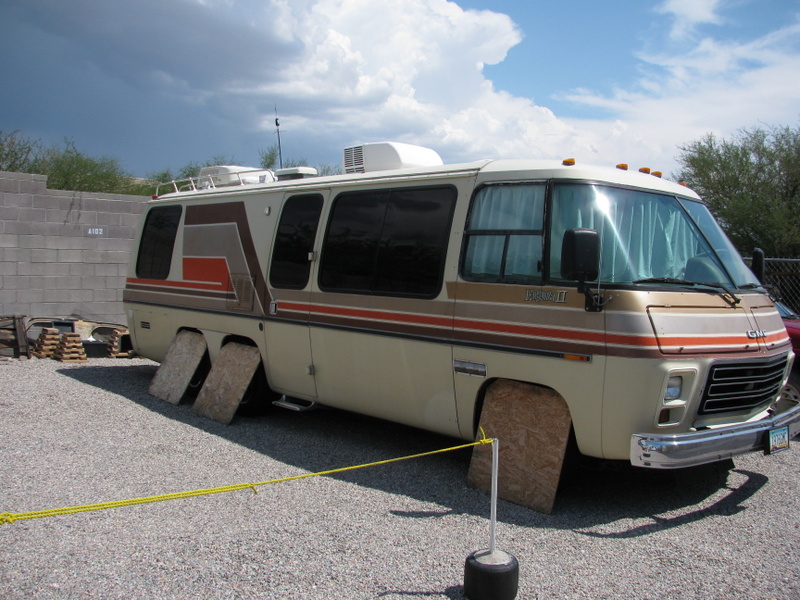
Good luck.
thanks for the great write up with pictures! quick question the window tint. Did you tint to the edge of the glass or did you leave an untinted boarder for the RTV to stick to? thanks
I tinted all the way to the edge (minus 1/8″) figuring that the tint sticks really good too so there should be no problem. The RTV is the non-acid cure type from Jim Bounds so it shouldn’t affect the film.