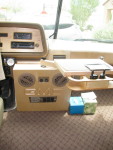
Lots of GMCs – about 115 or so – and some good info about distributors and other GMC stuff. Carol made a blanket for a local charity and I found some very interesting wood carvings in the yard around the fair grounds buildings. The artist carved these figures into trees whose stumps are still rooted in the ground.
Wind Cave National Park
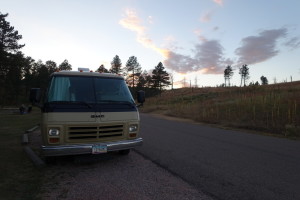
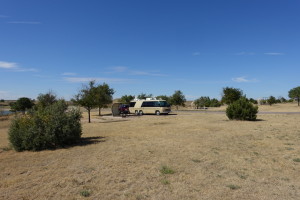
Our camping spot for the night. Tilted too far toward the passenger side makes for poor shower drainage but otherwise awesome.
We spent the night in the strictly dry-camping Wind Cave National Park campground. It was beautiful and quiet. By the way, we figured out that one night pretty much depletes our batteries – our new tri-metric meter tells it accurately. At 7:00 a.m. we just drove about 1/2 mile down to the parking area in front of the HQ building and had some breakfast while we waited for it to open at 8:00 a.m. so we could buy our tickets for the first (9:30 a.m.) tour and be on our way.
Our tour guide was Ranger Rick (really) and he was pretty entertaining. The cave and the whole experience was a little tough though – very narrow and tight the whole way compared to many other cave tours we have done. After the tour we drove to the rally with stops at WalMart and a do-it-yourself car wash for both vehicles. Dinner at the rally – one of only two provided – was a whole roasted pig which didn’t quite make it for all 200+ people – oops. Below are some photos from the cave tour and the dinner.
Wind Cave National Park – vapor issues but fewer of them
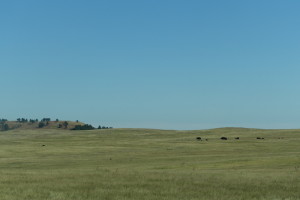
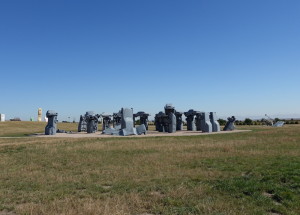 Today we drove about 5 hours from the Northeast corner of Colorado to Wind Cave National Park in Southwest South Dakota. On the way we stopped to pay homage to carhenge in Alliance, Nebraska. We saw a few buffalo on the way into the park but wonder what it must have been like when there were thousands of them filling the wide open spaces.
We stopped twice for gas. The first time we had no issues but the second time we had the same old problem. The engine recovered pretty quickly – a minute or so – and the noise was kept to a minimum because I have replaced the exhaust manifold gasket. I guess we will have to learn to live with it. I did check the distributor and the advance is still moving freely – don’t know if the spring post is still OK or not but at least the advance is not stuck on any more.
We are camping at Wind Cave National Park and it is beautiful. Very serene. Camping is only $9 per night – no hookups of course but that’s why it is so quiet and peaceful here. The ranger told us the camping area has never been filled. I guess lots of people don’t like dry camping but we love it (short term of course). When we drove into the park, we saw the small herd of buffalo pictured above and then later saw one resting near the road. Tomorrow is the big buffalo roundup in Rapid City and we will miss seeing it so glad that we got to see these guys today.
On our way to Rapid City – running great
Maybe my theory about running hot due to a poorly maintained distributor was correct. It was cooler today but it did get into the low 80’s F(high 20’s C) where we have had problems on prior days. The engine started and ran great. It had no problem going up a very steep hill inside the park like it did when we came in. We stopped for gas after about 100 miles or so and had no problems afterwards like we have had for almost the whole trip.
We are staying in North Sterling State Park in the Northeast corner of Colorado very close to the Nebraska state line. Streets & Trips (it has lots of good features) took us on a roundabout route to this park that included several miles of unpaved (but relatively smooth) county roads. We were very dusty when we arrived and are planning to hose the whole rig off once the rangers leave. So far we are the only ones here. The section we are in, called the Elks Campground but nothing to do with the organization, has electricity (30 AMP) and a dump station and only cost $20 per night. Looks like it will be quiet.
On our way to Rapid City, SD – lots to tell
My high school English teacher taught me many things but the one that she repeated most often was “only a fool is positive” [about something]. When I last wrote I was pretty sure (but definitely not positive) that the problem had been identified. That is, it was the modification to the fuel system that we made prior to this trip. Well, sure as heck, it failed at the next gas stop with the clamped off modification. We pushed on through the bad running for a minute or two and then got on our way to the rally where I could discuss this with some experts – guys that have been working on cars and engines their whole lives.
The problem – only occurring at gas stations – stumped all of the experts. All of the experts suggested that I remove the carburetor filter. Nothing else that was suggested was something that I had not already done. On Monday morning after the goodbye meeting I got to work and removed the filter. In the process I was unable to get the line hooked up again so I plugged the hole in the filter housing with a plug from the auto parts store. I clamped the hose so that tank vapors would not escape through it and we left for Colorado Springs.
We ran well – it was only an hour or so – and did not stop for gas but… When we got off the interstate highway we had to wait a long time at a light and we fought vapor issues the rest of the way to the campground. Even stalled going down a long steep hill and had a hard time starting again. I have an auxiliary vacuum pump and I have been hearing it fairly often at these altitudes so we were probably safe but not wanting to find out.
When we got to the campground parking lot we could smell fuel. I checked the top of the engine and found no leaks but did hear the fuel boiling in the carburetor with the air cleaner off. The engine seemed especially hot to me even though the operating temperature was OK according to the guage. Seems the super capacity radiator is doing a good job and just working a little harder than usual. There are two potential reasons for my engine to be hotter than normal and that would be engine timing and the fan clutch. I think the fan clutch is OK but I knew that the distributor had a problem and just ignored it – actually, I forgot about it but I should have fixed it before we left.
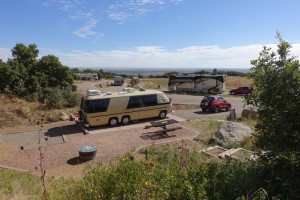
This is the view from just above our camp site. Being a state park the sites are far apart and it is nice and quiet
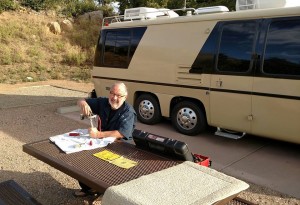
I took the distributor out, disassembled it, cleaned and lubed it. One of the posts that holds the advance weight springs was loose so I tried to make it tighter – we’ll see if I succeeded.
At the rally one of those experts said fixing the problem in the distributor would take no time at all and that I should just sit down and do it with the simple instructions he gave me. The reason this has bubbled to the top now is that the problem in the distributor is the mechanical advance mechanism was not working the way it should. It was sticky. The weights could not move the way that they are supposed to. If the timing on an engine is too advanced that can cause it to run hot. If the distributor was too advanced and not able to adjust to driving conditions that might cause higher temperatures. Today I took the distributor out, disassembled and cleaned it so that the advance did was it was supposed to. The whole job took me about an hour and that included trying to fasten a part that had come loose.
After the distributor repair in the morning and some laundry and errands that Carol had to do we went to Garden of the Gods Park – a must-see natural wonder. In the evening we went out with Carol and Gordie from our Winter RV group who also were at Pueblo and are headed to Rapid City. They are the ones who told us about this park.
Tomorrow we plan to drive about 200 miles I think. I’ll let you know what happens.
Raton, NM – taking our time and fixing problems
OK, I was wrong, it was not the fuel pump. I hate to start off talking about bad stuff but it has been consuming my thoughts for most of three days. We drove from just North of Santa Fe to Raton, NM today. Not very far but we wanted to be able to rest for a night before getting to the rally and once we get there we usually don’t rest much at all. The scenery was mostly gorgeous – Georgia O’Keefe was not wrong to spend her life painting this scenery.
Yesterday was our second day of the trip. I thought that I had the problem solved by swapping the fuel pump the night before but that was not the case. Everything ran great until our first gas station stop after which we had the problem again – unable to run at low speeds. Somehow we managed to make it to Santa Fe where I did swap out the big fuel filter near the electric fuel pump. It did not fix the problem so we limped our way to a campground just North of Santa Fe to spend the night. Thinking about what could be happening and not believing for a second that the fuel vapor bypass mod had anything to do with our problem. I decided to try ignition parts – module and coil – first and then, if that didn’t fix the problem, I would clamp the rubber portion of the hose in the bypass plumbing and thereby totally eliminate any effect it could have.
This could be a long story but I will simply say that the problem happened again in a gas station right after filling up. I immediately opened the engine hatch and clamped the hose and the problem went away completely. No doubt about it. Now the question is why is this happening? Carl S. suggested the possibility of a flow restrictor being needed since it is possible that there is not enough fuel flow to handle the engine and the bypass. Carl has the same mod done with different fittings which may have more restriction and he also uses the standard mechanical fuel pump which might have more flow capacity than my electric. More later as I find it.
Hatch, New Mexico for R&R – Rest and Repair that is
The air conditioning worked great! It was about 90 to 95°F (32-35°C) today and about half of it was heading East into the sun and the dash air worked great. At one point it was getting a little warmer than we wanted due to heat from the back so we turned on the generator and one roof air and it was immediately comfortable again – running both roof units did not help much before. We had decided to only go as far as Deming, NM and spend the night at an RV park that is apparently the figment of the gps’ imagination. The RV park was not where it was supposed to be so we drove an extra 40 or 50 miles and still got here by 3:30. Not bad.
We did have a GMC issue though. I have swapped out the old electric fuel pump (a Carter P4070) for one I bought as a spare 3 years ago. I am not positive the fuel pump was causing the problem but it is highly suspicious. A factor that is clouding the water (air, fuel, …?) is the addition of a fuel bypass line that is causing some symptoms of its own. I usually have some positive pressure in the fuel tanks on very hot days – over 100°F (38°C) but now I am getting it at 5 or 10 degrees less. I think this might be attributable to the recirculating fuel that is being heated in the engine compartment and then being sent back to the tanks. This is the only valid (my opinion) objection that I have heard to the recirculating scheme which is intended to eliminate vapor bubbles before they can enter the carburetor.
The symptoms we had today are exactly like vapor issues – fuel starvation. Trying to connect today’s symptoms to the bypass modification is where the clouding comes in. I think they are two separate issues. I don’t like the fuel being heated up but I am not sure how bad that is – yet. I have more thinking to do because I feel that some pressure is good and helps to reduce boiling. If I am correct and the fuel pump is the culprit then the hotter fuel did not make a difference – problems showed up just after filling tanks with at least 27 gallons of cold fuel.
Other evidence that the fuel pump was the problem includes problems suddenly starting to recur after more than 2 years with lots of heat and no problems. The “vapors” started showing up again on the last trip to Northern California and back. It happened on the interstate highway as I was getting ready to exit and then the engine actually stalled on the exit ramp. It happened again but not as bad after a road-side pee break on the way home. More evidence is that Jared (at Next Generation Automotive in Tucson) told me that he observed the fuel pump not working until he “goosed” the throttle while he was working on the bypass mod for me.
We’ll see tomorrow and I’ll have to admit it if I am wrong.
By the way, the Celsius stuff is for any friends in other countries – did you know the U.S. was one of only two countries in the world that don’t use the metric system? You never heard of the other one. Besides, I want to be able to understand what my Canadian friends are talking about and using it should help.
Reworking the OEM Dash Air Conditioning System
When we got our coach it had an under-dash air conditioner that some previous owner (PO) had installed in place of the original equipment (OEM) setup. The OEM system was never very good until the mid-1977 and 1978 models and even then I hear complaints. Our coach is a 1976 so the system was not good – it did not blow very much air and what it did blow was 100% from outside air so it was not very cool and gave hardly any heat in the winter.
The under-dash unit was in the way, poorly installed, and made lots of noise from fans hitting housings, etc. I hated the way it looked and hated that it got in the way of the suspension switchs and of having a tray or other platform for holding drinks, food, and our navigation computer. A couple of years ago I made a cover for the under dash unit that made it a lot more attractive and incorporated a swiveling tray that held drinks, food and our computer.
Our last trip – the June 2015 trip to Northern California – was so hot and uncomfortable that I decided to do something about it before our next trip in September when it will still be hot here. I had read and heard that there were solutions to the problems with the OEM system. One fellow GMCer that I talked to last Spring at our Treasure Island rally said that he had to turn his down on the trip to the rally even though it was about 100 degrees out.
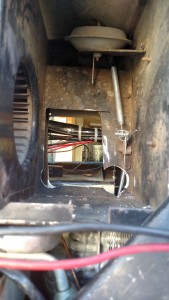
This is showing the hole that I cut in the back of the input chamber of the HVAC box and the coach fire wall to allow inside air to be taken in instead of the hot outside air as designed. The damper control on the right is the “max air” damper that is now normally open unless the “defroster” cable is pulled. The spring helps keep it open.
Fixing the OEM system requires two things: converting the system so that all of the input air is recirculated from the already cooled (or heated) interior air – commonly called “recirculate” on controls. This involves cutting a hole in the back of the fan intake section of the system and through the firewall so inside air will be drawn in. Covering the outside air intake forces all (95% probably) air to come from inside the coach. The OEM control has a position on the temperature control that says “recirc” but it does not – that control is supposed to open a door that sends most of the cooled air inside so should be labeled “max air” if anything. There is no recirculation in the original setup.
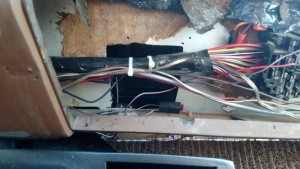
This is a view of the hole in the fire wall from inside the coach. I used a hole saw, a 4 1/2″ grinder, and a reciprocating saw to make the hole. I protected the wires with blocks of wood while I was cutting. This hole is directly behind the glove box and next to the fuse box.
The second part of the requirement is to simplify the routing of the conditioned air – the standard ducting system is so convoluted that hardly any air comes out. I looked at our system and determined that the duct work and its controls were so old and leaky (it uses vacuum from the engine) that it was hopeless to get it working again. One of the vacuum actuators actually disintegrated in my hand when I touched it. Instead of using the ducting system I plan to just keep the “max air” door open all the time unless we need defrosters at which time I will close the “max air” door and allow air to go through the OEM ductwork but completely uncontrolled. I also plan to turn the heater valve on and off mechanically (instead of the non-functional vacuum system) and control the flap that regulates the amount of air flow over the heater core mechanically (like it was originally). The heater valve, the “max air” door, and the heater air flow damper will all be controlled using old-fashioned manual choke cables in place of the non-functioning vacuum actuators. The air conditioner will be turned on with a toggle switch and the fan will be controlled using the OEM switch and wiring.
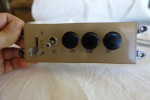
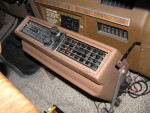
The modified OEM control panel has the original fan speed switch on the left with 4 controls on the right. The toggle switch controls the air conditioner clutch and when it is lit on the end. The first knob turns the heater valve on and off, the second controls the heat damper, and the third closes the max air vent damper and forces the air through the duct work and maybe some defrosting.
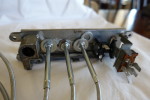
The back side of the OEM metal control panel – the extra washer is because there was a high spot on the other side of that control that needed to be offset
Since I needed to hold the original fan speed switch, a toggle switch for the air conditioner, and three “choke” cables I decided to just modify the OEM control panel. The front of the control panel is made of cast metal with a plexiglass insert. The back of it has standoffs to hold the fan speed switch. I removed the plexiglass insert and used a grinder to flatten out the face of the metal part so that I could replace their plexiglass insert with my own. In the original arrangement of controls the right side of the panel had two left-to-right slide levers that selected mode and temperature. I drilled holes in the slot that housed the top slider and backed them with washers to hold the new controls. I made my insert from a 1/8″ plexiglass scrap, printed clear labels with mirror imaged text that I installed behind the plexiglass and then painted the back of the plexiglass to hide the ground-down metal panel behind it.
The cable that controls the heater on/off valve and the one that controls the damper that controls air flow over the heater core were no problem but the “defroster” cable, the one on the right, is a problem. My idea was that under normal conditions the “max cool” opening under the dash would be wide open and when we needed the defroster function I could close that damper and force the air through the old vent system and then some of it would be directed on the windshield. I had a real hard time getting the cable positioned correctly to perform the function because of the position of the control lever and the directions it had to move in.
Below are some detail photos and the finished product. I can report that the dash air conditioning is now performing the way you would expect a good dash-air system to work – it blows lots of cold air. Success!
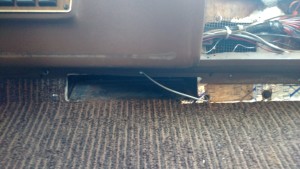
The “max air” vent exits the HVAC box in this approximately 2″ x 12″ hole under the dash and pretty close to the new intake hole. The damper that is supposed to open with “max air” is right beyond this hole. Originally, there was duct work that directed this air toward each side of the cockpit. The cable that is crossing the opening is the “defroster” control cable making its way from the dash panel to the HVAC box – it was slightly repositioned later to avoid conflict with the duct work.
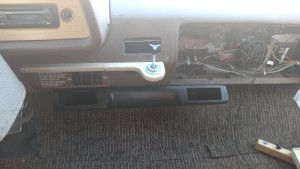
This shows the duct work that I got from Golby in Florida in place and waiting for the diffusers that Golby also supplied. The wooden piece attached to the dash is the console pivot point holder.
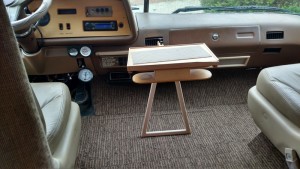
This is the new center console arrangement. The triangular gizmo holds it up and provides side-to-side stability while allowing it to be positioned where we want it. Moving it just involves lifting and sliding side to side. Removing and storing it is easy too.
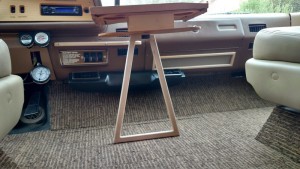
This view shows the “finished” product. I cut a hole in the glove box to allow the return air to flow more easily. I installed the diffusers in the max air duct and they really help direct and focus the cold(!) air.
Another hot day – 3 air conditioners not enough – hot fuel again
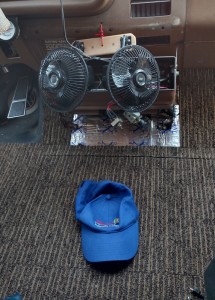
Carol said that this was a “redneck air conditioner” if she ever saw one. I had to add the fans to get the cool air where it was needed. The hat is my “redneck sun visor” – a PO forcefully removed the original visors so I use a hat – better anyway.
Today we started out at about 70 degrees and drove through Mojave, Barstow, and Needles, CA. It gradually worked its way up to about 100 to 105 degrees by the time we got to our camp site at Lake Havasu State Park. We started out trying our now stripped down air conditioner to see how it would do. Well, I am pretty sure it needs to be recharged because while it is blowing cold air, it is not “icicles” like it should be and the air is just blowing straight out instead of at us. When it got hotter we fired up the generator and ran both roof air units all day. It was nice and comfortable in the living area but not so much in the driving area. For tomorrow we have two solutions to try. One is my “redneck air conditioner” in the photo – I took the fans from the now removed console and wired them to the dash so that we can direct the cool air at ourselves. The second thing to do is to use tape to aim the forward roof air conditioner’s output straight out instead of down. That is a low-end Coleman and it is so bad it has soured me on buying any more Coleman products. It also does not work very well and the air direction vanes were so fragile that you literally could not touch them or they would break – like they were made of sugar or something as fragile. We may stop at a hardware store and buy a fan to blow air forward from the living area

It looks nice and innocent enough but it was still well over 100 degrees and humid. Beautiful though – this is the new white sand beach at the far end of the park.
Just as we were coming to the I-40 exit onto AZ-95 and Lake Havasu I felt the engine starting to “stutter” and lose power a little so I expected more trouble as I was slowing down. Sure enough, I could not keep the engine running and it stalled twice in traffic making the turn. Fortunately, it pretty quickly restarted both times and I got to the gas station that is just off the exit on the right. We fueled up and drove the remaining 20 miles to the camp ground with no more trouble.
Tehachapi again
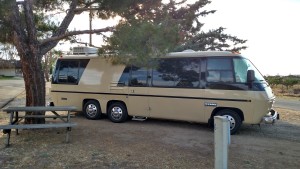
This was the only camp site in the place that had a shadow on it when we got here so we took it – #5.
OK, so I lied. I said last week that I would not cross Tehachapi again heading East because it is too steep. I changed my mind. Why did I change my mind? We had to climb a large percentage of I-80’s Donner Pass last week and we did it easily by unhooking the tow car and driving it up the hill. Except for the steepest parts, the GMC really goes up those hills pretty easily. The only time I had to downshift was when I hit traffic – slow trucks and fast cars don’t mix. So Carol had to drive 20 miles up the hill and maybe 5 more to the camp ground. The good thing was that the Tracker has good air conditioning so she was more comfortable than I was for sure.
We had a little bit of hot fuel symptoms today. It was just under 100 degrees while climbing and I had a very short hesitation as I was pulling out to pass a truck. I just changed my mind and waited but it never came back. The fuel cap was singing when we parked at the camp ground so the fuel was pretty hot but the engine never showed any problems.
Tehachapi is almost as hot as Bakersfield and Mojave on either side of it. It was 103 when we got here but we managed to get the only spot in the place that has shade in the afternoon. It is small and crowded because of the trees but the GMC is a perfect fit. Fortunately, this place has 50 amp service so we could run both air conditioners for a while after we got here.
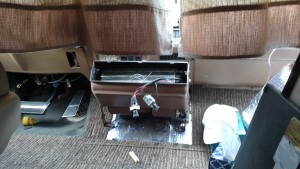
I had removed the air diverter stuff from the top/front of the under-dash unit that some PO installed because it looked bad. The cover was intended to be a temporary measure until I reworked the dash and that time is here. The cover was restricting the flow of cool air so we will spend the day with out it and see what difference it makes. I hope it is a lot.
Our plan is to get up early and get going so that we get to Lake Havasu City before the hottest part of the day. The state park there also has 50 amp service so we will be able to run both roof air conditioners as long as we need them – probably until the sun goes down. I also removed the wooden cover that I had made for the under-dash air conditioner. The air diverter pieces are not going to be in place but it seems to blow a lot of cold air like that. We’ll see tomorrow. That is Plan ‘A’. Plan ‘B’ will be to add one or both roof air units powered by our generator. If that is still no good we know there is a good air conditioner in the Tracker so Carol can either drive it or sit in it with the engine and air conditioning running while I tow it with the GMC.
