In March we attended at Jetset rally at Benson, AZ and one of the planned activities was a visit to Gammon’s Gulch Movie Set and Museum just north of town. We had a tour conducted by the owner and builder of the little movie town and it was very entertaining.
Body work – time to repair some SMC
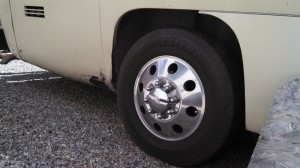
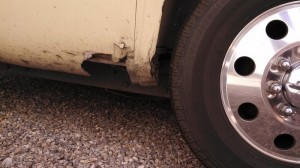
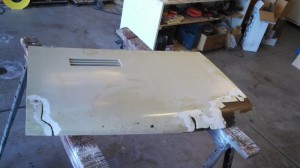
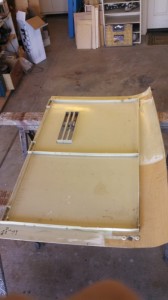
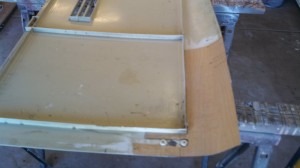
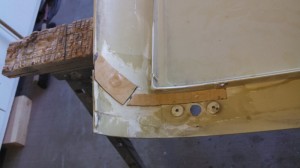
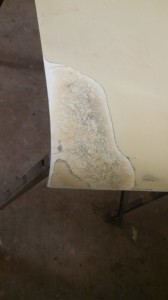
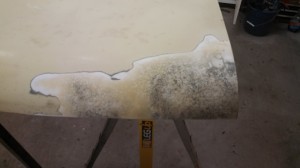
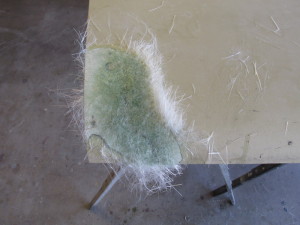
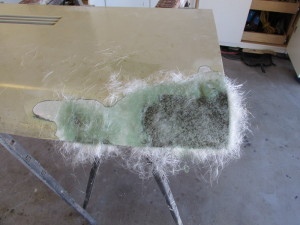
The classic GMC motorhome body is made up of aluminum and fiberglass-like material called SMC (Sheet Moulded Compound). The front and rear “caps” of the motorhome and the sides below the “waist” and made of SMC. SMC, like fiberglass, is somewhat brittle and when tires come apart, like they occasionally do on motorhomes, the SMC cracks and breaks when it is hit by the disintegrating tire. “Barbie” had some damage from a tire failure when we bought it – Uncle Dave had the right-rear tire come apart and make a hole in the propane door and the fender just in front of it. Since then we have had two more instances of tire failures – one on the same wheel as Uncle Dave’s and another on the middle wheel on the driver’s side. The driver’s side one did more damage there.
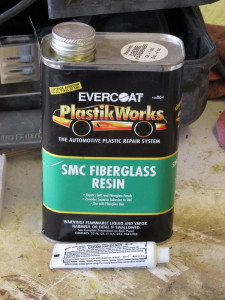
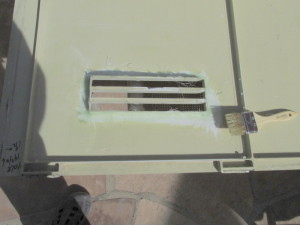
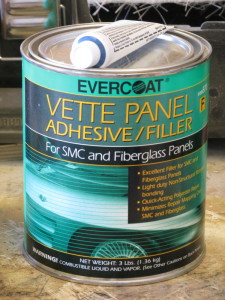
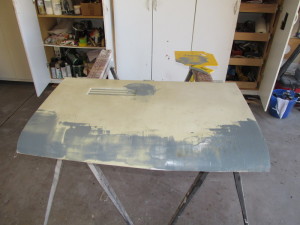
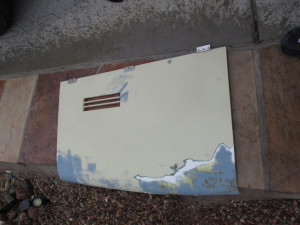
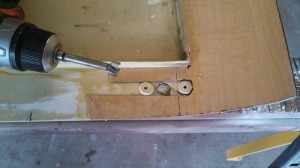
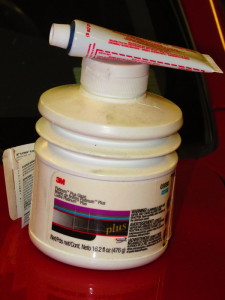
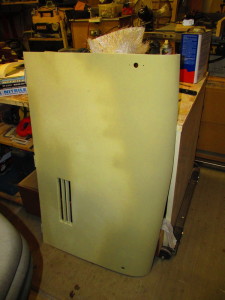
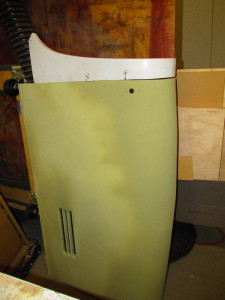
This post is going to cover the repair of the propane door. I intend to take some more photos of the fender just in front of the propane door when I begin that repair next week. I worked a little with fiberglass when I was a starving student in Omaha and had to repair a badly rusted VW bus but I really didn’t know much about it. I read all I could from the various GMCnet sources, I watched a few youtube videos and went to Finishmaster, our local auto-body supplier for some advice. They sell the Evercoat line of products for SMC and, after 3 trips, one for each phase of the repair, I have a nicely repaired propane door. Total material costs so far are about $210 for the supplies which should be enough to fix all the holes in the SMC – I hope.
The 2014 Agri-Country Bluegrass Festival
This is our 40th trip in our GMC. Yes, it is kind of short but we are staying in it 3 nights so it is a trip. We are basically dry camping because the electricity keeps going out. Something is wrong in the main box or lots of RVs are drawing too much power. Since it has not happened here before for us I am leaning toward the main box.
This festival gets better each year. They bring in about 4 well-known bands and each of them does about 4 performances over a 2-day period. There are performances beginning at 9 or 10 a.m. Friday, Saturday and Sunday. There are lots of other bands that perform every day and all are great. There is also a car show on Saturday and a tractor pull which we have never seen – just too busy listening to the music.
Here are some photos – forgive the blurry ones. I need a new camera.
A good trip home but something is amiss
After watching lots of balloons take off (ascend) on Sunday morning we decided we saw enough and it was time to head for home. The coach ran great the whole way but for the last hour or hour and a half of the 6-hour trip we had a sort of whistling noise coming from somewhere up front. At first I thought it might be either the power steering pump or the alternator but a little experimenting convinced me that it is probably a vacuum leak somewhere. The noise completely disappeared below 60 mph and, above 60 mph I could make it come and go with the gas pedal. The vacuum gauge did not seem to be any different than normal so I didn’t worry about it.
Once we got home and unpacked – not completely since we will be leaving again in 4 days – I moved the coach to the parking lot (can’t park on the street overnight) and it ran like there was some sort of fuel problem – I had to keep working the gas pedal to keep it running. At first I didn’t connect the whistling noise to this problem but now I am thinking that the hour or so parked in front of the house allowed the engine to cool enough that the theoretical vacuum leak affected the advance or choke mechanisms. I will inspect all of the hoses later this morning to see what I can see.
Well, nothing wrong that I can tell right now. I inspected all of the hoses and nothing is off where it should be and all of the hoses are fresh and solid. The coach started right up and ran great getting back over to the house. The next trip is only about 50 miles each way so not much risk there. More later if there is anything to report.
Update 1/27/2014: The rough running went away for some reason. When I went back to get the coach the next morning I checked all of the vacuum hoses and connections and could find no problem. The hoses are very new and all connected solidly. The whistling noise I now believe to be coming from the power steering pump and maybe it is more of a high-pitched whine than a whistle. Time for a new one I think.
Ho Hum – more balloons
When we got up this morning we had to start the generator to recharge our batteries. Our clock which projects on the ceiling, was so low on power during the night that you couldn’t even read it. We both thought there was something wrong with our eyes. There were other generators running and we felt bad about the noise but we had to do it.
It turned out to be a really beautiful day and there were a bunch of balloons up by 8 am as opposed to yesterday when it took them a while to get stirring. We took a walk down by the marina again trying to get a view of balloons touching the water but no luck. I think the place to go to see them in the water is over where the water goes under the London Bridge.
We made the mistake of leaving the campground in the Tracker for a “quick” trip to the store around noon. That was a mistake. There was a line a mile long of bumper-to-bumper cars heading right past our campground toward the main entrance to the event. It took us about 45 minutes to get back “home” after our “quick” trip.
We made another trip back to the event but this time we walked – on prior trips we drove the Tracker to the free parking lot and then walked the last quarter-mile. It was a pretty comfortable walk along the shoulder of the road and probably made up for that huge sandwich I had for lunch while there.
We spent the afternoon napping and reading. We may or may not go back over there tonight but probably not. Heading for home tomorrow morning.
The “Glow” event at the balloon festival was AWESOME!
Watch to video and then check the photos below it. This is our second balloon festival (Albuquerque in 2009) but our first dark sky event. It was awesome. The weather was perfect and there were 20-30 balloons on the field. They were really jammed in. That is what makes it. You can walk around under the balloons.
Arrival and first day at the balloon festival
We left home at about 9:00 am got to Lake Havasu City at about 3:00 pm without any trouble at all. The weather was nice – it never got above 78 and it wasn’t very windy at all. We took our usual route around Phoenix via highway 85 between I-8 and I-10. We get off the interstate about 40 miles short of Quartzsite and go directly toward Parker and up highway 95 to Lake Havasu City. We missed the detail that the turn onto London Bridge required being on a parallel street and that was our only “problem” all day. We cruised at about 63 mph (it felt good) all day and the coach ran like a top.
We arrived at the parking lot where we will spend the next 3 nights and it was wide open – not crowded at all. The problem was we didn’t know where the activities would be so where we should park. We finally settled on a row of spots that are back-in only and less desirable to minimize the number of neighbors – some people are jammed in next to each other.
We spent a nice quiet night – quiet time is after 10 pm and there were lots of generators before then, this is dry camping only for $20 per night. The schedule said that the “mass ascension” would be at 7:45 am so we got up and dressed so we could sit at the far corner of the parking lot. By 8 am there was only one balloon showing at the “balloon field” so we shrugged our shoulders and headed back to the coach for some breakfast and coffee. Walking back we saw a good half-dozen balloons being inflated in the area immediately in back of our coach. It turns out that the balloons launch from all over town – any empty parking lot they can find. There is no better spot to watch than the one we chose.
We watched from 50 to 60 balloons fly out over the lake and back again on a wonderful morning, warm and calm. We wandered around the festival area which is on a golf course and arranged in a large circle around the “balloon field” which is actually pretty small as balloon fields go I think.
Tonight, just after dark, they are supposed to do a “night glow” but it is iffy because of wind. Right now (2 pm) it is a little windy and yesterday it was very windy. We are hoping – had the same problem in Albuquerque in 2009 and no evening or morning events happened.
List of all (or most anyway) repairs and upgrades to our ’76 Eleganza II
| Date | Vendor | Description | Cost | Mileage | Owner | ||||
| 01/24/94 | Southland Enterprises Buford, GA | radiator, transmission & oil cooler lines, transducer, alternator | 46661 | Jim Bowles | |||||
| 02/25/94 | Southland Enterprises Buford, GA | fan clutch, transmission governor, exhaust system | 46994 | Jim Bowles | |||||
| 06/09/94 | Southland Enterprises Buford, GA | master cylinder, fuel lines | 49694 | Jim Bowles | |||||
| 08/30/94 | Southland Enterprises Buford, GA | RH cv joint & boot | 51818 | Jim Bowles | |||||
| 09/26/94 | Southland Enterprises Buford, GA | LH wheel bearing, knuckle and lower ball joint | 52034 | Jim Bowles | |||||
| 05/12/95 | Camping World | Heat strip for Duotherm | Howard Black | ||||||
| 01/10/97 | fuel hoses | ||||||||
| 02/04/97 | NAPA | CV Joint boot 2456SB | |||||||
| 03/19/97 | Sams Club | tires | 60203 | Jack Benson | |||||
| 04/01/97 | NAPA | Steering boot kit UVB101 | 13.00 | ||||||
| 04/17/97 | Clasco Manufacturing Corp | Front end – steering column master bearing, drag link, idler arm, tie rod ends and adjusters, relay lever, upper control bushings, lower arm control bushings, upper and lower ball joints | 2,500.00 | Jack Benson | |||||
| 06/26/97 | Camping World | Aqua Magic toilet | |||||||
| 08/03/97 | CarQuest | alternator | 156.00 | ||||||
| 03/24/98 | Golby Motor Corp | Front and rear brake hoses | 181.00 | Jack Benson | |||||
| 04/01/98 | steering column bushings and bearing | ||||||||
| 04/24/98 | Camping World | Dometic RM2652 2-door refrigerator | 949.00 | ||||||
| 07/10/00 | Golby Motor Corp | 9# radiator cap | 10.00 | ||||||
| 08/21/00 | Golby Motor Corp | Air bags (2) | 530.00 | 75890 | Jack Benson | ||||
| 05/17/02 | NAPA | heater blower motor relay | Patrick Loe | ||||||
| 05/22/02 | Alex Sirum GMC | headlight kit | 225.00 | Patrick Loe | |||||
| 05/31/02 | Golby Motor Corp | Grille, door latch, holding tank sender | 438.00 | Patrick Loe | |||||
| 06/17/02 | Alex Sirum GMC | water tank sender | 121.00 | Patrick Loe | |||||
| 07/17/02 | Ramco | Ramco mirrors | 411.00 | Patrick Loe | |||||
| 09/16/02 | Alex Sirum GMC | Install complete macerator system | 300.00 | 78906 | Patrick Loe | ||||
| 09/16/02 | Alex Sirum GMC | complete front brake upgrade – new rotors, 80mm calipers, hoses, carbon metallic pads | 531.50 | 78906 | Patrick Loe | ||||
| 09/16/02 | Alex Sirum GMC | replace both windshields | 1,050.00 | 78906 | Patrick Loe | ||||
| 09/17/02 | Alex Sirum GMC | Trailer hitch – thru bumper | 250.00 | 78906 | Patrick Loe | ||||
| 09/17/02 | Alex Sirum GMC | 3.55 final drive | 1,250.00 | 78906 | Patrick Loe | ||||
| 09/17/02 | Alex Sirum GMC | rear brakes, new Delco shoes, new o/s cylinders | 206.00 | 78906 | Patrick Loe | ||||
| 09/17/02 | Alex Sirum GMC | KYB shock absorbers (6) | 297.00 | 78906 | Patrick Loe | ||||
| 11/20/06 | Uncle Dave | original purchase | 10,000.00 | 81041 | Armand & Carol Minnie | ||||
| 11/27/06 | Simonson Generator | tune up Onan generator | 322.48 | Armand & Carol Minnie | |||||
| 02/13/07 | B&B auto repair | fix leaking radiator | 477.49 | Armand & Carol Minnie | |||||
| 03/06/07 | Cinnabar | Propane tank sender | 52.84 | Armand & Carol Minnie | |||||
| 03/31/07 | Armand | replace hoses from engine to water heater | Armand & Carol Minnie | ||||||
| 05/21/07 | Duane Simmons | electronic cruise control – installed by AJM | 265.00 | Armand & Carol Minnie | |||||
| 06/20/07 | Arizona Mobile Mechanic | replace rear main seal on original engine | 932.00 | 90579 | Armand & Carol Minnie | ||||
| 07/10/07 | Arizona Mobile Mechanic | repair L/H exhaust manifold | 180.00 | 92095 | Armand & Carol Minnie | ||||
| 07/16/07 | All RV | new roof air and misc b.s. | 1,133.76 | 92133 | Armand & Carol Minnie | ||||
| 07/18/07 | Arizona Mobile Mechanic | repair & recharge A/C | 275.00 | Armand & Carol Minnie | |||||
| 08/21/07 | Taylor Chevrolet – Rexburg, ID | Replace engine – Motor Works, Spokane, WA | 5,938.00 | 94515 | Armand & Carol Minnie | ||||
| 08/21/07 | Taylor Chevrolet – Rexburg, ID | Check transmission | 187.04 | 94515 | Armand & Carol Minnie | ||||
| 09/17/07 | Lube-it Express Moab, UT | change oil | 34.43 | 95020 | Armand & Carol Minnie | ||||
| 09/24/07 | Arizona Mobile Mechanic | replace choke heater tube | 74.85 | 96415 | Armand & Carol Minnie | ||||
| 09/24/07 | Arizona Mobile Mechanic | replace all rubber fuel lines and filler hose | 403.25 | 96415 | Armand & Carol Minnie | ||||
| 09/24/07 | Arizona Mobile Mechanic | replace air filter | 12.25 | 96415 | Armand & Carol Minnie | ||||
| 09/24/07 | Arizona Mobile Mechanic | check brakes – over 50% worn | 25.00 | 96415 | Armand & Carol Minnie | ||||
| 09/24/07 | Arizona Mobile Mechanic | replace turn signal switch & 4-way | 118.89 | 96415 | Armand & Carol Minnie | ||||
| 12/03/07 | Costco | tires | 1,305.84 | 96450 | Armand & Carol Minnie | ||||
| 12/04/07 | Arizona Mobile Mechanic | fix r/h exhaust manifold noise | 156.00 | 96459 | Armand & Carol Minnie | ||||
| 12/10/07 | Applied GMC | Eagle wheels (7) | 1,225.00 | 96450 | Armand & Carol Minnie | ||||
| 12/10/07 | Applied GMC | T-skirts & brackets | 95.00 | Armand & Carol Minnie | |||||
| 01/11/08 | Arizona Mobile Mechanic | fuel tank not switching properly | 114.56 | 98861 | Armand & Carol Minnie | ||||
| 01/11/08 | Arizona Mobile Mechanic | fix r/h exhaust manifold noise | 138.33 | 98861 | Armand & Carol Minnie | ||||
| 01/11/08 | Arizona Mobile Mechanic | fix exhaust leak in choke heater | 90.50 | 98861 | Armand & Carol Minnie | ||||
| 11/27/08 | Coop motor works | Onan board | 223.00 | Armand & Carol Minnie | |||||
| 12/03/08 | Arizona Mobile Mechanic | change brake fluid – repack rear wheel bearings | 417.95 | 101557 | Armand & Carol Minnie | ||||
| 04/14/09 | replace macerator pump (again) | macerator pump | 125.99 | Armand & Carol Minnie | |||||
| 05/07/09 | Applied GMC | electric fuel pump kit | 186.00 | Armand & Carol Minnie | |||||
| 05/07/09 | Applied GMC | digital monitor panel | 96.70 | Armand & Carol Minnie | |||||
| 05/07/09 | Applied GMC | APC cable | 25.00 | Armand & Carol Minnie | |||||
| 05/07/09 | Applied GMC | city water fitting | 35.79 | Armand & Carol Minnie | |||||
| 06/02/09 | Applied GMC | transmission vent – hose | 18.50 | Armand & Carol Minnie | |||||
| 06/02/09 | Applied GMC | Lumina Wipers and blades | 84.95 | Armand & Carol Minnie | |||||
| 06/02/09 | Applied GMC | Buttons and screws for window | 3.00 | Armand & Carol Minnie | |||||
| 06/03/09 | Arizona Mobile Mechanic | install electric fuel pump | 465.96 | 104097 | Armand & Carol Minnie | ||||
| 06/03/09 | Arizona Mobile Mechanic | fix transmission leak – still leaking from front | 211.80 | 104097 | Armand & Carol Minnie | ||||
| 07/14/09 | AJM | install house battery shutoff | 30.00 | Armand & Carol Minnie | |||||
| 07/14/09 | AJM | install Intellipower PD9245CV power converter | 172.32 | Armand & Carol Minnie | |||||
| 07/14/09 | AJM | install city water fitting – take insides out of original check valve | 10.00 | Armand & Carol Minnie | |||||
| 07/14/09 | AJM | change oil – Mobil 1 – NAPA filter | 104097 | Armand & Carol Minnie | |||||
| 09/16/09 | AJM | Digital monitor panel – installed | Armand & Carol Minnie | ||||||
| 11/06/09 | Applied GMC | replace oil cooler lines with JR Slaten’s SS setup | 230.00 | 107400 | Armand & Carol Minnie | ||||
| 11/06/09 | Applied GMC | replace left outer CV joint & boot | 107400 | Armand & Carol Minnie | |||||
| 11/06/09 | Applied GMC | replace right knuckle | 107400 | Armand & Carol Minnie | |||||
| 11/06/09 | Applied GMC | replace steering damper | 107400 | Armand & Carol Minnie | |||||
| 11/06/09 | Applied GMC | replace end link bushings | 107400 | Armand & Carol Minnie | |||||
| 11/06/09 | Applied GMC | replace sway bar bushings | 107400 | Armand & Carol Minnie | |||||
| 11/06/09 | Applied GMC | replace both lower ball joints | 107400 | Armand & Carol Minnie | |||||
| 11/06/09 | Applied GMC | replace bearing on left intermediate axle | 107400 | Armand & Carol Minnie | |||||
| 11/06/09 | Applied GMC | repack rear bearings | 107400 | Armand & Carol Minnie | |||||
| 11/06/09 | Applied GMC | replace brake shoes on both intermediate wheels | 107400 | Armand & Carol Minnie | |||||
| 11/06/09 | Applied GMC | replace brake cylinder on right intermediate wheel | 107400 | Armand & Carol Minnie | |||||
| 11/06/09 | Applied GMC | replace plugs, rotor, distributor cap, ignition wires | 107400 | Armand & Carol Minnie | |||||
| 11/06/09 | Applied GMC | replace alternator | 107400 | Armand & Carol Minnie | |||||
| 11/06/09 | Applied GMC | replace both front bearings add zerk fittings | 107400 | Armand & Carol Minnie | |||||
| 11/06/09 | Applied GMC | replace transmission with Manny rebuild | 2,298.00 | 107400 | Armand & Carol Minnie | ||||
| 11/06/09 | Applied GMC | Change oil and filter (wix filter) | 70.00 | 107400 | Armand & Carol Minnie | ||||
| 11/11/09 | Applied GMC | install dual bag rear suspension system | 1,231.00 | 108000 | Armand & Carol Minnie | ||||
| 11/11/09 | Applied GMC | replace mufflers | 108000 | Armand & Carol Minnie | |||||
| 11/11/09 | Applied GMC | replace steering boot | 108000 | Armand & Carol Minnie | |||||
| 11/11/09 | Applied GMC | replace fuel pump – pressure too high | 0.00 | 108000 | Armand & Carol Minnie | ||||
| 11/11/09 | Applied GMC | replace carburetor with Patterson rebuild | 514.00 | 108000 | Armand & Carol Minnie | ||||
| 11/11/09 | Applied GMC | replace transmission with Manny rebuild – first one failed | 0.00 | 108000 | Armand & Carol Minnie | ||||
| 12/01/09 | Replace driver’s side windshild with new gasket | 108000 | Armand & Carol Minnie | ||||||
| 12/30/09 | Arizona Mobile Mechanic | final drive – new seals and gaskets | 434.00 | 109352 | Armand & Carol Minnie | ||||
| 04/05/10 | AJM | install VIAIR compressor and all metal fittings | 85.00 | 111868 | Armand & Carol Minnie | ||||
| 04/06/10 | Dave Lenzi | ride height adjusters | 61.00 | 111868 | Armand & Carol Minnie | ||||
| 04/06/10 | AJM | rotate tires – spare to RF – clockwize – LF to spare | 111868 | Armand & Carol Minnie | |||||
| 04/06/10 | Springfield Ignition | Replace distributor & add timing tab (missing from rebuilt engine) | 111868 | Armand & Carol Minnie | |||||
| 04/28/10 | AJM | install Shurflo Whisper King water pump | 92.22 | 111868 | Armand & Carol Minnie | ||||
| 07/15/10 | Arizona Mobile Mechanic | install aluminum radiator | 1,200.00 | 114582 | |||||
| 07/31/10 | AJM | remodel interior living space | 5,000.00 | ||||||
| 01/01/11 | AJM | upgrade rear suspension to quad-bag | 500.00 | ||||||
| 08/01/11 | AJM | upgrade rear brakes to discs with reaction arm | 5,000.00 | ||||||
| 02/07/12 | AJM | fuel/vapor separator & charcoal cannister | 200.00 | ||||||
| 02/08/12 | AJM | stainless hot water heater | 300.00 | ||||||
| 02/10/12 | AJM | aqueous foam fire extinguisher in engine compartment | 400.00 | 17,615.22 | |||||
| 02/21/12 | AJM | new switches for lights and water pump including in bath | 100.00 | ||||||
| 03/03/12 | AJM | r & r intake manifold to install blocking plates on exhaust crossover | |||||||
| 03/03/12 | AJM | belt tensioner on A/C compressor | 25.00 | ||||||
| 03/03/12 | AJM | install Remflex gasket on passenger side exhaust manifold | |||||||
| 03/30/12 | AJM | two new Magnaflow SS mufflers and 2 1/2″ pipe from mufflers back including new “Y” | 495.00 | ||||||
| 04/02/12 | AJM | ventilation – with remote control blast gates | |||||||
| belt tensioner on alternator | 70.00 | ||||||||
| 04/15/12 | AJM | aux. vacuum pump for brakes | |||||||
| 04/15/12 | AJM | new belts on alternator and a/c | 20.00 | ||||||
| 04/15/12 | AJM | new fresh-air ventilation | 100.00 | ||||||
| 06/10/12 | rebuilt transmission purchased from Steve Ault | 600.00 | |||||||
| 06/11/12 | NextGenAuto | install transmission | 588.00 | ||||||
| 07/03/12 | NextGenAuto | install new seals in final drive and fix engine oil leaks | 300.00 | ||||||
| 07/03/12 | NextGenAuto | replace A/C compressor, hose, and recharge w/R134 | 1,049.00 | ||||||
| 07/05/12 | AJM | fabricate and install center console in cockpit | |||||||
| AJM | install transmission temperature gauge | ||||||||
| 07/12/12 | AJM | replace Onan mount cushions to fix sag | |||||||
| 09/06/12 | AJM | replace tires (6) | 866.00 | 142000 | |||||
| 11/27/12 | AJM | replace driver’s side outer CV boot, shockmount grommet, install transmission cooler, replace spark plugs, dist cap, rotor, and wires, repair bogie greasers (tire failure) | 501.79 | 145628 | |||||
| 08/08/13 | AJM | reconditioning and retinting all living area windows | 1,000.00 | ||||||
| 09/15/13 | AJM | new house batteries – 2 6V golf cart batteries | 200.00 | ||||||
| 12/292013 | AJM | installed surge tank for house water system | 100.00 | ||||||
| 02/15/14 | AJM | installed new suburban 19K BTU furnace | 500.00 | ||||||
| 03/15/14 | AJM | body work and paint – repair and paint SMC sides below waist to start | 2,000.00 | ||||||
Installing a surge tank for house water system
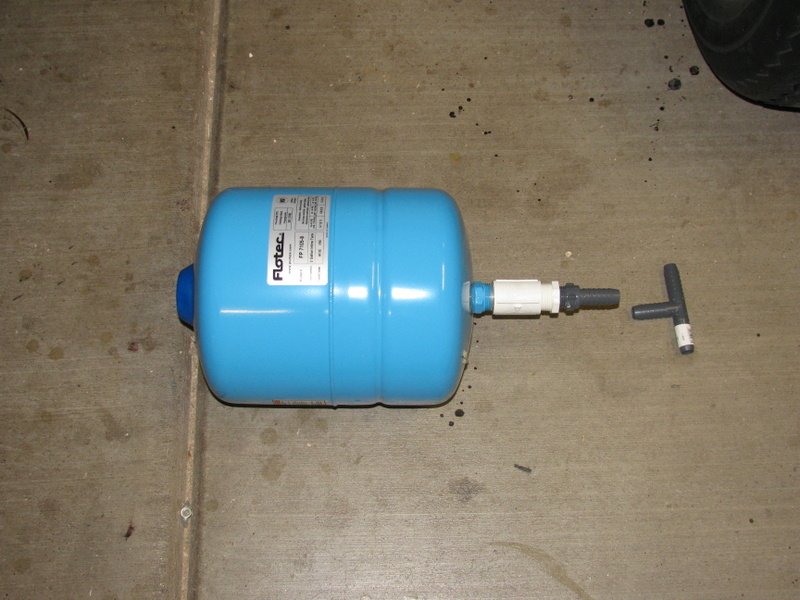 A long time ago (during the permanent bed conversion) I installed a Shurflo Whisper King water pump and have mostly been very happy with how quiet it is. The problem is that no matter how quiet it is, it is still audible when it runs. It makes us want to keep the water pump switch in the “off” position (very annoying) because it “burps” every 10 or 15 minutes. It doesn’t seem like much but some of us are sensitive to any noise when it is otherwise nice and quiet and it bothers us.
I figured it was happening because of a small leak in the built-in check valve in the pump. It turns out that a surge tank is listed as one of the solutions to this problem by Shurflo. They also recommend using a surge tank to prolong the life of the pump – so it doesn’t constantly start and stop. I found a nice sized (about 8.5″ diameter and about a foot long) at Home Depot’s web site (a Flotec FP 7105-8).
The photos below show a mock-up of how I planned to measure the pressure in the house water system (22 pounds with the Whisper King even though it claims 30 pounds in the documentation – I guess that could be because of a power issue, so I plan to check) and then to substitute the surge tank for the gauge. I held the tank in place against the back wall by adding a brace in front of it and connecting it to either side of the bed supports. The tank is held well out of the way of the rolling drawer that slides under there too – the horizontal line in the insulation below the installed tank in the last photo is where the rolling drawer rests.
We plan to use the coach in the next month. I will report on if and how this helps solve our “noise problems“.
Update 1/20/2014: We used the coach for a weekend trip – 3 nights – and the surge tank has fixed the problem of the water pump “burping”. We can now leave the water pump turned on when we are in the coach and there is no water pump noise except when the pump runs to refill the surge tank when we use more than around a gallon of water. When the pump runs it does so for about 30 seconds and then stops. Since it is a Whisper-King it is very quiet when it does run so, almost like home. Worth doing.
Re-skinning the bath and closet doors
When I refurbished the interior living area in the summer of 2010 I did it in a hurry. The hurry was because of a self-imposed deadline for beginning a 7000+ mile trip to the East Coast and back again. Even though both doors had areas where the plastic laminate was not stuck to the aluminum frame I patched what I could with some new contact cement and skinned over the dark laminate with a real maple wood veneer also using contact cement. When we left on August 1st we headed east and everything looked great for quite a while but, once we hit the humidity of the East the wood veneer expanded and buckled. I have been trying to get around to it since returning from that trip. Now is the time.
The doors are made from an aluminum frame, skinned on either side with a Formica-type plastic laminate, and filled with a few blocks of particle board in strategic spots and expanded corrugated cardboard in the rest of the interior space. My plan was to remove either the veneer or the entire exterior of the doors depending on what worked. I had purchased enough new laminate (WilsonArt makes a natural maple plastic laminate that is a good match for real natural maple coated in polyurethane) to re-cover both doors so, when we returned from our last trip I removed the doors from the GMC and got started.
It turned out that the exterior laminate on both doors was loose enough to get off using a large paint scraper type of putty knife and a hammer (see the photo) with some gentle tapping. In one case the corrugated filler was completely loose and in the other it was stuck to the interior skin so I didn’t have to remove it. In that same case the interior skin was also loose enough to require re-gluing so I had to completely disassemble the door.
I cleaned the aluminum frame with a sander, added plywood pieces to the interior of the door where reinforcement was needed (towel racks on the bathroom door and a full length mirror in the closet) and reassembled everything using DAP non-flammable contact cement (I think it is better than the original one) everywhere. My only error was that when I reassembled the door that was completely disassembled I put it together with a slight twist to it. It still closes but that was not too bright.
Here are some photos that might be helpful:


