I know this will be upsetting to some GMC enthusiasts but the GMC motorhome has some design flaws – specifically in the braking. They did put disc brakes on the front wheels but left drums in the back – drum brakes are not very efficient or safe compared to discs. It can be really exciting if you need to stop an original design GMC quickly. One time we were climbing and descending steep mountain passes – several in one day – and after we had finished the descent from over 8000 feet on a series of tight switch-backs the brakes failed completely from the heat generated by the drum brakes.
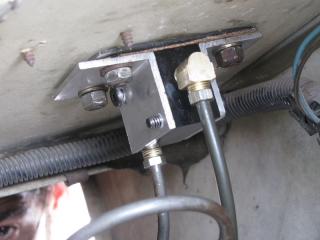
Another issue with the design is that the middle wheels are suspended on forward facing arms that tend to lift the frame during hard braking – hard for some to understand but true. The problem is solved using a system called the “reaction-arm” invented by Chuck Aulgur and designed by Rick Flanagan for Jim Kanomata at Applied GMC in Fremont, CA. I had test driven a coach (Rick Flanagan’s) equipped with the reaction-arm system at the GMCWS rally in Auburn, CA last year (2010). The difference between his coach’s stopping ability and mine was dramatic. His coach stopped like a new car.
The reaction arm system must be installed over disc brakes. The combined kits – 4 disc brakes and the reaction-arm – are very expensive but I hate worrying about my brakes, especially going down long hills with only a 3-speed automatic to help slow me down.
I bought both kits from Applied GMC and began installing them on Wednesday, July 20th. I had planned to install them myself – how hard could it be? – but was pretty apprehensive. Applied GMC estimated it would take them “about 2 days” if they did it but I didn’t or couldn’t spend that kind of money on top of the parts. Paul Cloutier told me that he did it in 3 days with help from a friend only on the first day. When I showed up at our storage space with the parts a young mechanic named George expressed enthusiastic interest in helping me do the installation. We worked out a very fair hourly rate for him – I couldn’t afford to not hire him – so he has helped me every day. “Helping me” is actually: he does it with my help and supervision. George is a very smart, hard-working guy who knows what he is doing – I got lucky.
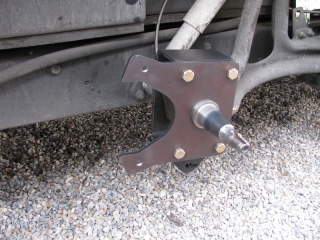
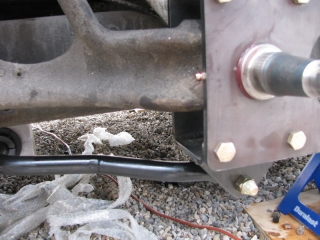
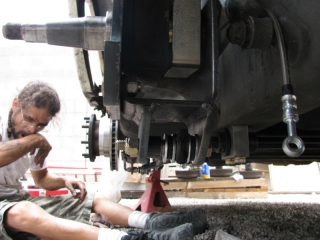
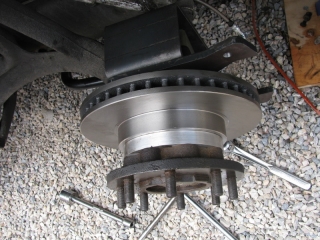
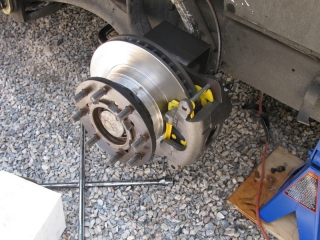
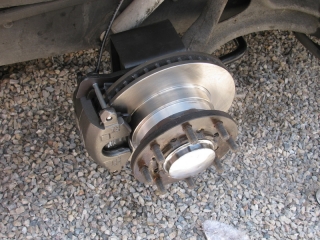
On the first day my hope was to get the parts sorted and the coach up on jack stands so I could start work on Thursday. With George’s help we not only got it up on stands but got the drum brakes removed and the coach ready for installation of the new hardware – all in 4 hours. The second day we got the torque boxes (part of the reaction-arm system) installed and the emergency brakes removed – another 4 hours. On the third day, Friday, we got the sway bars (more reaction-arm stuff), the hubs and discs, and the calipers installed – 5 hours.
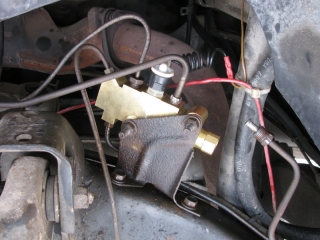
Monday we got master cylinder and the proportioning valve installed. The new master cylinder is big compared to the OEM but it fits perfectly and the push rod is already the correct length. The proportioning valve is another perfect match for the original. Lots of penetrating oil needed along with some encouragement from George. George also did a great job plumbing the line lock. Of course, I did a great job making a mounting bracket with suggestions from George. George is a good mechanic and he says his real skill is in electronics. .
The test drive was less than satisfactory. It had to be air in the lines because everything seemed to be perfect. After 6 hours both of us were tired and hot so we decided to come back on Tuesday for a second bleeding and some unrelated maintenance (greasing the front bearings via the zerk fittings JimK installed for me last year). On Monday night I happened to tell JimK about the bleeding issue – it shouldn’t still have air in it – and he told me about the instructions that I forgot about: a special procedure for the calipers.
On Tuesday a.m. George and I followed the procedure and got air out of 3 of the 4 calipers. Brakes work much better now. I ordered some new woven SS hoses for the front and some EBC pads. When they come in we will finish the installation. For now I am saying it is ‘done’ and I will move on to making a new dinette table to go with the Honda seats I installed last summer.
On Friday, July 29th, I finally got the job done. Put new SS braided hoses and EBC pads on the front. Stops great but the line lock doesn’t work and I don’t know why. Maybe the back brakes still need to be bled or maybe the line lock itself is bad. I will find out later – done for now.
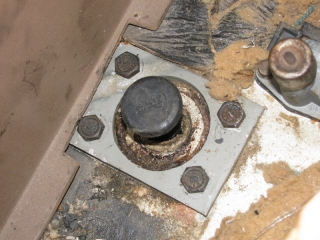
Is the button (floor switch?) next to the highbeam switch the ‘line lock’ ?
Is the line lock part of the new brakes system package, or your add-on?
Which method did you use bleeding the brakes. We have fought with this.
Thanks,
Richard
Yes, that is the line lock. It came – as an extra – with the disc brake upgrade kit. Right now it doesn’t work for some reason which I am still trying to figure out. I used the gravity bleeding method. I was going to use a pressure bleeder – I was going to make one – but could not find a garden sprayer with the proper hose connection. Gravity works fine – probably takes a little longer but it does work