
Between-trip activities since last post – January 2015

Between-trip activities since last post – January 2015

After we got home from the Ajo rally in early December I had plans for a few upgrades: mud flaps like Bob H’s coach (by Steve F), a door stop to keep the bath door from opening too far, and a drinking water dispenser for the kitchen sink.

The mud flaps – actually called “splash guards” – are sold in auto parts stores (PEP Boys) and at Amazon. They have several choices but the Powerflow 6402 Pro-fit Splash Guards are the right ones for the GMC ($15-$20 per pair). Steve F had installed some on his GMC (now owned by Bob H) and I thought that they looked great – functional too.

The door stop is needed to prevent the bath door from opening too far. That door and the closet door both open form a little private bath area that both of us like. The latch used to catch of the face frame of the drawer unit but, for some reason, it stopped – probably something to do with the bracket I erroneously removed during the interior remodel.

My first step was to install the drinking water dispenser at the kitchen sink. We have a perfectly clean water tank but we don’t use it for drinking water – too much chance of getting tastes and odors from random water sources. We only use it for bathing, brushing our teeth and washing dishes. We carry some one-gallon jugs that we fill from our reverse osmosis system at home or the ones at grocery stores. The problem with this is that there is always a jug in the way or that needs to be stored or retrieved.

When we redid our kitchen at home we replaced the drinking water dispenser faucet with a new one. Meanwhile, the soap dispenser at the kitchen sink in the GMC turned out to have been a bad idea so I replaced it with the old drinking water faucet. Then I had to figure out how to take advantage of it.

I bought a 3-gallon plastic water jug at the grocery store, drilled a hole for a hose in the very large top, and then installed a regular RV water pump under the sink next to the furnace to supply the water. I powered the water pump directly from the house fuse panel and switched it via a relay triggered by the power from the regular water pump. Adding a switch allows me to control it from the regular pump switch and be able to disable it if needed.

While all of that work was going on we had some pretty heavy rains and even a snow storm. The bed got wet from some unknown sources both times. So that started me on more projects – finding and fixing the leaks along with some incidental stuff that has needed to be done for 4 years.

The first leak turned out to be the roof rack – I had forgotten to put a screw in one hole. The problem was that for some reason, the roof rack was invisible during my search for the source of the leak. I just did not ever “see” it as a potential leak. I saw only the drip rail and the A/C unit for some reason. I think the reasons are: the A/C unit had leaked in the past because of a very poor installation by some previous owner, and the drip rail was the most likely place, especially at the end. I ended up taking the A/C unit off and removing the FRP ceiling panel before I saw the real leak and the view of the sky through hole for the missing screw.

The second leak was even more fun. Because of the location of the leak – the other side’s drip rail end – and some faulty detective work I thought the source of this particular leak was definitely the A/C unit so I took the whole thing apart again. Did I mention that I had reinstalled the ceiling and the A/C unit from the last dumb move?

The leaks are now fixed and tested by rain, the water pump is installed and ready for use at the next rally on Jan. 22nd, and a leaking valve stem on a tire has been identified and repaired. The mud flaps require the rear wheels to be removed and replaced so they may not get installed before the rally but maybe the front ones can.

Rebuilding the Onan carburetor

Rebuilding the Onan carburetor

Just as I was getting into the paint job after returning from our Spring rally trip to Hemet I used the Onan and it died. It coughed and ran rough for a few seconds and died. It would not start. I verified that I had spark and that the fuel pump was working so it had to be the carburetor. I figured I could take it off and clean it and maybe even rebuild it when the paint job was done. That was in April. It is now August and the paint job is done so, last week, I got started.

The first thing I did was take the carburetor off and, using the diagrams in the maintenance manual, disassemble it and see what was up. There was no obvious dirt anywhere but I did find that the float level was way off of the recommended settings. Since there was no obvious reason for the failure I decided the best path would be to rebuild it (new valve seats, etc.) and then adjust it. While I was tied up with the paint job I read of at least one person having trouble figuring out what was and was not included in the rebuild kit. I ordered the kit from Applied GMC and when I got it and read the included instructions and diagrams I saw the problem. The 6K Onan carburetor is not like any of the versions shown in the diagrams. There seemed to be too many parts – a spring that seemed to be extra and a couple of pieces ( an O-ring and a small gasket) that I could not find in my carb.

I laid out all of the parts that came in the kit along with the main needle valve and float valve seat from my carb, assigned numbers to each item, and tried to figure out what was what. I called JimK and asked him for help. Jim referred me to Greg, his carburetor rebuilder, who uses the same kit as I have.  Greg was kind enough to help me validate my guesses and to figure out how to go about the process. The results of our conversation are documented with the photo below (click on the photo to enlarge it):

1. Internal gasket at bottom of bowl – reuse the external gasket.
2. Intake manifold
3. Bowl gasket – if the old one is good reuse it.
4. Spring – not used
5. Idle adjustment needle – use the spring from the old one
6. Float valve needle
7. Float pin
8. Gasket – not used
9. Old main adjustment needle – with old O-ring still in place
10. Float valve seat with rubber seat still installed – see additional photo below
11. Gasket for float valve seat – see additional photo below
12. O-ring that goes on main adjustment needle (#9)
13. New rubber valve seat and retaining ring for float valve seat (#10)

IMG_0742

Back of float valve seat showing rubber seat at the bottom and gasket around top.


This shows the view from the back/top of the float valve seat. The gasket (#11) goes around the outside and the new rubber seat and retaining ring (#13) are pressed into it using a drill bit that just fits after pressing out the old one from the back with a smaller drill bit.


IMG_0738

I thought I messed up

The instructions that come with the kit say to not touch the “nozzle” and that if you do touch it you need to install a new one. In a moment of confusion I did touch it but, it turns out, did no damage. It is reinstalled by turning until it bottoms – no problem.


After I had the information from Greg it only took me a few minutes to install the pieces and adjust the float – Greg does set the upper limit at 1/8″ (measured with a drill bit) and the lower at 5/16″ (estimated). The adjustments are made by bending – very gently with needle-nosed pliers, not by pushing on the float – a couple of tabs on the float. It took a few tries but I got it right. Greg says to adjust the 1/8″ favoring larger rather than smaller.

After reassembling the carburetor I installed it and the Onan started right up and ran great. I did not have to readjust anything although I verified that by trying. I think I’ll install the solid-state ignition kit by Gary Bovee next.

Body work – time to repair some SMC

Body work – time to repair some SMC

The classic GMC motorhome body is made up of aluminum and fiberglass-like material called SMC (Sheet Moulded Compound). The front and rear “caps” of the motorhome and the sides below the “waist” and made of SMC. SMC, like fiberglass, is somewhat brittle and when tires come apart, like they occasionally do on motorhomes, the SMC cracks and breaks when it is hit by the disintegrating tire. “Barbie” had some damage from a tire failure when we bought it – Uncle Dave had the right-rear tire come apart and make a hole in the propane door and the fender just in front of it. Since then we have had two more instances of tire failures – one on the same wheel as Uncle Dave’s and another on the middle wheel on the driver’s side. The driver’s side one did more damage there.

This post is going to cover the repair of the propane door. I intend to take some more photos of the fender just in front of the propane door when I begin that repair next week. I worked a little with fiberglass when I was a starving student in Omaha and had to repair a badly rusted VW bus but I really didn’t know much about it. I read all I could from the various GMCnet sources, I watched a few youtube videos and went to Finishmaster, our local auto-body supplier for some advice. They sell the Evercoat line of products for SMC and, after 3 trips, one for each phase of the repair, I have a nicely repaired propane door. Total material costs so far are about $210 for the supplies which should be enough to fix all the holes in the SMC – I hope.


 2013-09-14 12.31.30  This is the way the propane door and the fender just in front of it looked when we bought the coach. The tire had come apart on Uncle Dave and done this damage.
2013-09-14 12.31.07  Closeup of the damage.
 2014-01-29 09.46.22  Once I had the door off I found that there was more damage than previously visible. The rear corner and latch was almost completely broken off. Things I saw on youtube suggested using a grinder and opening up serious cracks and breaks so I did. I used some scraps of Formica-type material as backing, bent them using a heat gun and then glued them into place using the epoxy resin for the SMC.
 2014-01-29 09.47.14  This is a view of the back side of the repairs showing the plastic backing that was epoxied into place and shaped using heat. The curve was made to match the fender-repair piece (next phase of the repair) that Fay Curtis supplies.
 2014-01-29 09.47.39  A closer-up photo of the back of the repair.
 2014-01-29 09.47.48  Support for the “crack” at the rear of the door. It also was epoxied into place.
 2014-01-29 14.46.35  This is after the first “layup” of epoxy resin and glass fabric was put over the “crack” at the rear of the door and supported by the Formica backing. I think that this was 2 or 3 layers of thick glass matting and resin.
 2014-01-29 14.46.42  This is after the first “layup” of epoxy resin and glass fabric was put over the big hole and sanded off. This was after 2 – 4 layers of thick glass matting and resin.
 IMG_0005  This is the second layup on the crack at the rear of the door. The objective here is to bring the area up to near the finished level
 IMG_0006  This is the second layup on the missing section. Also trying to bring this up to the finished level – another 2 to 3 layers, more in one spot.
 IMG_0008  This is the SMC resin that I have seen recommended on the internet and by my local supplier. The little white tube is the hardener – a very small percentage is used in the mix.
 IMG_0035  There were a couple of small cracks developing around the vent louvers so I decided by reinforce the frame around them in the back. In the front, I opened up two cracks with a sander so I could use some filler on them.
 IMG_0038  This is the next coat as recommended by the Evercoat company and by my local supplier. It can be used as an adhesive or filler. It sets up fast even in (Arizona) cool weather but does a great job of filling. It took two or three thin layers to get the low spots filled.
 IMG_0039  This is the door after the filler was applied the last time.
 IMG_0040  This is the door after sanding the filler for the final time.
 IMG_20140131_105444_310  I used a Forstner bit to re-open the holes for the latches. I ordered a set of stainless steel latches from Applied GMC.
 IMG_0047  I bought a can of beige SEM primer and gave the “finished” door a light coat and was shocked to see lots of little pin holes and minor defects show up that I could not see before. Another visit to the supplier resulted in the purchase of this glaze that fills those minor defects. I was told that this was the normal process – it takes a coat of primer to see what you have missed.
 IMG_0047 cropped  Here is a closeup so you can read the label.
 IMG_0048  Here is the final product, ready for reinstallation.
 IMG_0049  This is the fender repair piece that Fay Curtis makes. I used it as a guide to match the curve for the missing piece. The next phase of the project is to install that fender repair piece.

List of all (or most anyway) repairs and upgrades to our ’76 Eleganza II

List of all (or most anyway) repairs and upgrades to our ’76 Eleganza II
Date Vendor Description Cost Mileage Owner
01/24/94 Southland Enterprises Buford, GA radiator, transmission & oil cooler lines, transducer, alternator 46661 Jim Bowles
02/25/94 Southland Enterprises Buford, GA fan clutch, transmission governor, exhaust system 46994 Jim Bowles
06/09/94 Southland Enterprises Buford, GA master cylinder, fuel lines 49694 Jim Bowles
08/30/94 Southland Enterprises Buford, GA RH cv joint & boot 51818 Jim Bowles
09/26/94 Southland Enterprises Buford, GA LH wheel bearing, knuckle and lower ball joint 52034 Jim Bowles
05/12/95 Camping World Heat strip for Duotherm Howard Black
01/10/97 fuel hoses
02/04/97 NAPA CV Joint boot 2456SB
03/19/97 Sams Club tires 60203 Jack Benson
04/01/97 NAPA Steering boot kit UVB101 13.00
04/17/97 Clasco Manufacturing Corp Front end – steering column master bearing, drag link, idler arm, tie rod ends and adjusters, relay lever, upper control bushings, lower arm control bushings, upper and lower ball joints 2,500.00 Jack Benson
06/26/97 Camping World Aqua Magic toilet
08/03/97 CarQuest alternator 156.00
03/24/98 Golby Motor Corp Front and rear brake hoses 181.00 Jack Benson
04/01/98 steering column bushings and bearing
04/24/98 Camping World Dometic RM2652 2-door refrigerator 949.00
07/10/00 Golby Motor Corp 9# radiator cap 10.00
08/21/00 Golby Motor Corp Air bags (2) 530.00 75890 Jack Benson
05/17/02 NAPA heater blower motor relay Patrick Loe
05/22/02 Alex Sirum GMC headlight kit 225.00 Patrick Loe
05/31/02 Golby Motor Corp Grille, door latch, holding tank sender 438.00 Patrick Loe
06/17/02 Alex Sirum GMC water tank sender 121.00 Patrick Loe
07/17/02 Ramco Ramco mirrors 411.00 Patrick Loe
09/16/02 Alex Sirum GMC Install complete macerator system 300.00 78906 Patrick Loe
09/16/02 Alex Sirum GMC complete front brake upgrade – new rotors, 80mm calipers, hoses, carbon metallic pads 531.50 78906 Patrick Loe
09/16/02 Alex Sirum GMC replace both windshields 1,050.00 78906 Patrick Loe
09/17/02 Alex Sirum GMC Trailer hitch – thru bumper 250.00 78906 Patrick Loe
09/17/02 Alex Sirum GMC 3.55 final drive 1,250.00 78906 Patrick Loe
09/17/02 Alex Sirum GMC rear brakes, new Delco shoes, new o/s cylinders 206.00 78906 Patrick Loe
09/17/02 Alex Sirum GMC KYB shock absorbers (6) 297.00 78906 Patrick Loe
11/20/06 Uncle Dave original purchase 10,000.00 81041 Armand & Carol Minnie
11/27/06 Simonson Generator tune up Onan generator 322.48 Armand & Carol Minnie
02/13/07 B&B auto repair fix leaking radiator 477.49 Armand & Carol Minnie
03/06/07 Cinnabar Propane tank sender 52.84 Armand & Carol Minnie
03/31/07 Armand replace hoses from engine to water heater Armand & Carol Minnie
05/21/07 Duane Simmons electronic cruise control – installed by AJM 265.00 Armand & Carol Minnie
06/20/07 Arizona Mobile Mechanic replace rear main seal on original engine 932.00 90579 Armand & Carol Minnie
07/10/07 Arizona Mobile Mechanic repair L/H exhaust manifold 180.00 92095 Armand & Carol Minnie
07/16/07 All RV new roof air and misc b.s. 1,133.76 92133 Armand & Carol Minnie
07/18/07 Arizona Mobile Mechanic repair & recharge A/C 275.00 Armand & Carol Minnie
08/21/07 Taylor Chevrolet – Rexburg, ID Replace engine – Motor Works, Spokane, WA 5,938.00 94515 Armand & Carol Minnie
08/21/07 Taylor Chevrolet – Rexburg, ID Check transmission 187.04 94515 Armand & Carol Minnie
09/17/07 Lube-it Express Moab, UT change oil 34.43 95020 Armand & Carol Minnie
09/24/07 Arizona Mobile Mechanic replace choke heater tube 74.85 96415 Armand & Carol Minnie
09/24/07 Arizona Mobile Mechanic replace all rubber fuel lines and filler hose 403.25 96415 Armand & Carol Minnie
09/24/07 Arizona Mobile Mechanic replace air filter 12.25 96415 Armand & Carol Minnie
09/24/07 Arizona Mobile Mechanic check brakes – over 50% worn 25.00 96415 Armand & Carol Minnie
09/24/07 Arizona Mobile Mechanic replace turn signal switch & 4-way 118.89 96415 Armand & Carol Minnie
12/03/07 Costco tires 1,305.84 96450 Armand & Carol Minnie
12/04/07 Arizona Mobile Mechanic fix r/h exhaust manifold noise 156.00 96459 Armand & Carol Minnie
12/10/07 Applied GMC Eagle wheels (7) 1,225.00 96450 Armand & Carol Minnie
12/10/07 Applied GMC T-skirts & brackets 95.00 Armand & Carol Minnie
01/11/08 Arizona Mobile Mechanic fuel tank not switching properly 114.56 98861 Armand & Carol Minnie
01/11/08 Arizona Mobile Mechanic fix r/h exhaust manifold noise 138.33 98861 Armand & Carol Minnie
01/11/08 Arizona Mobile Mechanic fix exhaust leak in choke heater 90.50 98861 Armand & Carol Minnie
11/27/08 Coop motor works Onan board 223.00 Armand & Carol Minnie
12/03/08 Arizona Mobile Mechanic change brake fluid – repack rear wheel bearings 417.95 101557 Armand & Carol Minnie
04/14/09 replace macerator pump (again) macerator pump 125.99 Armand & Carol Minnie
05/07/09 Applied GMC electric fuel pump kit 186.00 Armand & Carol Minnie
05/07/09 Applied GMC digital monitor panel 96.70 Armand & Carol Minnie
05/07/09 Applied GMC APC cable 25.00 Armand & Carol Minnie
05/07/09 Applied GMC city water fitting 35.79 Armand & Carol Minnie
06/02/09 Applied GMC transmission vent – hose 18.50 Armand & Carol Minnie
06/02/09 Applied GMC Lumina Wipers and blades 84.95 Armand & Carol Minnie
06/02/09 Applied GMC Buttons and screws for window 3.00 Armand & Carol Minnie
06/03/09 Arizona Mobile Mechanic install electric fuel pump 465.96 104097 Armand & Carol Minnie
06/03/09 Arizona Mobile Mechanic fix transmission leak – still leaking from front 211.80 104097 Armand & Carol Minnie
07/14/09 AJM install house battery shutoff 30.00 Armand & Carol Minnie
07/14/09 AJM install Intellipower PD9245CV power converter 172.32 Armand & Carol Minnie
07/14/09 AJM install city water fitting – take insides out of original check valve 10.00 Armand & Carol Minnie
07/14/09 AJM change oil – Mobil 1 – NAPA filter 104097 Armand & Carol Minnie
09/16/09 AJM Digital monitor panel – installed Armand & Carol Minnie
11/06/09 Applied GMC replace oil cooler lines with JR Slaten’s SS setup 230.00 107400 Armand & Carol Minnie
11/06/09 Applied GMC replace left outer CV joint & boot 107400 Armand & Carol Minnie
11/06/09 Applied GMC replace right knuckle 107400 Armand & Carol Minnie
11/06/09 Applied GMC replace steering damper 107400 Armand & Carol Minnie
11/06/09 Applied GMC replace end link bushings 107400 Armand & Carol Minnie
11/06/09 Applied GMC replace sway bar bushings 107400 Armand & Carol Minnie
11/06/09 Applied GMC replace both lower ball joints 107400 Armand & Carol Minnie
11/06/09 Applied GMC replace bearing on left intermediate axle 107400 Armand & Carol Minnie
11/06/09 Applied GMC repack rear bearings 107400 Armand & Carol Minnie
11/06/09 Applied GMC replace brake shoes on both intermediate wheels 107400 Armand & Carol Minnie
11/06/09 Applied GMC replace brake cylinder on right intermediate wheel 107400 Armand & Carol Minnie
11/06/09 Applied GMC replace plugs, rotor, distributor cap, ignition wires 107400 Armand & Carol Minnie
11/06/09 Applied GMC replace alternator 107400 Armand & Carol Minnie
11/06/09 Applied GMC replace both front bearings add zerk fittings 107400 Armand & Carol Minnie
11/06/09 Applied GMC replace transmission with Manny rebuild 2,298.00 107400 Armand & Carol Minnie
11/06/09 Applied GMC Change oil and filter (wix filter) 70.00 107400 Armand & Carol Minnie
11/11/09 Applied GMC install dual bag rear suspension system 1,231.00 108000 Armand & Carol Minnie
11/11/09 Applied GMC replace mufflers 108000 Armand & Carol Minnie
11/11/09 Applied GMC replace steering boot 108000 Armand & Carol Minnie
11/11/09 Applied GMC replace fuel pump – pressure too high 0.00 108000 Armand & Carol Minnie
11/11/09 Applied GMC replace carburetor with Patterson rebuild 514.00 108000 Armand & Carol Minnie
11/11/09 Applied GMC replace transmission with Manny rebuild – first one failed 0.00 108000 Armand & Carol Minnie
12/01/09 Replace driver’s side windshild with new gasket 108000 Armand & Carol Minnie
12/30/09 Arizona Mobile Mechanic final drive – new seals and gaskets 434.00 109352 Armand & Carol Minnie
04/05/10 AJM install VIAIR compressor and all metal fittings 85.00 111868 Armand & Carol Minnie
04/06/10 Dave Lenzi ride height adjusters 61.00 111868 Armand & Carol Minnie
04/06/10 AJM rotate tires – spare to RF – clockwize – LF to spare 111868 Armand & Carol Minnie
04/06/10 Springfield Ignition Replace distributor & add timing tab (missing from rebuilt engine) 111868 Armand & Carol Minnie
04/28/10 AJM install Shurflo Whisper King water pump 92.22 111868 Armand & Carol Minnie
07/15/10 Arizona Mobile Mechanic install aluminum radiator 1,200.00 114582
07/31/10 AJM remodel interior living space 5,000.00
01/01/11 AJM upgrade rear suspension to quad-bag 500.00
08/01/11 AJM upgrade rear brakes to discs with reaction arm 5,000.00
02/07/12 AJM fuel/vapor separator & charcoal cannister 200.00
02/08/12 AJM stainless hot water heater 300.00
02/10/12 AJM aqueous foam fire extinguisher in engine compartment 400.00 17,615.22
02/21/12 AJM new switches for lights and water pump including in bath 100.00
03/03/12 AJM r & r intake manifold to install blocking plates on exhaust crossover
03/03/12 AJM belt tensioner on A/C compressor 25.00
03/03/12 AJM install Remflex gasket on passenger side exhaust manifold
03/30/12 AJM two new Magnaflow SS mufflers and 2 1/2″ pipe from mufflers back including new “Y” 495.00
04/02/12 AJM ventilation – with remote control blast gates
belt tensioner on alternator 70.00
04/15/12 AJM aux. vacuum pump for brakes
04/15/12 AJM new belts on alternator and a/c 20.00
04/15/12 AJM new fresh-air ventilation 100.00
06/10/12 rebuilt transmission purchased from Steve Ault 600.00
06/11/12 NextGenAuto install transmission 588.00
07/03/12 NextGenAuto install new seals in final drive and fix engine oil leaks 300.00
07/03/12 NextGenAuto replace A/C compressor, hose, and recharge w/R134 1,049.00
07/05/12 AJM fabricate and install center console in cockpit
AJM install transmission temperature gauge
07/12/12 AJM replace Onan mount cushions to fix sag
09/06/12 AJM replace tires (6) 866.00 142000
11/27/12 AJM replace driver’s side outer CV boot, shockmount grommet, install transmission cooler, replace spark plugs, dist cap, rotor, and wires, repair bogie greasers (tire failure) 501.79 145628
08/08/13 AJM reconditioning and retinting all living area windows 1,000.00
09/15/13 AJM new house batteries – 2 6V golf cart batteries 200.00
12/292013 AJM installed surge tank for house water system 100.00
02/15/14 AJM installed new suburban 19K BTU furnace 500.00
03/15/14 AJM body work and paint – repair and paint SMC sides below waist to start 2,000.00

Installing a surge tank for house water system

Installing a surge tank for house water system

A long time ago (during the permanent bed conversion) I installed a Shurflo Whisper King water pump and have mostly been very happy with how quiet it is. The problem is that no matter how quiet it is, it is still audible when it runs. It makes us want to keep the water pump switch in the “off” position (very annoying) because it “burps” every 10 or 15 minutes. It doesn’t seem like much but some of us are sensitive to any noise when it is otherwise nice and quiet and it bothers us.

I figured it was happening because of a small leak in the built-in check valve in the pump. It turns out that a surge tank is listed as one of the solutions to this problem by Shurflo. They also recommend using a surge tank to prolong the life of the pump – so it doesn’t constantly start and stop. I found a nice sized (about 8.5″ diameter and about a foot long) at Home Depot’s web site (a Flotec FP 7105-8).

The photos below show a mock-up of how I planned to measure the pressure in the house water system (22 pounds with the Whisper King even though it claims 30 pounds in the documentation – I guess that could be because of a power issue, so I plan to check) and then to substitute the surge tank for the gauge. I held the tank in place against the back wall by adding a brace in front of it and connecting it to either side of the bed supports. The tank is held well out of the way of the rolling drawer that slides under there too – the horizontal line in the insulation  below the installed tank in the last photo is where the rolling drawer rests.

We plan to use the coach in the next month. I will report on if and how this helps solve our “noise problems.

Update 1/20/2014: We used the coach for a weekend trip – 3 nights – and the surge tank has fixed the problem of the water pump “burping”. We can now leave the water pump turned on when we are in the coach and there is no water pump noise except when the pump runs to refill the surge tank when we use more than around a gallon of water. When the pump runs it does so for about 30 seconds and then stops. Since it is a Whisper-King it is very quiet when it does run so, almost like home. Worth doing.

Re-skinning the bath and closet doors

Re-skinning the bath and closet doors

When I refurbished the interior living area in the summer of 2010 I did it in a hurry. The hurry was because of a self-imposed deadline for beginning a 7000+ mile trip to the East Coast and back again. Even though both doors had areas where the plastic laminate was not stuck to the aluminum frame I patched what I could with some new contact cement and skinned over the dark laminate with a real maple wood veneer also using contact cement. When we left on August 1st we headed east and everything looked great for quite a while but, once we hit the humidity of the East the wood veneer expanded and buckled. I have been trying to get around to it since returning from that trip. Now is the time.

The doors are made from an aluminum frame, skinned on either side with a Formica-type plastic laminate, and filled with a few blocks of particle board in strategic spots and expanded corrugated cardboard in the rest of the interior space. My plan was to remove either the veneer or the entire exterior of the doors depending on what worked. I had purchased enough new laminate (WilsonArt makes a natural maple plastic laminate that is a good match for real natural maple coated in polyurethane) to re-cover both doors so, when we returned from our last trip I removed the doors from the GMC and got started.

It turned out that the exterior laminate on both doors was loose enough to get off using a large paint scraper type of putty knife and a hammer (see the photo) with some gentle tapping. In one case the corrugated filler was completely loose and in the other it was stuck to the interior skin so I didn’t have to remove it. In that same case the interior skin was also loose enough to require re-gluing so I had to completely disassemble the door.

I cleaned the aluminum frame with a sander, added plywood pieces to the interior of the door where reinforcement was needed (towel racks on the bathroom door and a full length mirror in the closet) and reassembled everything using DAP non-flammable contact cement (I think it is better than the original one) everywhere. My only error was that when I reassembled the door that was completely disassembled I put it together with a slight twist to it. It still closes but that was not too bright.

Here are some photos that might be helpful: 

Rebuilding/refurbishing the original windows

Rebuilding/refurbishing the original windows

There are two alternatives for new windows for the GMC Motorhome and we don’t like either one of them. The original living area and bedroom windows in our coach – a 26-foot 1976 Eleganza II – open by sliding half the window forward behind a fixed section. The new windows do not open that way – they have sections at the bottom that open by swinging out. There are two problems with that style of window as far as we are concerned. One is that the original windows provide an easy fire escape path and the new ones do not. Two is that the bar which supports the swing-out sections cut right across the windows at eye level (at least they do in our interior arrangement).

The only solution to this problem is to recondition/rebuild the original windows. Jim Bounds of Cooperative Motor Works in Orlando, FL has the materials and the knowledge to accomplish this. The materials for the large front sliders are less than $100 per window and Jim’s website, at one time, had a complete description of the whole process at www.gmccoop.com -with lots of tips for the first timer. He had it filed under “window rubbers” but the site has been rearranged since I found that. The newest thing is that Jim has done some videos that pretty much explain the whole process and shows him actually doing things on a coach. Ask Jim and buy the supplies from him – lots of info and fair prices.

Another point in favor of rebuilding vs. replacing is that the entire job of rebuilding can be done from the outside. This is important to me because I should have done all of this before I rebuilt the interior but I didn’t and I don’t want to uninstall cabinets and valances now. Also, I have covered the kitchen window on the inside and getting at it from the inside would be a major PIA.

Besides needing new rubber around the outside, our windows have been tinted with film and it is old and has turned purple and must be replaced. The sliders must be cleaned up because they are difficult to open and close and the exterior aluminum frames need to be repainted.

I bought a rebuild kit for one of the large front sliders from Jim a year ago and never got the chance (I was avoiding it I guess) to do it but my Navigator has made a strong request that I get this done before we leave in September for Oregon and the Fall 2013 GMCWS rally.

Monday, August 5th: today I got started on the driver’s side large slider. Earlier, I had scoped this all out – I read Jim’s article above – looked at the actual windows to better understand what had to be done, and even made a simple little tool for removing the plastic tracks for the sliding pane – I used about a one foot piece of a “electrician’s fish tape” because it is a good size and is flexible. I went to an automotive finish supply store and bought some SEM self-etching metal primer and some black enamel for the frames. I bought some good masking tape and paper and some Scotch 233 tape for holding some 3.5 mil plastic over the window openings while I had the windows out.

The first thing I did was cover the window shade and the couch with some plastic so I could work on the window without messing them up and then I removed the old, stiff window rubbers from the whole window – the coach looks better already.

The next step was removing the post that divides the window in half. I forgot to unlatch the window so it could move but I figured that out pretty quickly. Removing the fixed window pane was next and it was easy – it was a hot day like every day in Southern Arizona in the summer – but the “glue” holding the fixed pain in was so soft it felt and acted like a cross between black grease and glue and it got on everything but no damage. I had bought some suction-cup type glass handles at Harbor Freight so it was easy to handle the glass.

Removing the slider was easy too. All I had to do was remove the track from the top of the frame behind where the fixed glass was and then move the slider into that area (open the window) and it lifted right out. The bottom slider track was a little difficult to get out because of all the dirt in it and under it but it did come out. I did some first-pass cleanup on the window frame using a putty knife and lots of mineral spirits to get the “glue” off. I covered the opening with the 3.5 mil plastic sheeting and the Scotch masking tape that is not supposed to leave anything behind even after a week in the hot Arizona sun – we’ll see.

The rest of the afternoon – about an hour or two – was spent removing the old tint film with a razor-blade window scraper. It did take about half the time to just get the “glue” and a lot of silicone off the fixed glass section though. What a mess. Nitrile gloves are a good idea during the whole job with frequent changes – probably depending on the type of “glue” your PO used.

Next will be sanding and painting the window frame and the center post while I try to get some new film installed on the glass. A recommended tint applicator is supposed to call me this week. The plan is to do one window at a time: I remove and clean a window, take it to his shop in late afternoon, he installs the film and then I let it dry for a day before I reinstall it. I am now waiting for him to call.

Tuesday, August 6th: the weather was great for working outside today; it never got above 84 degrees and there was a nice breeze. I put in a call to Jerry Sweet of Sweet Window Tinting to see if he was back in town yet. He answered and agreed to install film on my two window panes this afternoon at his home shop. Jerry does mostly commercial jobs because that is what is available but he likes to do cars and really knows what he is doing. I found him by calling my State Farm Insurance agent – State Farm always directs their clients to good repair people so I knew that they would know of a good one.

While I was waiting for Jerry to get back to his shop I continued the cleanup of the plastic tracks for the glass slider and I worked on preparing the interior under each of the other windows so I would not mess anything up when I do the rest of the windows. I removed all of the screens and their tracks so I could clean them and get them out of the way.

Jerry finally got to his shop at about 3:30pm. We selected a dark tinted film that will look black on the outside and will block about 40% of the suns heat. I watched Jerry install the film on both panes in about 30 minutes and the job is either perfect or close to it. He is fun to watch. Jerry suggested that I let the film dry for at least 24 hours before reinstalling the glass and he actually trusted me to pay him when the whole job is done. I left without even signing my name – I like doing business with people like that.

Tomorrow I plan to remove the glass from the large window on the passenger side and at least start cleaning up that frame. On the driver’s side I plan to paint the frame in preparation for the glass installation on Thursday.

Wednesday, August 7th: a bright and sunny day but not extremely high temperatures – I think it got to about 95 but not humid. I cleaned up the driver’s side window frame inside and out and primed and painted it. There was a ton of sandy dirt in the slot that holds the plastic slider track. It took a brush, a putty knife, and a narrow scraper (a flat screwdriver) to get all the dirt out.

While the primer was drying on the driver’s side window I started working on the passenger side. Having the experience of the first side and the awful greasy glue I used rubber gloves and made nowhere near the mess I made on the other side. The passenger side cleaned up so easily that I managed to get it painted too, both primer and final coat done on both sides now. I alerted Jerry Sweet that I would be bringing at least 2 more panes of glass to him tomorrow. I plan to get the old film off of those two panes in the morning and then start taking the smaller windows apart while I am waiting for Jerry.

Thursday, August 8th: I started out getting the window panes from the passenger side clean and ready to install the tint. That took me about 3 hours. Next was reinstalling the newly tinted panes on the driver’s side. The first piece to go in is the slider – the bottom track first then the top. I had cleaned up the window tracks and noticed that one of the reasons the windows don’t slide like new is because the track wears out – 37 years of grit accumulating in the slide and under it and that acts like sandpaper and wears it out. Even the glass is scratched from it. I installed the former upper tracks on the bottom so that I got a new wear surface (no weight on the top) and put the former bottom ones on the top. It now slides like it must have when it was new – perfect.

That was the easy part. Now to install the fixed pane – a real pain. I applied the  black RTV that Jim B. sent along with the rubbers and felt strip. I applied a narrow bead and then spread it with my finger (gloved). It did have some lumps which tried to make a mess but I think I outfoxed it. This is actually a two-person job. One person has to hold the glass in position with the glue and spacers trying to move all the time. The second person starts installing the rubber lock molding at the bottom to hold the bottom of the window and the spacers in place. After the turn is made it will not move.

IMG_3792

Completely reconditioned OEM window with black limo tint

Installing the rubbers is not as bad as it sounds – maybe I just have strong thumbs. I did try a tool that Steve Ferguson suggested (on the gmc-photo site I think) but it didn’t seem to help a lot and it made marks in the rubber. Before I do the next window I will figure out an alternative tool. Installing the larger rubber is more difficult than the smaller one but I got it done and it looks beautiful!.

I also removed the window over the kitchen sink – it is covered on the inside so this is for external looks.  I removed the window because it was falling out. I had removed the rubber yesterday because I hated how it looked and it had sagged and was in danger of falling out.

Friday, August 9th: I decided that for the next phase of this project I would concentrate on the driver’s side windows because I can’t fit all 8 remaining glass panes in my van at one time going to and from the tinting shop.

I removed the glass from the bedroom window next. This was made much more difficult because some PO had used steel screws to hold the center post in place where Jim Bounds recommends using aluminum rivets. The dissimilar metals action had welded the top screw in place and it would not budge while the bottom screw came out with superhuman effort. I had to use a thin cutting disk on a dremel type tool to cut the screw out from behind. I make a sort of mess of the upper part of the frame trying to drill a very hard piece of steel screw out of some very soft aluminum. I think a new rivet will cover the mess but, if not, I will have to repair it and redrill.

Once I had the 3 new pieces of glass at home I found that the ammonia under a black plastic trash bag worked really well and made it almost easy to get the old tint film off.  While the glass was “soaking” under the plastic and ammonia I worked on cleaning and painting the frames. Now the whole driver’s side is ready for glass whenever the new rubbers, etc. get here.

Saturday, August 10th: I took the 5 window panes to Jerry to re-tint. He had suggested getting an early start so we did. I arrived at his house at 7 a.m. and by 8:45 a.m. I was back home.  Had to go out of town for a couple of days so removing the remaining passenger side glass will have to wait until I get home. After that the big back window and the cockpit side windows will be next – they will have to be done in place.

Wednesday, August 14th: Had a family issue that took a few days but I got started again this morning. I took out the remaining windows from the passenger side – the door and the bedroom. Having learned what and how to do it, I immediately cleaned and painted the frames and then covered them to wait for tinting to be complete. I found the remaining rubbers and felt strips on my doorstep when we returned home last night so time to start putting some glass back in, maybe tomorrow.

Thursday, August 15th: I removed the film from the large back window over the bed and from the cockpit side windows this morning. I had tried applying some ammonia with plastic trash bags yesterday before I left but that apparently did no good. It took me about 2 1/2 hours to get the old stuff off but I ran the A/C and removed the mattress so I could stay cool and not make a mess.

In the afternoon I went back to the coach with my helper/navigator and reinstalled the newly tinted (former) kitchen window trying my new rubber installation tool – photos below – that I made from a broken wood chisel. I just ground the normally sharp end down to a flat surface, sort of like the end of a flat screwdriver and I rounded the corners and eased the edges a little so it would not mark or cut the rubber. It did slip a couple of times and scratch the newly painted frame but it is so much easier than thumbs or Steve’s recommended tool I will happily touch up the frames for the ease of installation.

Tomorrow, I plan to get down there early with my helper/navigator – her job is to hold the fixed pane and spacers in place on the glued frame while I insert the rubber – and install the bedroom window on the driver’s side and the big sliding window on the passenger side.

Driver's side living area windows done

Driver’s side living area windows done

Friday, August 16th: got the bedroom slider on the driver’s side and the big slider on the passenger side done today. The tool works great but the same thing in a hard plastic like ABS would be better because that would be less likely to scratch. I have a few little scratches on the frames to fix so far and only one minor paint damage – not that anyone will notice that.  Now just waiting for Jerry, my tint installer, to call me to set up an appointment.  I had to take a photo of the driver’s side with the living area windows complete. They look so good they make the cockpit windows look really bad so they are next. I have ordered the stuff from Jim Bounds – hopefully, that will include the slider tracks because they are a mess.

Well, I called Jerry to set up an appointment – thinking tomorrow (Saturday) and he asks: “How about now?” So, at 3:30 I took the coach along with the 3 panes of glass I took out yesterday and headed to Jerry’s. He did the 3 pieces while the coach cooled down a little with the A/C running. When he was done with the 3 pieces he jumped into the coach and tinted that 6-foot by 3-foot back window in no time at all.

I will have to take tomorrow off because I have to let the film dry for 24 hours before handling it. Monday it will be.

Monday, August 19th: Installed the bedroom and door windows on the passenger side so all done. Tomorrow, I will reinstall the screens but I don’t anticipate any problems with that. The plastic tracks for the screens were a little messed up and that resulted in the screens not fitting right and rattling. Messed up means that there were 3 different profiles of plastic track and a couple were installed upside down. I cleaned up the screen tracks, figured out how they were supposed to be installed and did it. I ended up with quite a bit left over because I did not extend the tracks across the window – I installed it only where it needs to be to hold the screens in place – because we never open the screens.

All in all, I would say that the job is not that hard to do. It is just time-consuming and dirty because the old “glue” is messy – maybe yours will not be? Also, I think that there must be a better way of installing the rubbers – there must be a tool. I would suggest taking a sample of the profiles to a body or glass shop and asking for suggestions. I think a hook-type tool could be used to pull the inside lip of the rubbers into place instead of pushing the outside lip in – just a theory.

Materials, including paint, etc. totaled under $1000 (one GMC unit) and the result really nice looking.

Here are the project steps I planned:

  1. protect (mask/cover) interior around windows
  2. remove the old rubber
  3. remove the center post on slider
  4. remove the fixed window – just pull/push it off – a putty knife helps – save the spacers
  5. remove slider window by removing the upper plastic track first
  6. clean and sand frame and post – mineral spirits worked great on the old “glue”
  7. clean and paint the frame and post with SEM self-etching primer and black glossy paint
  8. cover the window opening with 3.5 mil plastic sheeting and masking tape – will take 24 hrs for tint to dry
  9. clean windows and tracks and apply tint film – let film dry for at least 24 hrs.
  10. replace slider window
  11. replace fixed window – use original spacers but only use 1/2″ lengths to minimize difficulty with rubber trim
  12. replace small rubber trim – this is what holds the window in place – trim to edge of fixed glass
  13. install center post with new brush strip
  14. rivet post in place – do not use screws
  15. replace large rubber around sliding pane – leave about 1/8″ long and push it in

Here is a look at the passenger side.IMG_3804-001

Good luck.

Some progress on dash A/C

Some progress on dash A/C

It is hard to believe that my last post “between trips” was last summer, before our trip to Maine and back to Arizona. Even then, the post had lots of words about what I had been up to but no photos. In this post I will try to bring everyone up to date.

The latest updates are about my air conditioner cover/console that I wrote a lot of words about but did not provide any photos.

In the first 5 photos above you can see what I initially did to cover the after-market under-dash air conditioning unit while incorporating the Electro-Level switches, the air conditioner controls, and the console table that holds our laptop and drinks while we are traveling. Everything worked great except the air conditioner – there was just not enough air coming out, and what was coming out could not be directed where we wanted it – right at us. In the last photo above you might be able to tell that the round vents in the front panel of the cover are different than in the previous 5 photos. Below you will see another photo of what I hope is the final tweak – some external fans.

Our trip last summer began just after the console was finished and we found out pretty quickly about the lack of air and the lack of control of its direction. Our solution for that trip was to buy two clip-on fans at WalMart, clip them onto the arm that supports the laptop swivel table, and blow the cold air where we wanted it – right at us. This was effective but the hassle of the fan clips slipping and the cords getting tangled made it a less than ideal solution.

Between trips I found some RV air conditioning ceiling vents that allowed adjustment of output air in two directions where the original round vents only allowed one adjustment direction. These new vents were slightly larger than the first set and pure white so I had to enlarge the holes in the face plate and paint them an appropriate color. After this modification was complete we took a short trip to Sierra Vista (about 80 miles) and back in some very hot Arizona summer weather and found that the air delivery was still in bad shape.

My next iteration of the design incorporated the original two-way adjustable rectangular vents from the original air conditioner unit. I cut two rectangular holes in the top of the cover (lost a convenient storage shelf) and installed them there – you can see both changes in the next to last photo. I took a short drive in very hot weather and I believe we are getting closer to being comfortable but we are still not there. Re-enter those external fans. I made a saddle for the arm that holds the two external fans – the arms only articulate in one direction – I have them moving the fans perpendicular to the arm and I may not have that right. If I don’t I’ll update this later. The saddle and the fans are shown in the last photo.


My vapor lock problems are virtually gone.

My vapor lock problems are virtually gone.

[Note 5/12/2016 – even though they were “virtually” gone they were still around once in a while so I just converted to FiTech EFI]

Every year, when the outside temperatures across the country begin to rise, the subject of “vapor lock” rears its ugly head. I live in Arizona and, if gas is going to vaporize, it will do it here. I have had my GMC for almost 7 years and have gone from being stuck by the side of the road, at a gas pump, or at intersections many times but, so far, that is not happening any more. I say “so far” because there are variables like gasoline formulations which could affect us at any time. I said “virtually gone” because there have been slight hesitations on two occasions (on a coast-to-coast trip last summer) when it would have died before. Some quick pumping of the gas pedal fixed the problem immediately both times. I remember that happening occasionally when I was a kid when we had “real” gas.

So, how did I get to this point? Of course I don’t know for sure but I think the accumulation of several things has done it. Most of the things result in reducing the heat in the engine compartment and at the top of the engine. I have done nothing to insulate any fuel lines or tanks. The biggest things were: blocking the exhaust crossover passage on the intake manifold, fixing the exhaust system with good flow-through mufflers, and improving the air flow in the engine compartment (see the blog post HERE). Other things I did were to use an electric fuel pump full time and fix the fuel vapor recovery system. The mechanical fuel pump is gone and the electric one is installed on the outside of the frame just in front of the tank selector valve.

I think that fixing the fuel vapor recovery system helps the vapor lock problem a lot. I know of at least one very knowledgeable GMCer who would argue with me but I have evidence and some logic to help my argument. I “fixed” the system early in 2012 and, by that, I mean I connected all of the hoses the way they were meant to be connected and I replaced the fuel/vapor separator and the charcoal cannister. The reason I did this was that my navigator is very sensitive to odors and could smell gasoline in both the back bedroom and the flight deck.

Some people think that the fuel vapor system is allowed to vent fuel vapor to the atmosphere as rapidly as internal tank pressure demands and I think that, logically, cannot be true. The pollution rules, even back then, did not allow fuel vapor to just vent from open tanks. The charcoal cannister has a valve in it that limits the ventilation flow rate and that limit results in pressure in the tanks if fuel vapor is being produced faster than it can filter. That is my logical view – and now for some evidence:on April 27th of 2012, after the fuel vapor system, mufflers, and intake crossover were all done we left for California and the GMCWS rally.

I remember the date of April 27th because it set records for heat. We crossed the desert on our way to Palm Desert at well over 100 degrees. At our first stop for fuel in Gila Bend it was right around 100 degrees and when I went to remove the gas cap there was significant pressure to relieve before I could just take it off. The first time I experienced that was a couple of years ago and the vapor was accompanied by liquid gas when I just let it gush out. It took a couple of real clock minutes to bleed the pressure off completely. When I was re-entering the highway I had a “vapor lockish” hesitation but it went away quickly and did not recur. Our next stop for fuel was at Yuma where it was still over 100 degrees. This time the gas cap was playing a tune – the pressure in the tank had overcome the cap’s pressure limit (there is one). Gas caps are not allowed to be vented for pollution reasons. Since then I have found that the EPA requirements for gas say that April is outside of the season when summer formulations are required (to limit fuel vapor). We were burning “winter gas” which “boils” at lower temperatures.

Having that much pressure in the tanks seemed a little scary so I decided to allow the system to just vent by leaving the gas cap loose. The coach would barely run like that. We went just down the road to a shopping center lot to turn around and I could hardly keep it running. Finally, after about 5 minutes of deja vous with vapor lock I tightened the gas cap and within a minute it ran great and never did it again even through Brawley, California where the outside temperatures got to 110 degrees.

My theory is that the pressure in the tank keeps the fuel from boiling. In both cases I described above, I could hear the fuel boiling in the tank once I got the gas cap off. That is why I include fixing the fuel vapor recovery system as part of the problem/solution. Keeping the gas from boiling in the tanks helps a lot but eliminating it completely is probably not necessary because the fuel pump only has to keep the carburetor bowl full. A few bubbles getting that far are not a big deal and pressure in the tank minimizes it. Keeping the gas from boiling in the carburetor bowl is a bigger problem since it is essentially a small reservoir of fuel and there is not much room for bubbles. That is why keeping the temperature in the engine compartment, especially under the carburetor (the intake manifold), lower is the most important thing.

Comments are welcome.

Log of interior remodel, June and July of 2010

Log of interior remodel, June and July of 2010

This post is a log that I kept during the interior remodel project on our ’76 GMC. For a long time – then, August 1st, 2010 until now (March 2013) I had “lost” the log, could not find it anywhere. Today, I found it and decided to make it into a blog entry – even I am interested in how I remodeled the interior of our coach in only 8 weeks.

The photos included with this log show the original look, some of the work (I was too busy to take many photos) in progress on that particular day, and then the final results and some things that have happened since.

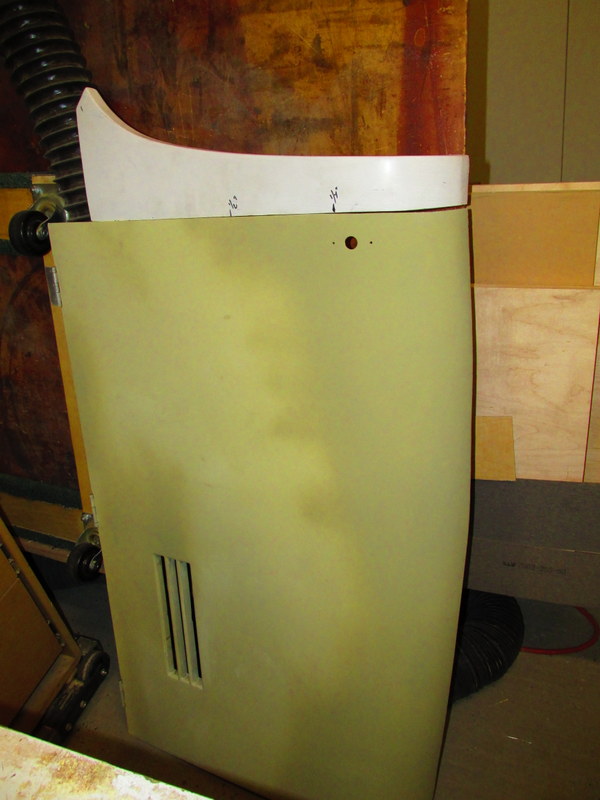
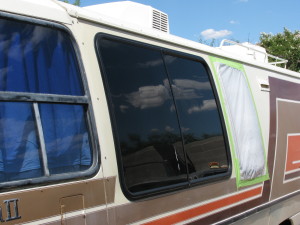
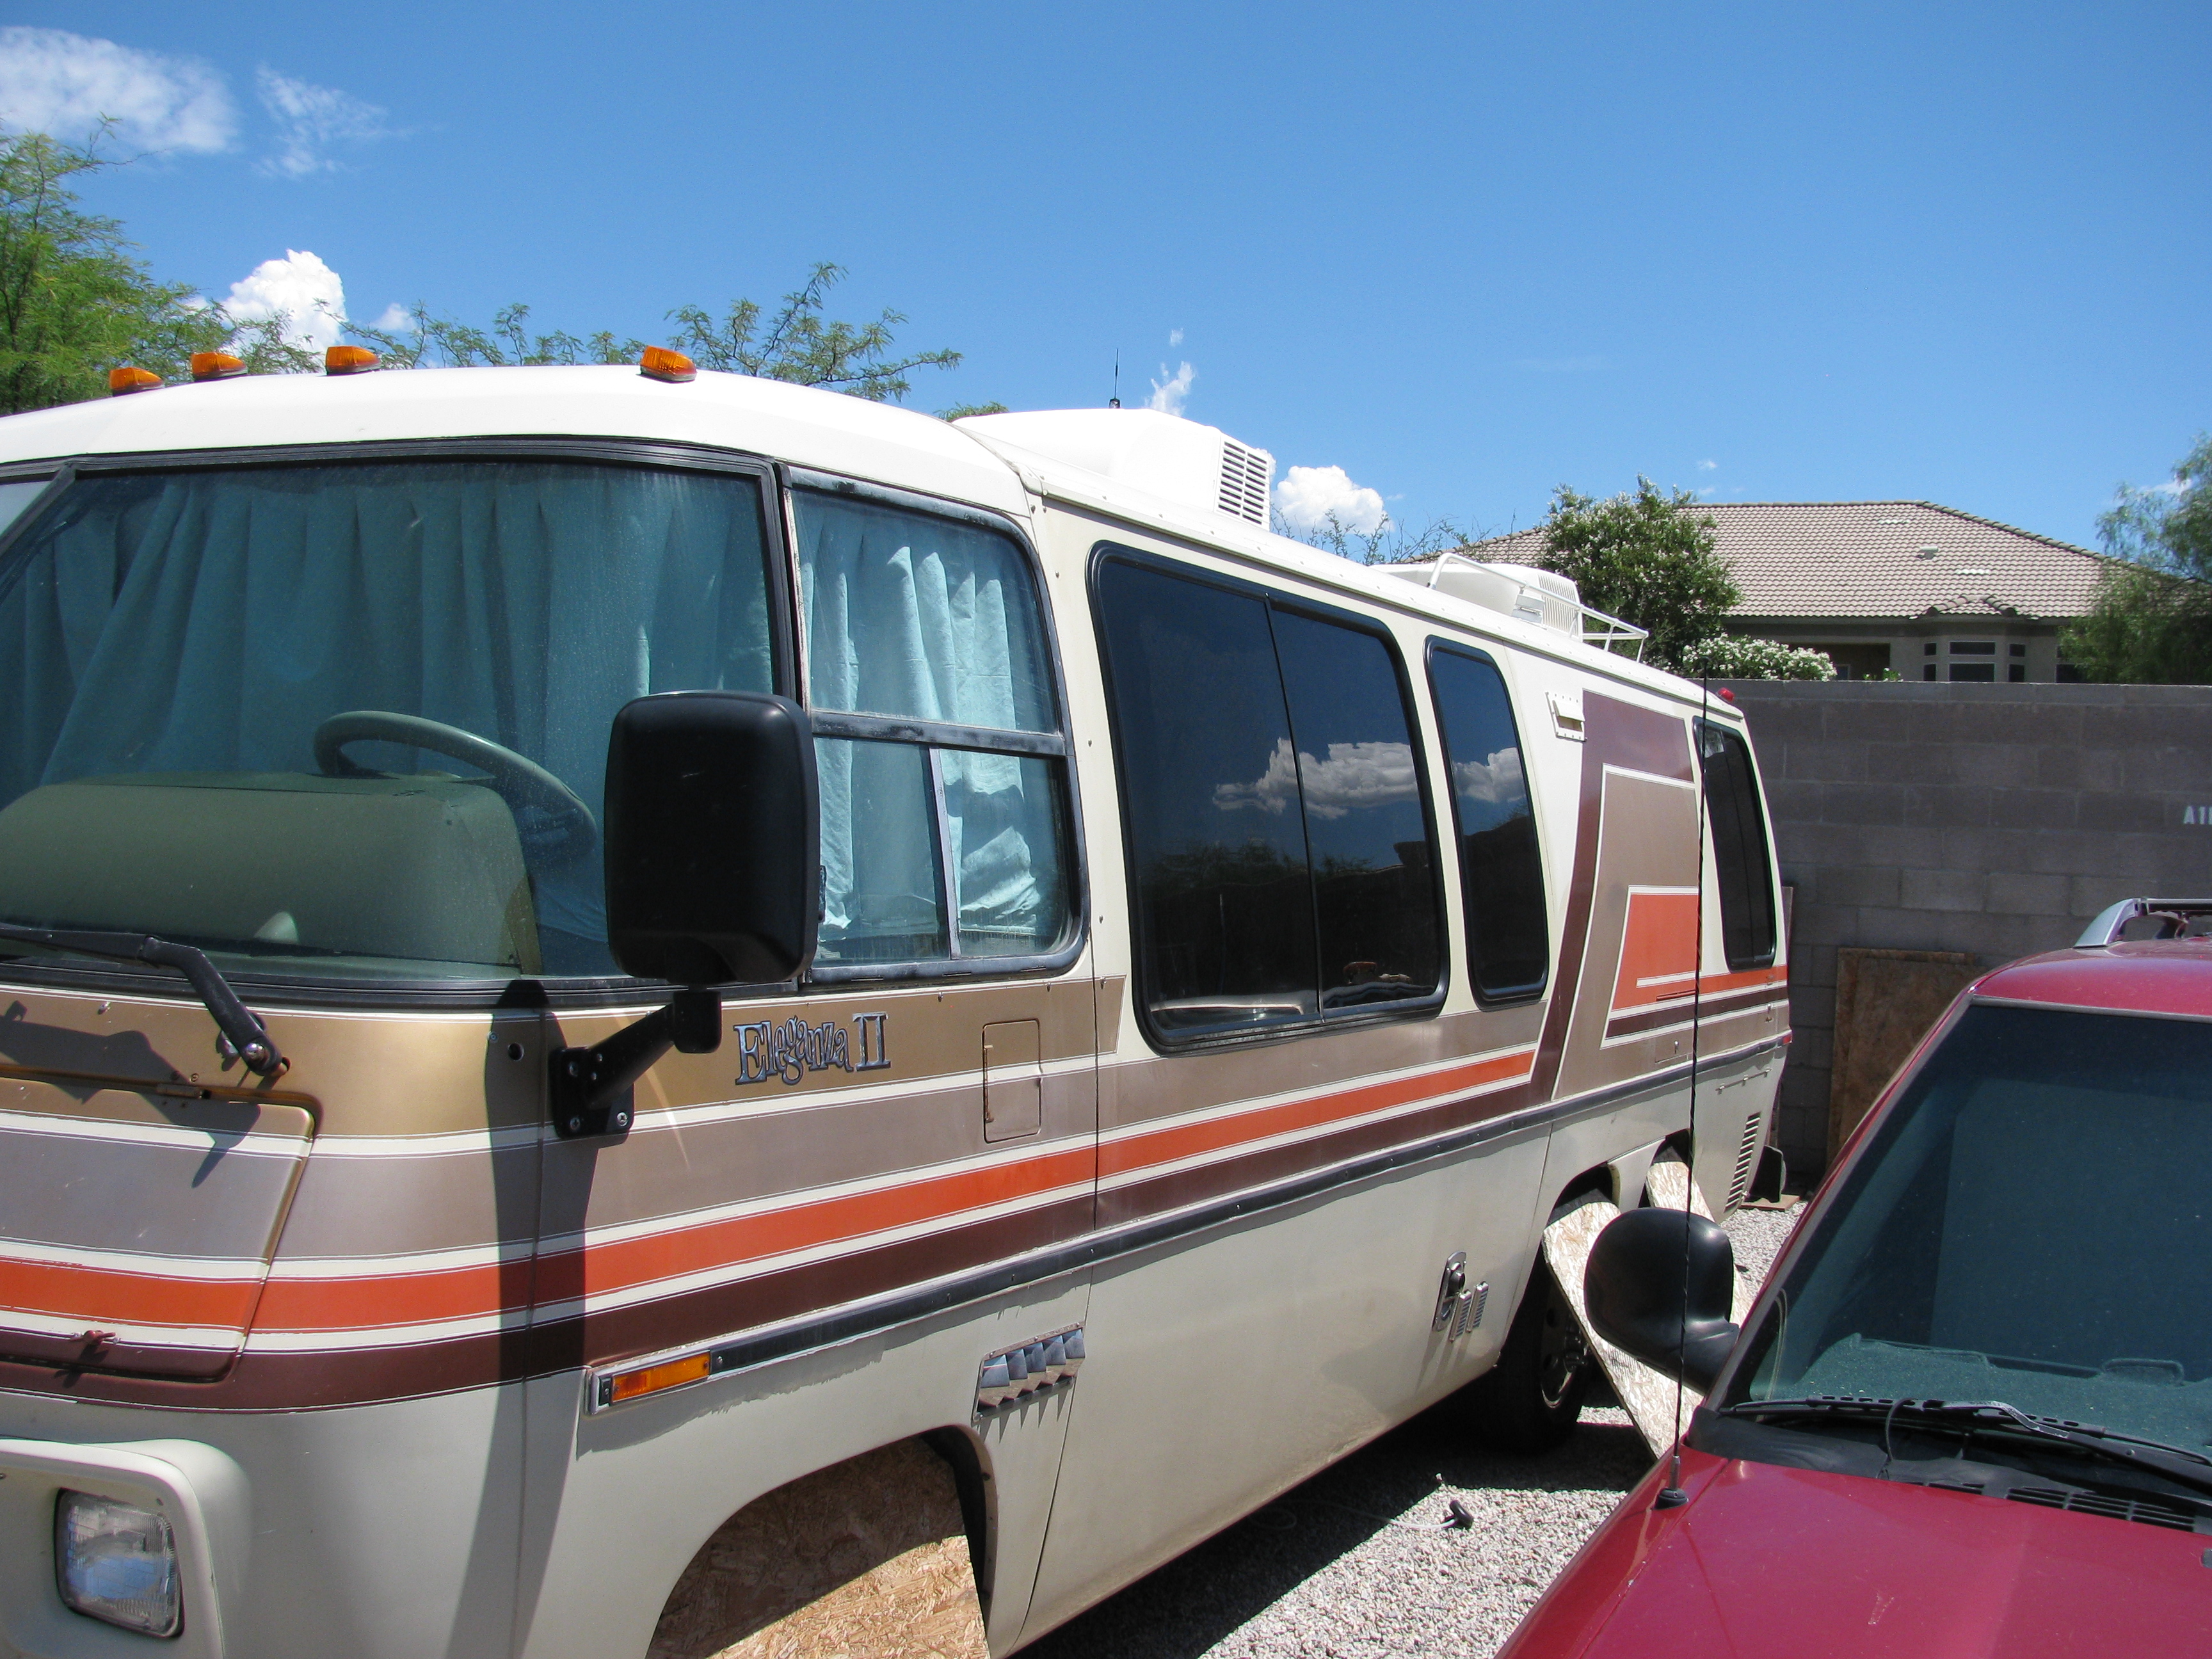
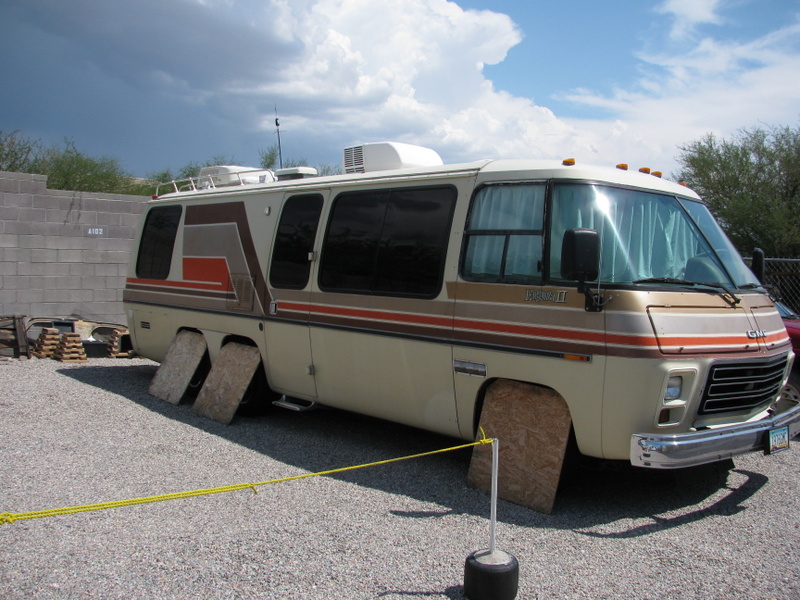
First, a couple of photos that the previous owner (Uncle Dave) took of the interior: 

Next, some photos that I took when I realized that I was well into the job but had not taken a single photo of the interior before I started or even during the first week. These photos were taken on June 9th – at least a week into the project:

A couple of days later I took some more photos. These were taken on June 11th: 

The following text was written as a log during the project. Photos are placed in sequence of when they were taken.

Lots of activities before this but cant’ remember everything and when so will start from here – June 16th – I did well remembering most of yesterday but not before in any detail.  Will try to do better.

June 15th, 2010

I planed down the wood strips for the ceiling and bent them to match ceiling curve.  Temporarily installed them on the ceiling to dry and hold the shape.

Tried out seat prototype but now need the second seat to see how they go together.

June 16, 2010

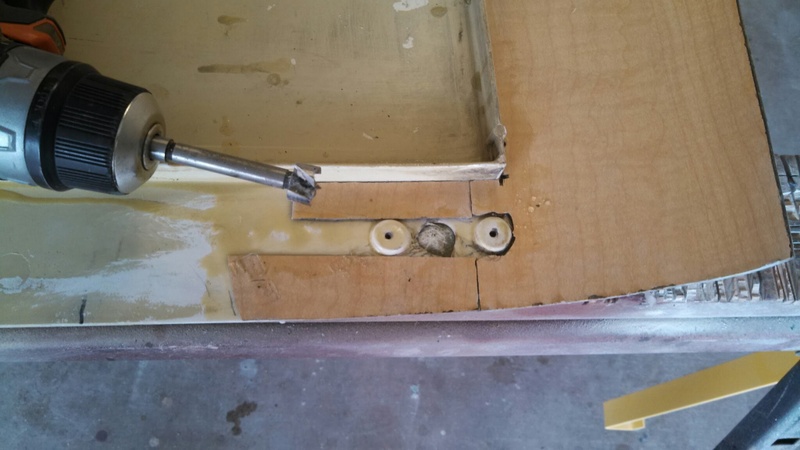
Today I inspected the wood strips that will hold the ceiling joints up – they have dried and are pretty color-free.  I got underneath the back and put the washout nozzle into the hole that the OEM-style level sender was in – I had drilled the washout flange to match the holes in the sender.  I took another look at the macerator discharge hose and I think that the kink is not bad enough to cause a problem – I will test before we go.

I installed the AC Delco 15-4644 fan clutch and removed the Haden 2927.  It sounds like it is running closer to engine speed but we’ll see.  The engine battery is dead again even tho it was disconnected since it was parked there upon return from Calif.

I made up the second seat pedestal prototype – the one that is wider and goes up front.  Tomorrow we will put it in and make final decisions on the size and placement of the pedestals, table and bench/cabinet.

I cut down the Create-a-Breeze bezel to match the depth required and some 1/2″ spacers to hold the ceiling out at the right level.

Made the trim piece that goes on top of the closet unit and holds the ceiling up.

Ordered some stainless steel sheet metal screws and recessed washers from McMaster-Carr.

June 17th

This morning – 7:00am – we (Carol too!) arrived at the storage lot and put screws into the ceiling panels that needed them (sagging FRP) and put some trim up over the closet.  Put the trim for the Create-a-Breeze and took down the maple strips since they are now dry from the bending.

Cleaned up a lot of the screws and trash that has been accumulating.

Put prototype of second dinette seat in place and measured for table and overall placement of the dinette pieces.

Took the maple strips home and Carol sanded and applied 3 coats of poly while I cut and edge-banded the doors and drawer-fronts for the closet unit.  Then I applied the veneer to the bathroom door.

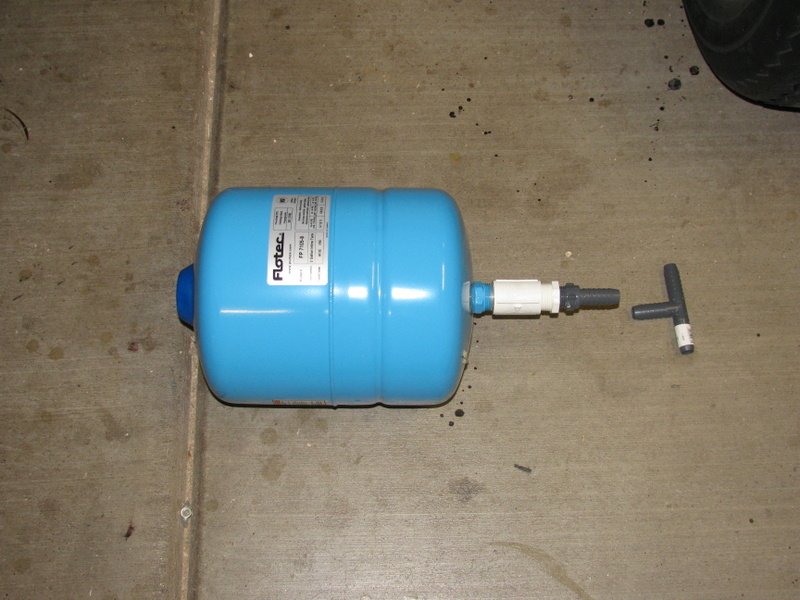
The macerator pump arrived today – can now finish the holding tank repairs and upgrades (replace macerator, try to fix the sending sensors, install washout).

June 18th

Finished putting veneer on the closet and bathroom doors – Carol is applying poly – they look good.

Now to start on the kitchen and the dinette.  First step is a design.

Stove arrived today and we went out and found a single bowl stainless sink at HD that will fit in the allotted space.

Carol is still working on polyurethane coatings of everything – having a hard time because of heat?

My back is killing me so not much today.

June 19th

Up early – off to install macerator and cleanout hose then will be done with black tank stuff – I hope.

Got that done and now it is time to start putting the new doors and drawer fronts together so we can get those installed tomorrow morning

Started cutting pieces for face frame of kitchen.  Laid out the stove and sink and thought up a way of extending the counter top with a swing-up extension.

Have not finished ceiling yet but have to make one more trim piece to go over bath to hold ceiling panel up – hope to get the ceiling finished early in the week and move on the replacing the fan shroud to get ready for a test run to see if we need a radiator.  Also, have to remove antenna and get some polyurethane adhesive caulk for around the FFF (our term for the Create-a-Breeze).  Also have to get a replacement engine battery.

Back getting better but still a problem.  Rest after a little bit of work tomorrow morning.

June 20th (Fathers’ Day)

got down there at about 8:00am and put the doors and drawer fronts back up – looks great but forgot, for now, to take photos.  Took about 2 hours.

That is it for today – breakfast, movie (Schreck??), the US Open and sleep in order.

June 21st

Schedule for today: see how to get the doors off the refrigerator so I can cover them in maple, attach the maple strips to the ceiling, make a trim piece for over the bathroom door, work on the face frame and the partitions between cabinet sections.

Can’t get doors off without a special wrench.  Maple strips now screwed to ceiling except for bath/closet area where I need a trim piece first.  Work on face frame and cabinet starting today.

June 22nd

working on the kitchen cabinet – tried it for fit today and it is ok so will proceed with building out the various spaces.

Made and installed the trim over the bath door to hold the ceiling up.

Going out to buy more supplies – lumber, shower curtain hooks, vent covers, paint, etc.

Went down to the storage lot at 7:15 since it had cooled off but it got dark by 8:00.  I removed the 3 old plumbing vent covers and did first pass cleanup of the area around them.  The refrigerator vent is pretty rusty and it looks like it is not sealed real well so started taking it off but several screws will not budge so drill and easy-out tomorrow.  Also, the antenna needs to come off and be sealed all around it – tomorrow too?

Carol thinks the passenger side buffing is done except for a small strip at the top.  Much easier to do in the evening.

June 23rd

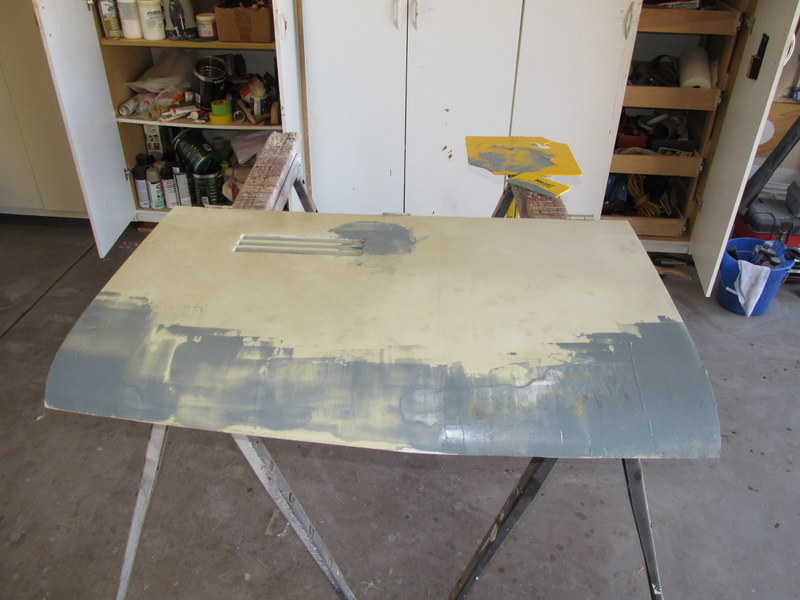
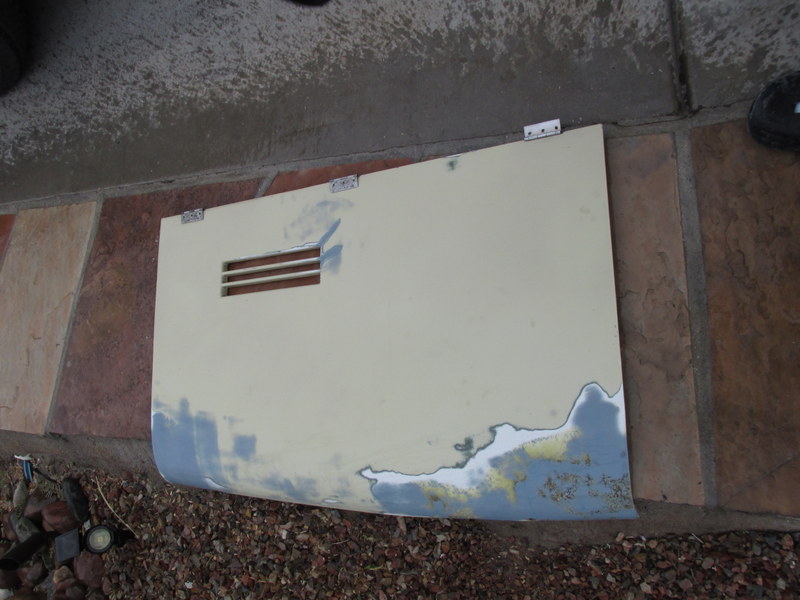
Started morning by removing refrigerator vent and old antenna.  The vent is in pretty bad shape so will look for another.

Worked on the kitchen cabinet – getting close.  Bought a refrigerator vent but don’t know if I like it.  Will call Jim K tomorrow to see what he has.

June 24th

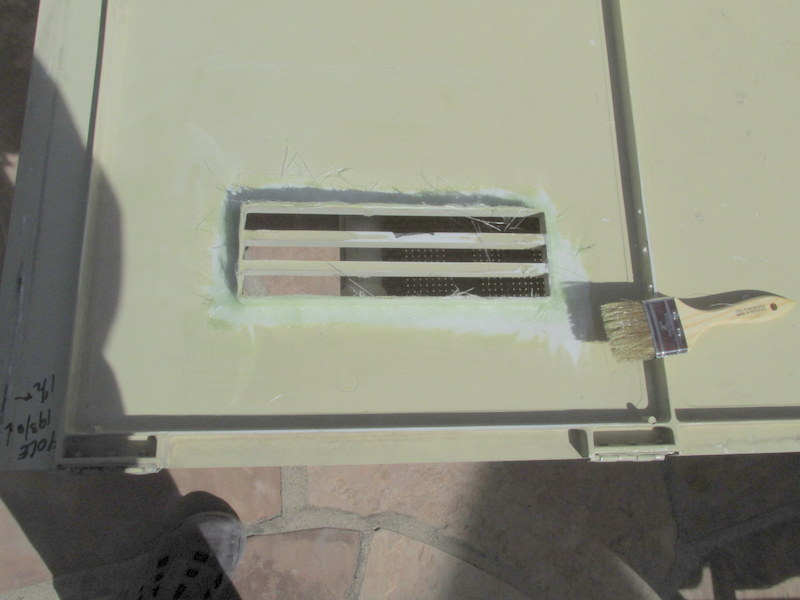
Changed my mind about waiting for another vent – rain started showing up in the forecast and it (the vent) looks OK.  Installed 3 plumbing vents, patched (with aluminum flashing) the 2″ hole left from the antenna, sealed around the Create-a-Breeze, and installed the refrigerator vent.  Put a couple more screws in the most forward ceiling panel and switched from buttons to washers in that panel to see what we like best.

Took the coach down from the rear ramps and put them under the front to prepare for the shroud replacement.

Got the refrigerator doors off so we can now cover them in the maple veneer.

Carol got the table edges refinished – sanded, stained and a couple of coats of poly.  We will use it for now.

Worked on the kitchen cabinet – made the slide out that will hold the counter extension and fit around the sink.

June 25

Hope to get the old fan shroud off today.  Maybe start working on the new one?

Got it off along with two of the 4 brackets.  One of the remaining brackets is on the same bolt as the A/C compressor and the other, also on the passenger side is involved with the axle.  Had a bit of a time getting the new one on – still have to go and buy some bolts and other stuff to finish.  Also, had to remove (again) the fan and clutch – ugh.

Will work on the refrig panels and the drawers for the kitchen.

OK, got the refrig panels veneered and installed the drawer slides.  Dr. appointment today – will stop at Ace to get bolts to complete shroud install – so that’s all for now.

June 26

Got the bolts so will put it all back together this morning.  Will probably work on drawers for kitchen but my back hurts and we are hosting a taco party tonight so will quit early.  Anniversary tomorrow – 23 years.

Got the shroud in and took it for a ride – still runs hot according to the temp gauge but I am curious about why the fan clutch – now the AC Delco 15-4644 – does not come on until the gauge reads 235 to 240.  Carl Stouffer thinks that maybe the radiator is plugged so that no water is passing through it and it doesn’t get the fan clutch hot enough to turn on.  Steve Ferguson thinks that the temp gauge is wrong and that the radiator is probably working OK since we should be hearing stuff – like pinging – if we are really running that hot.  He suggests getting a good mechanical temp gauge like an Autometer, or Stewart-Warner.  Next week.

June 27

Installed the newly covered refrigerator panels this morning and they look great.  Will get some photos asap.

Tomorrow: work on the kitchen cabinet – drawers and then give it to Carol to sand and varnish.  Get some cardboard to make template for side to sidewall curve.  Buy mechanical temp gauge.

June 28

Made the drawers for the kitchen.  Cut and machined the pieces for the face frames on the upper cabinets.  Bought a mechanical temp gauge and verified it in a pan of boiling water – found a web site that tells you the boiling point at the atmospheric pressure and altitude where you are – was exactly correct.  Will try to install it tomorrow.

June 29

Installed the temp gauge and took it for a ride – the temp is a little high.  Got to 225 climbing the hill with air temp of 95 degrees.  The fan came on at about 220 and stayed on as long as I was going slow.  The temp did drop when the fan was on as opposed to the way it seemed with the old temp gauge.  I think the radiator has a problem – will talk to Steve Ferguson and Tom at AZ Mobile Mech. to see what my options are.  Also will check on why the Tracker’s rear tires are wearing so badly.

Assembled the face frames for the upper cabinets.  Tomorrow will trim them and start cutting plywood for bottoms, backs and ends.

Tomorrow morning I plan to finish the ceiling completely.  That means installing another trim piece over the closet, installing the battens on the seams in the aisle, re-attaching the Create-a-Breeze trim piece.  Carol will wash the walls to be painted and we will mask the windows and other stuff so we can paint the walls.

June 30

Finished – finally – the ceiling this morning.  Started masking for painting the walls forward of the kitchen and door.  Painted the FRP panels in the dinette and couch area with same paint as closet, bath, etc.

Trimmed face frames for upper cabinets and started figuring out how to make the bodies.

July 1

Will see how the interior painting went yesterday when I pull the masking off.  Plan to install the kitchen cabinet today so I can measure for the couch and the counter top.

Got the kitchen cabinet installed, finished the painting started yesterday – missed some spots, and re-installed the dining table in the slightly adjusted location.  More work on the upper cabinets if I can stand the heat – the humidity is getting higher lately.

Did some work on the upper cabinets – cut the plywood bottoms and backs for all of them and now to figure out how to join the backs to the bottoms at the 10 degree angle required.

July 2

Assembling upper cabinets.  Made the ends and middle pieces from a template rescued from one of the old cabinets.  Using biscuits and glue – maybe some screws with wood filler plugs at the back.

Got all the pieces cut for the 4 cabinets and got one of the small (bedroom) ones assembled – just need to put the mounting cleats on the top and back.  More tomorrow.

July 3

Assembling more cabinets – almost done with major parts then will have to put inside false bottoms, shelves and mounting ribs on, round the bottom edges and give them to Carol for sanding and varnishing.  Probably will get all that done on Monday???

July 5

Will begin work on kitchen back splashes – left and back – and getting profile for valances.

Got profile and sizes for back splashes and plan for implementation but no start.  Got profile for valances and cut a bunch of poplar for returns.  Made appointment with Tom at AZ Mobile to fix radiator issues and install timing tab.  Sanded upper cabinets and Carol put first coat of poly on them.

Tomorrow – measure for kitchen doors and drawers in case I need more work to do while Tom has it.  Rework wiring behind kitchen counter for outlet and microwave – bought shallow boxes so they won’t interfere with backspash’s fit against wall.

July 6

Got the wiring reworked and the kitchen stuff measured.  Planed returns on valances and cut most of the vertical pieces – discovered that the vertical dimension will be different if there is a cabinet in front – if no cabinet the valance will be taller to cover the old holes.  Took the GMC to Tom and it may or may not get back to us by Thursday afternoon – if not will start making doors after valances are done.

July 7

Made valances – two for large front windows – skipping door for now since I can’t measure (until I get the GMC back) and it is a complicated fit. They will be ready for Carol to sand and varnish tomorrow.  Will leave the bedroom valances until our return later in the Fall.

July 8

Sand the valances and then give them to Carol to finish.  Begin work on the couch.  Got most of the couch body and face frame done – will finish trimming the edges of the plywood and then make the drawers when I get the materials for that.  Will do as much as I can on the couch tomorrow and then start on the dinette pedestals.

July 9

Finished the couch body and prepared for Carol to varnish.  Began dinette pedestals – keeping them simple.

July 10

Working on the dinette pedestals.  Finished those except for some magnetic catches to hold the removable sides and some sanding and now started cutting wood to make doors and drawer fronts.

July 12

Cut out the back splash plywood and covered the side one with laminate – still needs to be trimmed.  The back splash needs to be fitted to the coach before I cover it.  I also covered the pantry door with veneer so it will look ok for this trip – will replace the whole refrigerator unit in phase II.  Had to quit for the day because my back/hip is hurting too bad – time for another massage for $60 – ouch.

July 13

Finished side splash – ready to install.  Now cutting rails and stiles for cabinet doors – Carol helping so I do not stress my back more than is necessary.  Radiator arrived at Tom’s yesterday he is having some issues with having to move the steel pieces that hold the rubber cushions.  Got all the rails and stiles cut and planed and got the inside edges shaped.  All rails are cut to length so just need to shape the ends.  Time to make the panels but need to get more wood – tomorrow.

July 14

Shaped all the ends of rails.  Went to the lumber yard and got more maple for door panels, a sheet of baltic birch, drawer guides and a sheet of 1/4″ mdf for the drawers in couch and hinges for all of the cabinet doors.  Tom will hopefully have coach radiator done tomorrow.  I guess the first thing we ought to do is get a new engine battery.

July 15 – 17

Installed new engine battery when I got the coach back – amazing difference in starting.  Made panels for doors and assembled and trimmed doors.  Ready for sanding. Cut out backsplash and covered it with Formica and installed it.  Cut out counter top got it ready for Formica.

July 19

Covered counter top with Formica.  Installed the valances and shades on the two front windows.  Removed the large valance on back window so we can try to trim it narrower.  Went to the plumbing shop to get some parts to plumb the sink but no luck – I don’t know what size the pipes are in the GMC so I don’t want to cut them – will probably just put the ‘P’ trap under the sink like it used to be.  Now to figure out how to make the door valance, trim the large valance in the back and hang the upper cabinets.  Right…

July 20

Cut down the depth on the rear valance to try to improve interference with sleeping space.  Put 1/2″ rounded front edge on kitchen countertop.  Did edge work on all doors and drawer fronts.  Reinstalled rear valance and installed new shade into it along with the two side shades in bedroom.  Started figuring out how to mount upper cabinets.  Called Sandy’s West and they have 1 1/4″ ABS pipe and fittings so I will be able to manufacture my own p-trap.

Plan for tomorrow is to begin or even finish mounting the upper cabinets.  Go to lumber yard and get more maple for stuff that is left – countertop extension, wire channel covers.  Go to Sandy’s West for plumbing parts needed to plumb kitchen sink.   Get bolts and nuts needed to install couch, dinette and upper cabinets.

July 21

Still working on mounting the upper cabinets – designed and installed rear spacers so valances can fit behind them, have an idea how to do the top spacer and do the initial attachment to the ceiling.  Carol is varnishing the doors and drawer fronts.  I bought the plumbing items and the lumber and the bolts to get close to finishing the project.

Tomorrow – hang the upper cabinets (help needed for this) – plumbing, counter top, stove, sink.

July 22

I finally got the upper cabinets hung.  It was not just a matter of duplicating the old mountings because I wanted the valances to go all the way around the window and there was not enough room for it (2″) in the old mounting.  I made the rear mounting rib wider and that pushed the cabinet out.  Pushing the cabinet out made the dimension of the upper mounting rib change so I had to remake one of them and I had to use a less than ideal profile on the other.  I should have made a mock-up of the cabinet profile and used that to determine the dimensions – next time ;-)…

July 23

Installed plumbing – had to remove old stuff and put in my own version of a p-trap made from pipe and elbows and adapt it to 1 1/2″ tubing from sink.  Installed counter top, sink and stove.  Hooked stove to gas and connected water to faucet.  Have to wait for glue (sink is glued down) to dry before I can connect the drain and try everything – tomorrow.  Also tomorrow I plan to install the cabinet doors and drawer fronts and, hopefully, get started on prepping for the floor.

July 24

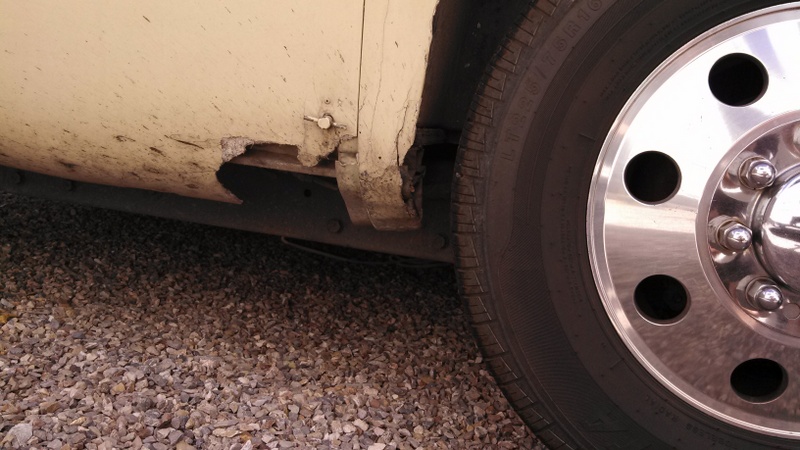
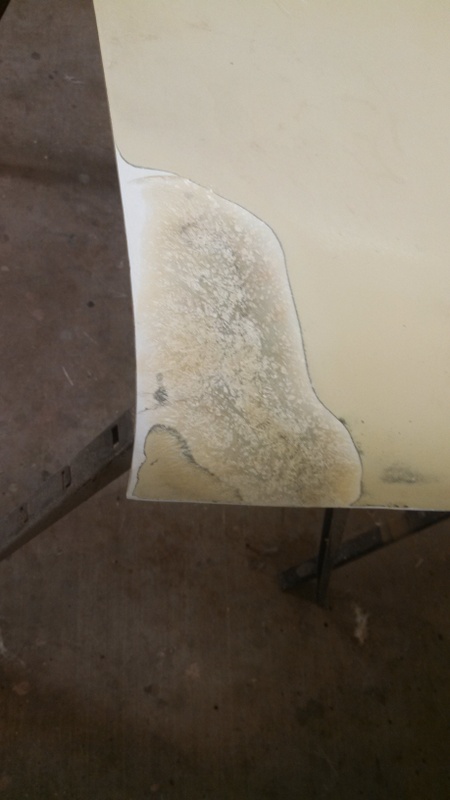
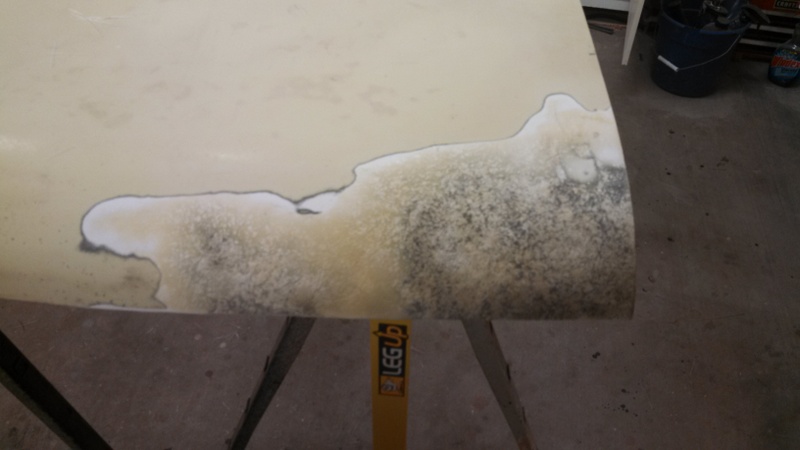
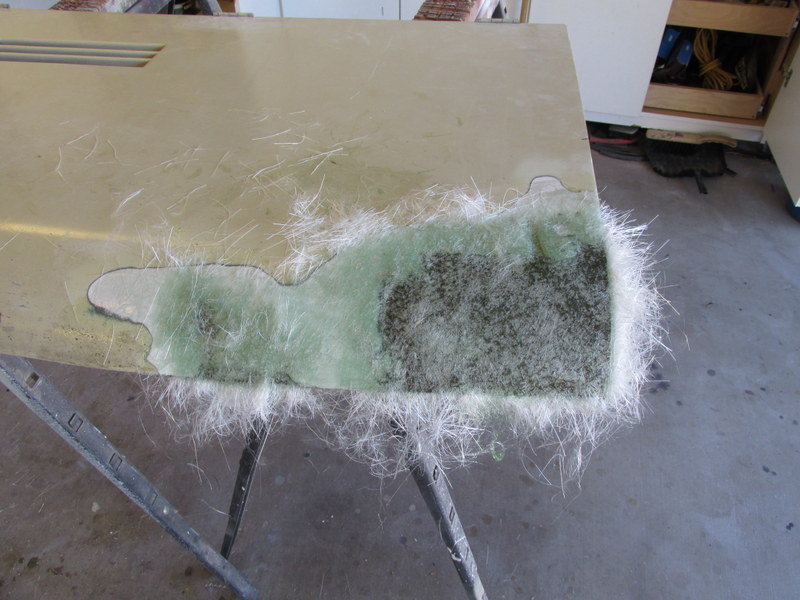
Installed doors and drawer fronts on kitchen and upper cabinets.  Took the upper cabinet off and installed it again!!  We decided that the microwave was going to stick out too far – about 4″ – and wouldn’t look good so we took it down and cut out the back to allow the microwave to slide in and unfortunately we only gained about 2″ more inward.  Now there should be about 2″ overhang and I’ll make it look good – I hope.  Got started prepping for the floor.  Took the carpet off the steps and found a rotten spot that opens to the driver’s side wheel well – about 6 x 8.  I am going to patch it but I am not going to worry too much since it will not show anyway – it will be under the foot of the couch.  Removed lots of staples and cleaned it all up.  Some rotten spots but not much to worry about so I will just leave them since they are not under traffic areas – in the kick area of the closet and the corners next to the first step.  Put the first two courses of flooring together – looks great and we should be able to get it done easily by tomorrow.  Also got the sink drain connected today – no leaks but I don’t know how well it will drain since not much slope due to the deep sink.  Tomorrow is Sunday and I usually take the day off and we figure out something that we both want to do but no time so at least some work tomorrow.

July 25

Installed the floor everywhere except for the step which has to get fixed and under the bed which may or may not get installed.  Back hurts too much to do more today.  Tomorrow will install the couch and dinette and maybe install the pantry door.  Bolting the couch and dinette down requires putting the coach up on the ramps at Ed’s and that is the time to change the oil too. Also have to salvage usable stuff from the old upper cabinets and tossing the remainder into Ed’s dumpster.  That will clean out much of Plocher’s garage.

July 26

Had to spend time this morning installing some patio lighting for a former neighbor who is returning while we are gone and who has already paid me.  Cut and installed the Pergo on the step to the flight deck.  Cut the FRP and the foil insulation for the two risers.  Went on a trip to get more paint for the FRP and to get the stair nose pieces, bolts to hold the couch and dinette down, and oil and a filter for the oil change that we must do before we leave.  Tomorrow, finish the stairs and install the couch and dinette pedestals and maybe the pantry door.

July 27

Finished the steps today and installed the noses.  Cleaned up the old cabinets and threw them out – Ed’s dumpster.  Put the couch and pedestals in the coach and it looks good.  Made the drawers and installed the slides in the openings before we put it in the coach.  Also installed the pantry door – needs a catch.  Tomorrow install the drawers and drawer fronts after the couch is bolted down – plan to change the oil during the bolt down process.  Also, make a piece of plywood to set across the top of the couch drawers and serve as a place to put a pillow and be a foot rest.  After all that is done make the wire cover molding and install the lights.

July 28

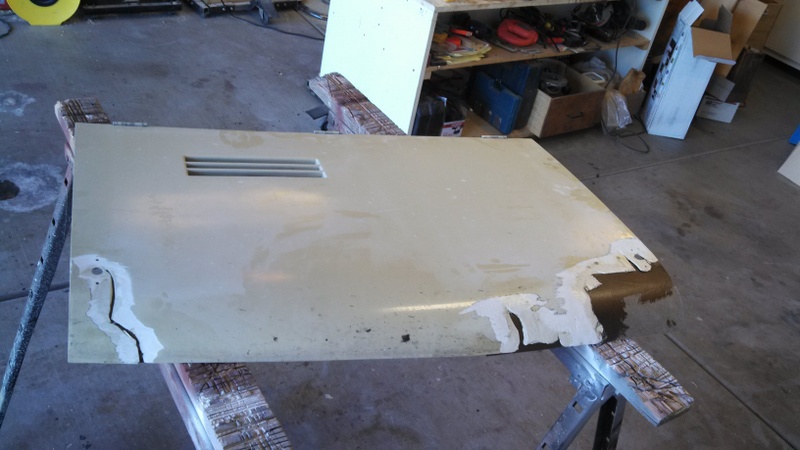
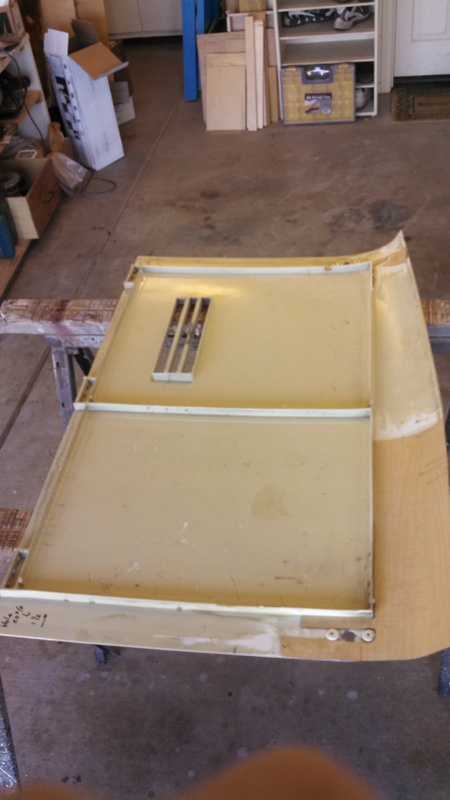
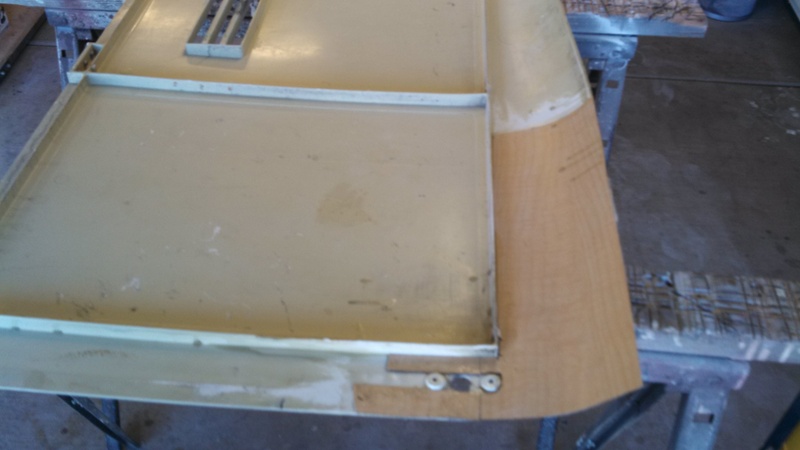
Tried putting drawers in under couch and broke one side of one of the drawer guides.  Took the coach down to Ed’s and up on ramps for oil change, drain excess fluid from tranny and bolt chair pedestals and couch to floor.  Needed longer bolts for chairs and then found needed even longer bolts for couch so not quite done yet.  Working on installing microwave.  Found that I can run one air conditioner using a heavy duty extension cord from a standard 20 amp circuit.  Got the oil changed and drained some excess tranny fluid by removing vacuum modulator after running and then shutting down engine to make sure that the torque converter was full.  Finally got the furniture bolted down and got the Honda seats attached to the pedestals.  Repaired and painted the old door bottom panel – install tomorrow.  Also had to cut the OEM table down again because the floor got 5/8″ higher.

Tomorrow: cut the foot rest plywood pieces for the couch drawers, make the wire cover moulding, install some lights, install the bottom door panel.  Install shelves in 3 of the cabinets using stuff from old cabinets.

July 29

Installed lower panel and shade on entry door.  Installed lights over bed, kitchen counter (over stove later), and couch.  Got wiring ready for lights over dinette.  Got trim piece made to cover wire conduit on passenger side and installed lights over dinette chairs.  Also, put shelves into upper cabinets.

July 30

Tacked up baseboard under kitchen and under pantry. Hung up clock.  Installed roller catches on both couch drawers.  Found the new radiator leaking at the overflow outlet which had been stripped and cross threaded – put it back in with epoxy around it and, hopefully, in the threads.  Made the counter top extension – will not install it until later, just put it into place when we want to use it.  We are done and ready for the trip.